• PORTFOLIOS
  • AP Portfolios
  • Tutorials
  • Instagram
Blair Academy Photography

Blair Academy Photography

  • PORTFOLIOS
  • AP Portfolios
  • Tutorials
  • Instagram

How to create interesting photos with ink and water

By: Megan Baldwin'18

Blog Tutorial: Ink in water

IMG_8858.JPG


In this tutorial, you will learn how to properly take photos of ink dropping into water. It is rather easy when you get used to the exposure and it turns into amazing photo!! Having another person help poor the ink is extremely helpful but not needed.


Things you need:

  • A medium sized tank

  • ink/cream that you were planning on using

  • Backdrop (darker colors work better)

  • Stool (to hold up the tank)

  • Lights for proper lighting


unnamed.jpg

Procedure:

  • Set up space

    • Set up backdrop (blue/black is nice)

    • Place stool in front of the backdrop

    • Place lights proper distance away and position them so they give the proper exposure

    • Fill tank a quarter to halfway with water

    • Place on stool

    • Figure out which ink colors you would like to use

  • Manual focus works best for this so you will have to work quickly before the ink falls to the bottom

  • Have one partner drop the ink in the water while you focus on the ink

  • Repeat until tank is full or you would like to restart

  • Bring tank to sink and dump out dirty water, rinse tank and repeat dropping ink in

  • Repeat this process as many times as you would like.


tags: ink, water
categories: Tutorial
Thursday 05.17.18
Posted by Megan Baldwin
 

How to add some color to you life

What a final product would look like.

What a final product would look like.

By Kenza Fernandez D ‘18

Step 1: Choose any black and white picture

Step 2: Go to the makerspace and open that picture in photoshop (for better printing quality)

Step 4: Print on designated size paper, in my case B2 paper size.

Step 5: Cut the paper edges on a big paper cutter (CIC 3rd floor)

Step 6: Choose color material (in my case: paint and pastelles)

Step 7: Color away!

Coloring in using different materials.

Coloring in using different materials.

Photos ready to cut! 

Photos ready to cut! 

tags: Color
categories: Tutorial
Thursday 05.17.18
Posted by Kenza Fernandez
 

Off Camera Flash Photography

By: Thomas Jenkins '18

DSC_0190.jpg


Step 1) Set up your off camera flash on the tripod ( put the adapter on the hot shoe of the camera).

IMG_1317.jpeg

Step 2) Add umbrella to the flash to control light.

IMG_1318.jpeg

Step 3) Place the flash off center of the subject (or whichever location you would like to start with).

Step 4) Change the location of the flash to switch up lighting on subject.

Step 5) Edit final photo.

tags: Off Camera Flash
categories: Tutorial
Wednesday 05.16.18
Posted by Thomas Jenkins
 

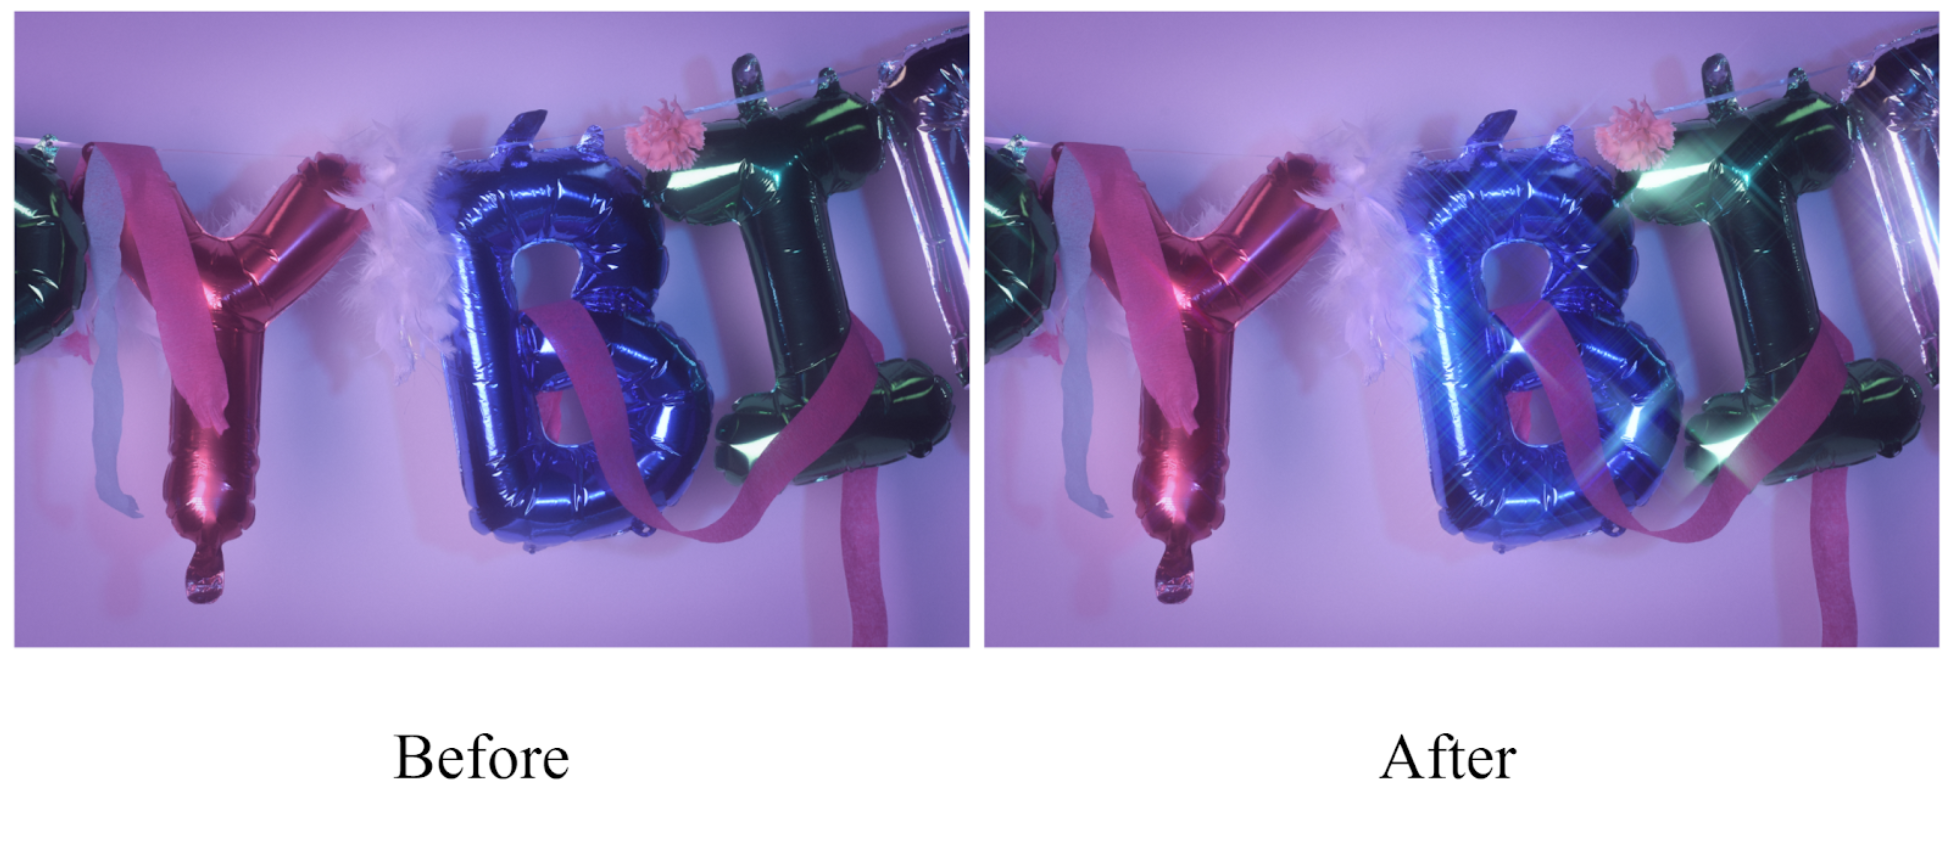
Create a Sparkle Effect in Photoshop

By Andrew Brooks '19

glittertest2.png
tutorial1.PNG

1. Choose your image

The best results with this technique come from images with clear bright points. (i.e. string lights)

2. Duplicate the layer

In the layers box at the bottom right of the screen, right click Background and then select Duplicate Layer.

3. Adjust levels

In the Adjustments tab above the layer box, select the icon for Levels

tut2.PNG

Adjust the level by sliding the leftmost arrow towards the right until only the brightest parts of the picture are visible.

4. Create a new layer

Using the New Layer button at the bottom of the layers box, create a new layer at the top of the list.

tut4.PNG

5. Cover up unwanted color

Using a black normal brush with 100% opacity, cover up any unwanted bright spots that you do not want the glitter to affect.

tut5.PNG

6. Create a Smart Object

Select all everything in the layer box besides the original background using Ctrl+left click. With everything selected, right click and select Convert to Smart Object.

7. Apply blur effect

With the new Smart Object selected, go to Filter → Blur → Motion Blur. Apply the blur at 45 degrees with the distance of your choosing. Repeat two more times to soften the blur effect.

tut6.PNG

8. Re-apply blur in other direction

Select your smart object (titled Layer 1 by default) and then select Duplicate Layer. This will duplicate the entire smart object, motion blurs included. On this new smart object, double click each motion blur and change the angle from 45 to -45 degrees. This is what creates the star effect.

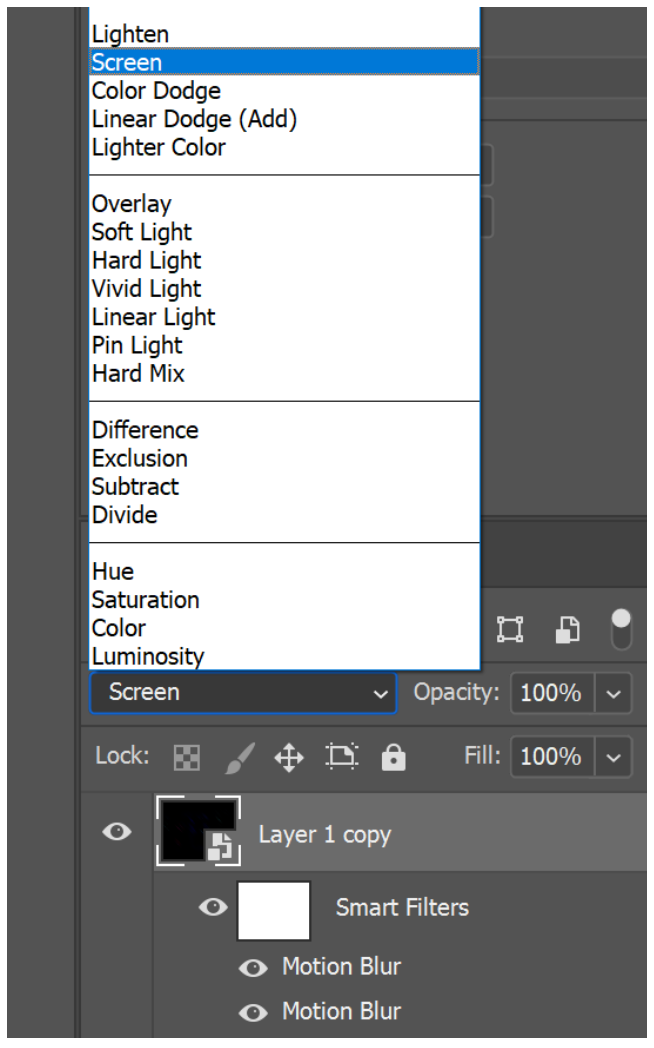
9. Set visibility to Screen

Select a single smart object, then in the drop-down menu above the layer box, select Screen. Repeat for the other smart object.

tut7.PNG

10. Re-adjust levels

At this point, the blur effect is likely invisible, or only slightly visible. To change this, we need to add a new level adjustment to both smart objects.

Select a smart object and then select Levels under the Adjustments tab as you did in step #3. Select the icon of a white box with an arrow pointing down, this makes the adjustment only apply to the object below it. Drag the right arrow to the left until the sparkle effect is to your desired visibility. Repeat with other smart object.

tut8.PNG

Make sure the layers are organized the following way:

Congratulations!

You just made your first glitter image!

tags: Photoshop
categories: Tutorial
Saturday 05.12.18
Posted by Andrew Brooks
 

How to Shoot Star Trail Night Photography Photos using

By: Clare Grant '19

IMG_5388.JPG
Fast shutter speed

Fast shutter speed

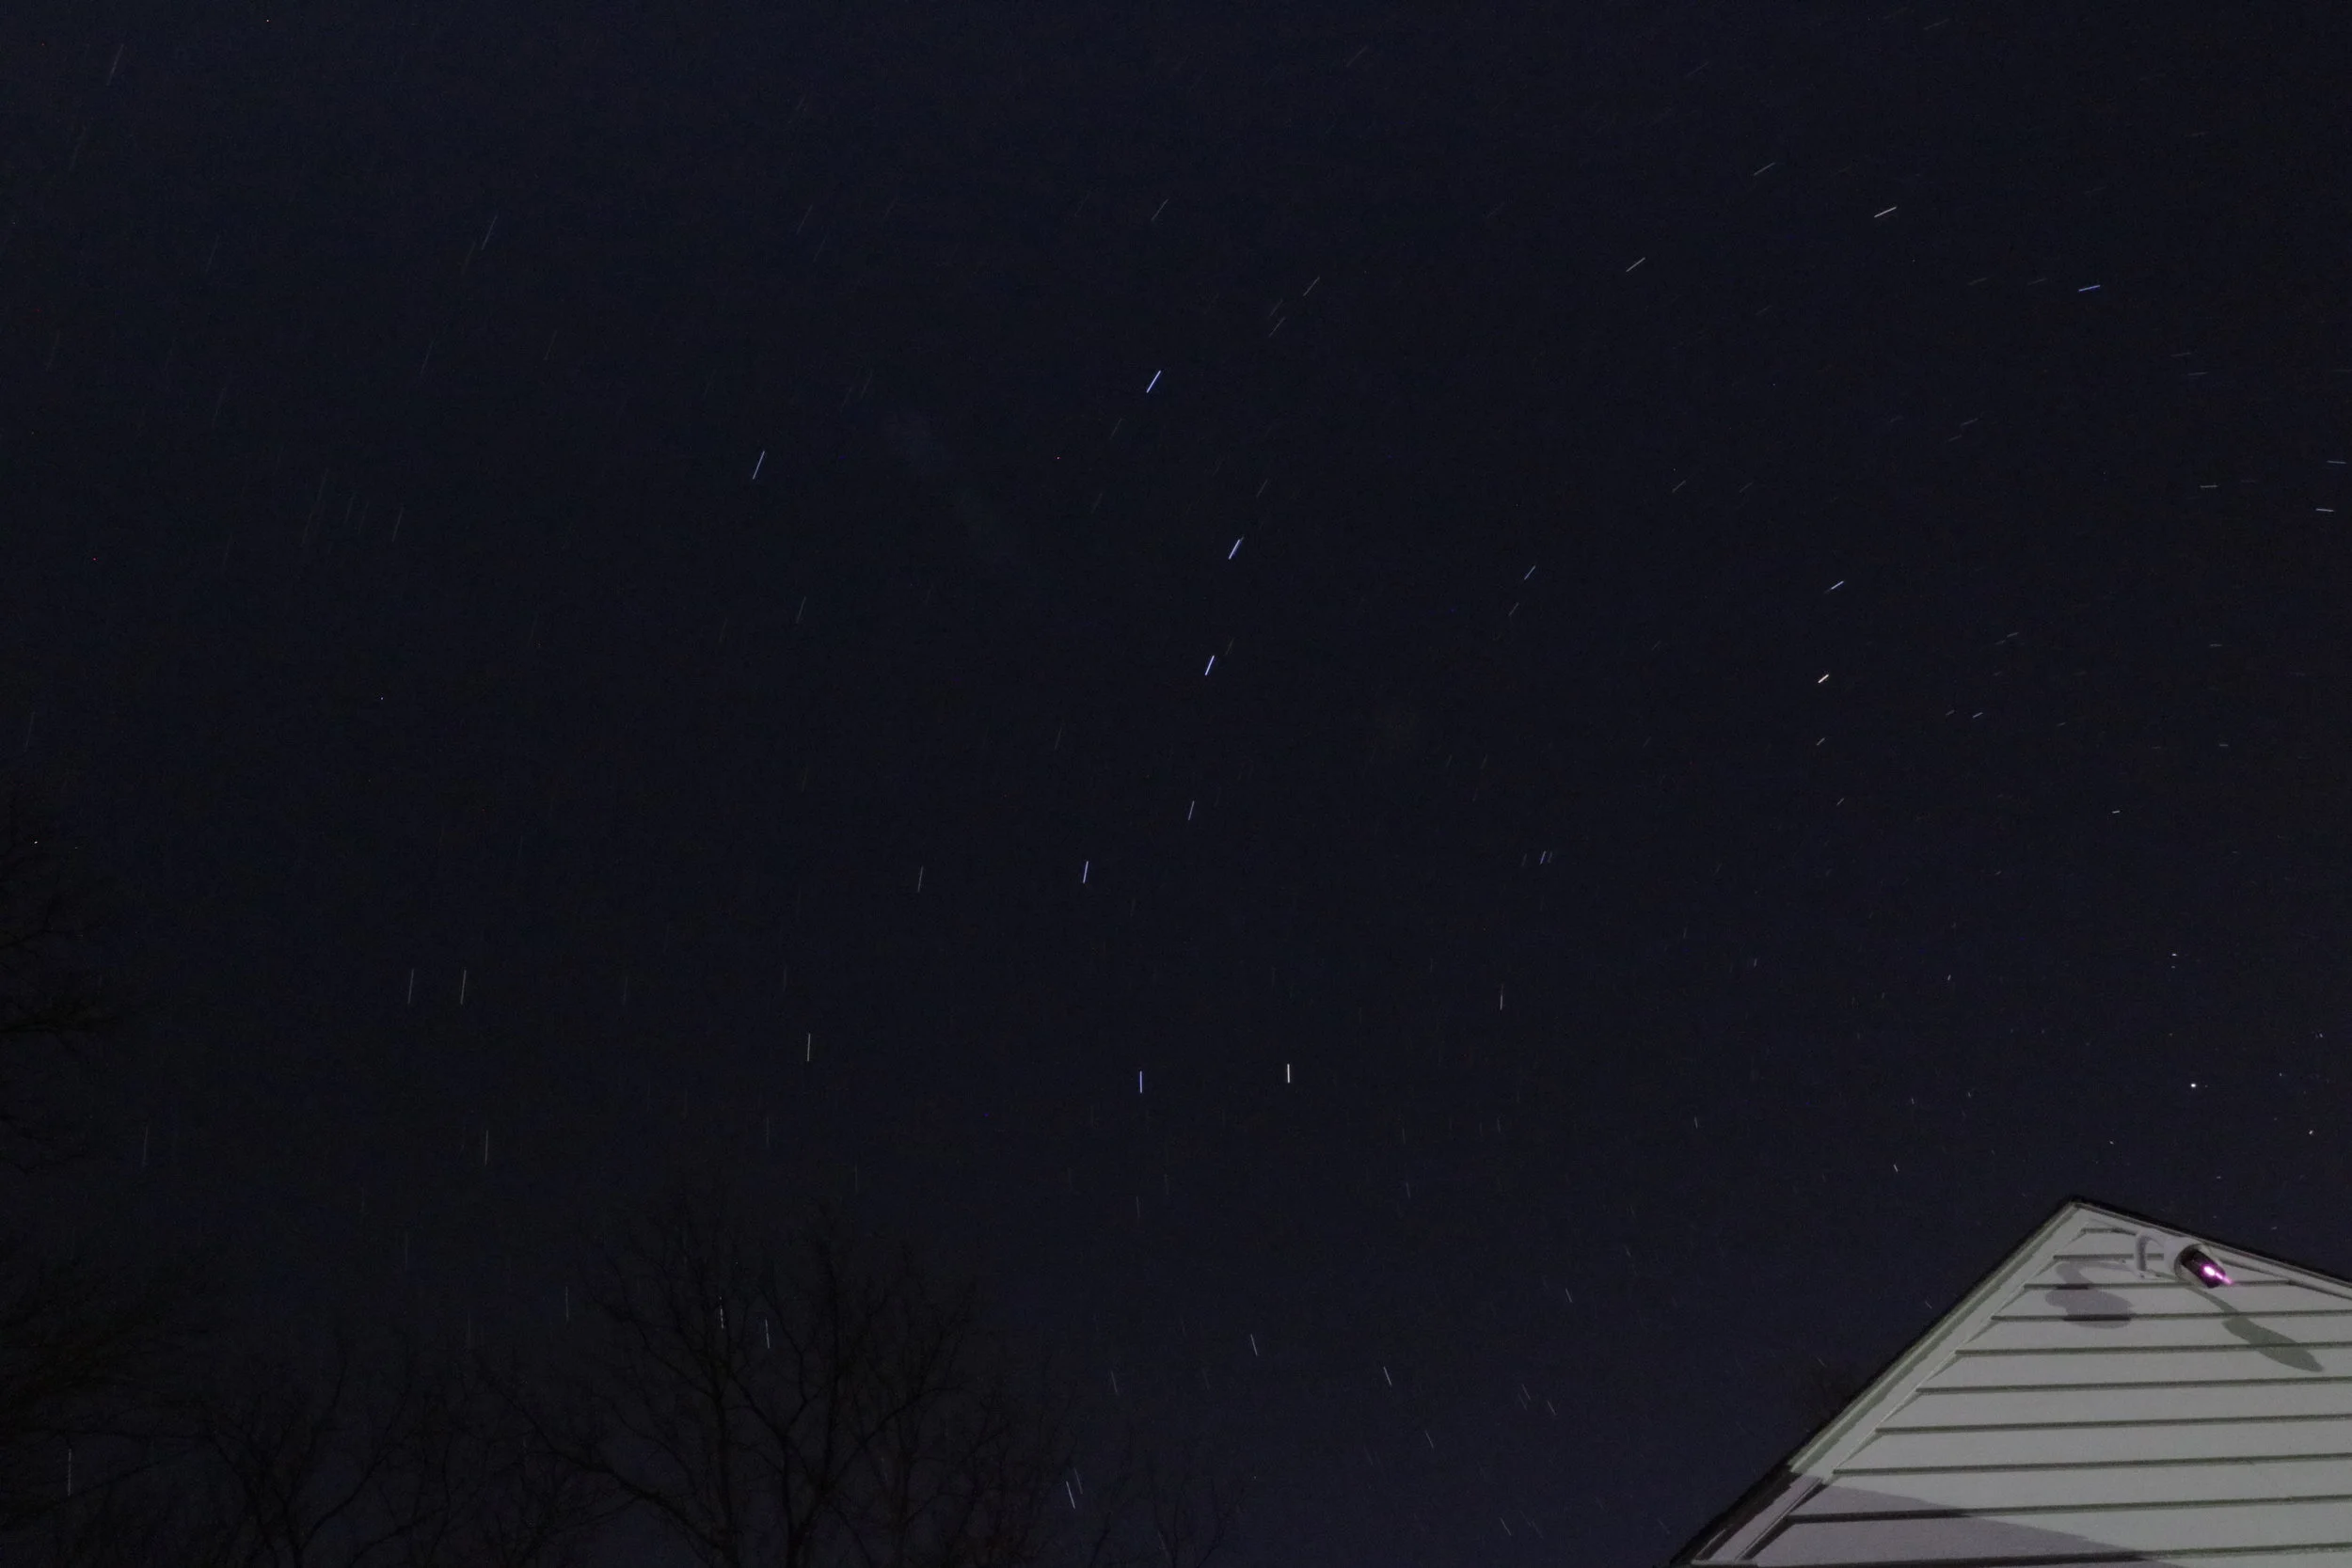
As you can see, it is all black, but if we adjust a few settings, it will start to show the light, in this case, the stars.

To get a lot of stars and to have the star trail longer we would need to keep the shutter open than the numbers given to us. To achieve this, we would need to turn the shutter dial to bulb mode. This will keep the shutter open as long as we have the shutter button held down. Now, who wants to keep their finger on their camera for 10+ minutes? No one that I know. To get around this obstacle, we will need an intervalometer. This allows us to keep the shutter open without us needing to do anything; we just need to flip the switch.

To show the difference in the time that you choose, I took 5 different photos at different intervals.

3 minutes:

3 minutes:

In this photo, it was left alone for 3 minutes. As you can see, there are stars with some movement, but not as much as we would like. Because of this, we move to the next photo

15 Minutes

15 Minutes

The trails are getting longer and more defined, but it could still use some more time

40 minutes:

40 minutes:

This is after 40 minutes. The area that I chose didn’t have many stars in it, but as you can see the star trail for the stars that are in it are long, and that is a good amount of time to have a good long star trail.

1 hour

1 hour

In this photo, you can see a lot of the stars and you have a good length of the trails. The exposure is too bright, so for this photo, and all photos with a long exposure, depending on the surrounding light, you would have to compensate with the exposure aperture of your camera.


tags: Shutter Speed, Stars
categories: Tutorial
Saturday 05.12.18
Posted by Clare Grant
 

The Importance of Shutter Speed for Sports Photos

By: Nami Hoffman '18

Screen Shot 2018-04-25 at 5.00.53 PM.png

As my activity this semester is to take photos of spring sports, I thought it would be interesting to explore just how much shutter speed can affect photos, but more specifically, sports photographs. Often when looking at sports images there is a variant of techniques used to produce successful photographs, yet it seems to me shutter speed is the most important technique.

For this post, I decided to go to a baseball game and focus on the pitcher. This is because I noticed his body position while throwing the baseball stayed pretty constant, which would make my images easier to compare. Once I decided on my subject, I found a good place with a clear background to take my photos. The overall process of taking the photographs probably took around thirty minutes because they kept on changing positions, but other than that it was all really smooth.

For my setup, I used a Canon EOS 5D Mark IV camera paired with a 70-200mm f/2.8 lens. I did not use a tripod while taking these photos because I had not planned to shoot slower than 1/30 for my shutter speed. Any slower than 1/30, I would have had to use a tripod or else my images would turn out completely out of focus. Furthermore, I captured all my sports images in manual mode. This is because I prefer to shoot in manual as I like to have more control over my settings, however Tv mode would work just as well.

Below are my images, the settings that were used to take each of them, and a small description of each image.

ISO: 200                    Aperture: 22                    Shutter Speed: 1/30As you can see in this image, the pitcher is almost complete…

ISO: 200                    Aperture: 22                    Shutter Speed: 1/30

As you can see in this image, the pitcher is almost completely blurred due to his fast motion and the slow shutter speed. Details are hard to spot.

ISO: 200                    Aperture: 22                    Shutter Speed: 1/50For this image I made my shutter speed faster by 1/20 of a s…

ISO: 200                    Aperture: 22                    Shutter Speed: 1/50

For this image I made my shutter speed faster by 1/20 of a second. I would not say it is clearer than the 1/30 image, but it is darker as less light was let in due to the faster shutter speed.

ISO: 200                    Aperture: 22                    Shutter Speed: 1/80At the shutter speed 1/80, the image starts becoming slightl…

ISO: 200                    Aperture: 22                    Shutter Speed: 1/80

At the shutter speed 1/80, the image starts becoming slightly clearer. It is easier to spot details on the subject and less of his movements are captured.

ISO: 200                    Aperture: 13                    Shutter Speed: 1/200Once I moved the shutter speed to 1/200 I had to also chang…

ISO: 200                    Aperture: 13                    Shutter Speed: 1/200

Once I moved the shutter speed to 1/200 I had to also change my aperture. If I had stayed at the exact same settings as the previous three, my image would have become overexposed. In addition, the image of the pitcher is getting clearer, but not in complete focus.

ISO: 200                    Aperture: 10                    Shutter Speed: 1/400This was the last image I shot of the pitcher. Similar to w…

ISO: 200                    Aperture: 10                    Shutter Speed: 1/400

This was the last image I shot of the pitcher. Similar to when I shot at 1/200, I had to change my aperture in order to get a regular, exposed image. At this speed, it is clear to say from 1/400 and faster, any photo taken of the pitcher would be without any blur of prior movements.

After downloading and comparing the images I took I confirmed an opinion I have always had: I enjoy clear sports photos. While there are many successful images with slower shutter speeds, that is just not the style of sports photography I enjoy taking. Personally, my clear-cut, focused sports images always seem to be better to me than the alternative.

However, I am not here to tell you that you should agree with my opinion. If you want to test this out for yourself and decide what shutter speed you like to take sports photos at, this comparison test is really easy to do! All you have to do is pick up your camera and find a subject to focus on. Once you do that, all you need to do is take photos from a variety of shutter speeds and compare. I would recommend staying towards the lower shutter speeds as it is easier to see the effects at numbers from 1/200 and lower. In addition, I would suggest taking more than one photo at each shutter speed just in case you want more options to choose from.

tags: Shutter Speed, Sports
categories: Tutorial
Friday 05.11.18
Posted by Nami Hoffman
 

The Power of Slow Shutter Speeds

By Caroline Wolfe '18

Why Slow Shutter Speeds?

Using slower shutter speeds as part of your photos can be a powerful tool in expanding your portfolio and creating images that are very intriguing and give the sense that the subject is moving. While stop action is a way of stopping time and only capturing a fraction of a second, slower shutter speeds give the viewer a true sense of the object or person in movement which can transform a photo entirely. Here are a few examples.

DSC_0053.jpg

The slow shutter speed as fluidity and softness to the picture. It makes the picture come alive as you can see the movement of the hands playing the piano. Taken at an ISO 100 at 1/16 shutter speed. 

This is one of my favorite slow shutter photos I have taken because of the contrast of the people who are moving and the people who stood still. Taken at an ISO 100 at 1/60 shutter speed.

DSC_0119+(1).jpg

How to: During the Day

Taking slow shutter speed photos during the day can be challenging because of the excess light. The shutter speed is a way of controlling exposure, so a longer shutter speed adds the risk of your photo because overexposed. One way to control this is by increasing your aperture. It will make the little opening which lets light in the camera a lot smaller. Sometimes though, if it is a very sunny day and you are shooting in direct sunlight, this will not work. The best time to take slow shutter photos is when it is cloudy or in a shady location so you capture what you want to without the photo being overexposed. I never recommend taking photos with over a 1 second shutter speed while the sun is out, though, because even in a shady location or on a cloudy day it will still most likely be overexposed. I usually take my photos with a 1/16-1/25 shutter speed.  

The photo below was taken at around 4pm and it was a cloudy day. Taken at 1/80 shutter speed with an ISO of 100.

DSC_0338+2.jpg

This photo was also taken during the day but indoors. Taken with 1/25 shutter speed and 100 ISO.

DSC_0086.jpg


tags: Shutter Speed
categories: Tutorial
Monday 05.07.18
Posted by Caroline Wolfe
 

How to Create Vinyl Stickers to Incorporate in Portraits

Jade.jpg
Zeynep.jpg
Onome.jpg
Aidan.jpg
Jasmine.jpg

By Anh Nguyen '18

INSPIRATION

Photographer Peter Devito

"Are you the man in the relationship?" @fk.nyc for @satellitejournal LINK STILL IN BIO👌

2,442 Likes, 27 Comments - PJ DeVito (@peterdevito) on Instagram: ""Are you the man in the relationship?" @fk.nyc for @satellitejournal LINK STILL IN BIO👌"

Photographer John Yuyi

#throwback "Julia's twitter" 201607 Tokyo @juliasumire Talking about "SMAD" on i-D CHINA. Article (in Chinese) Link in bio

8,057 Likes, 26 Comments - JOHN YUYI (@johnyuyi) on Instagram: "#throwback "Julia's twitter" 201607 Tokyo @juliasumire Talking about "SMAD" on i-D CHINA. Article..."

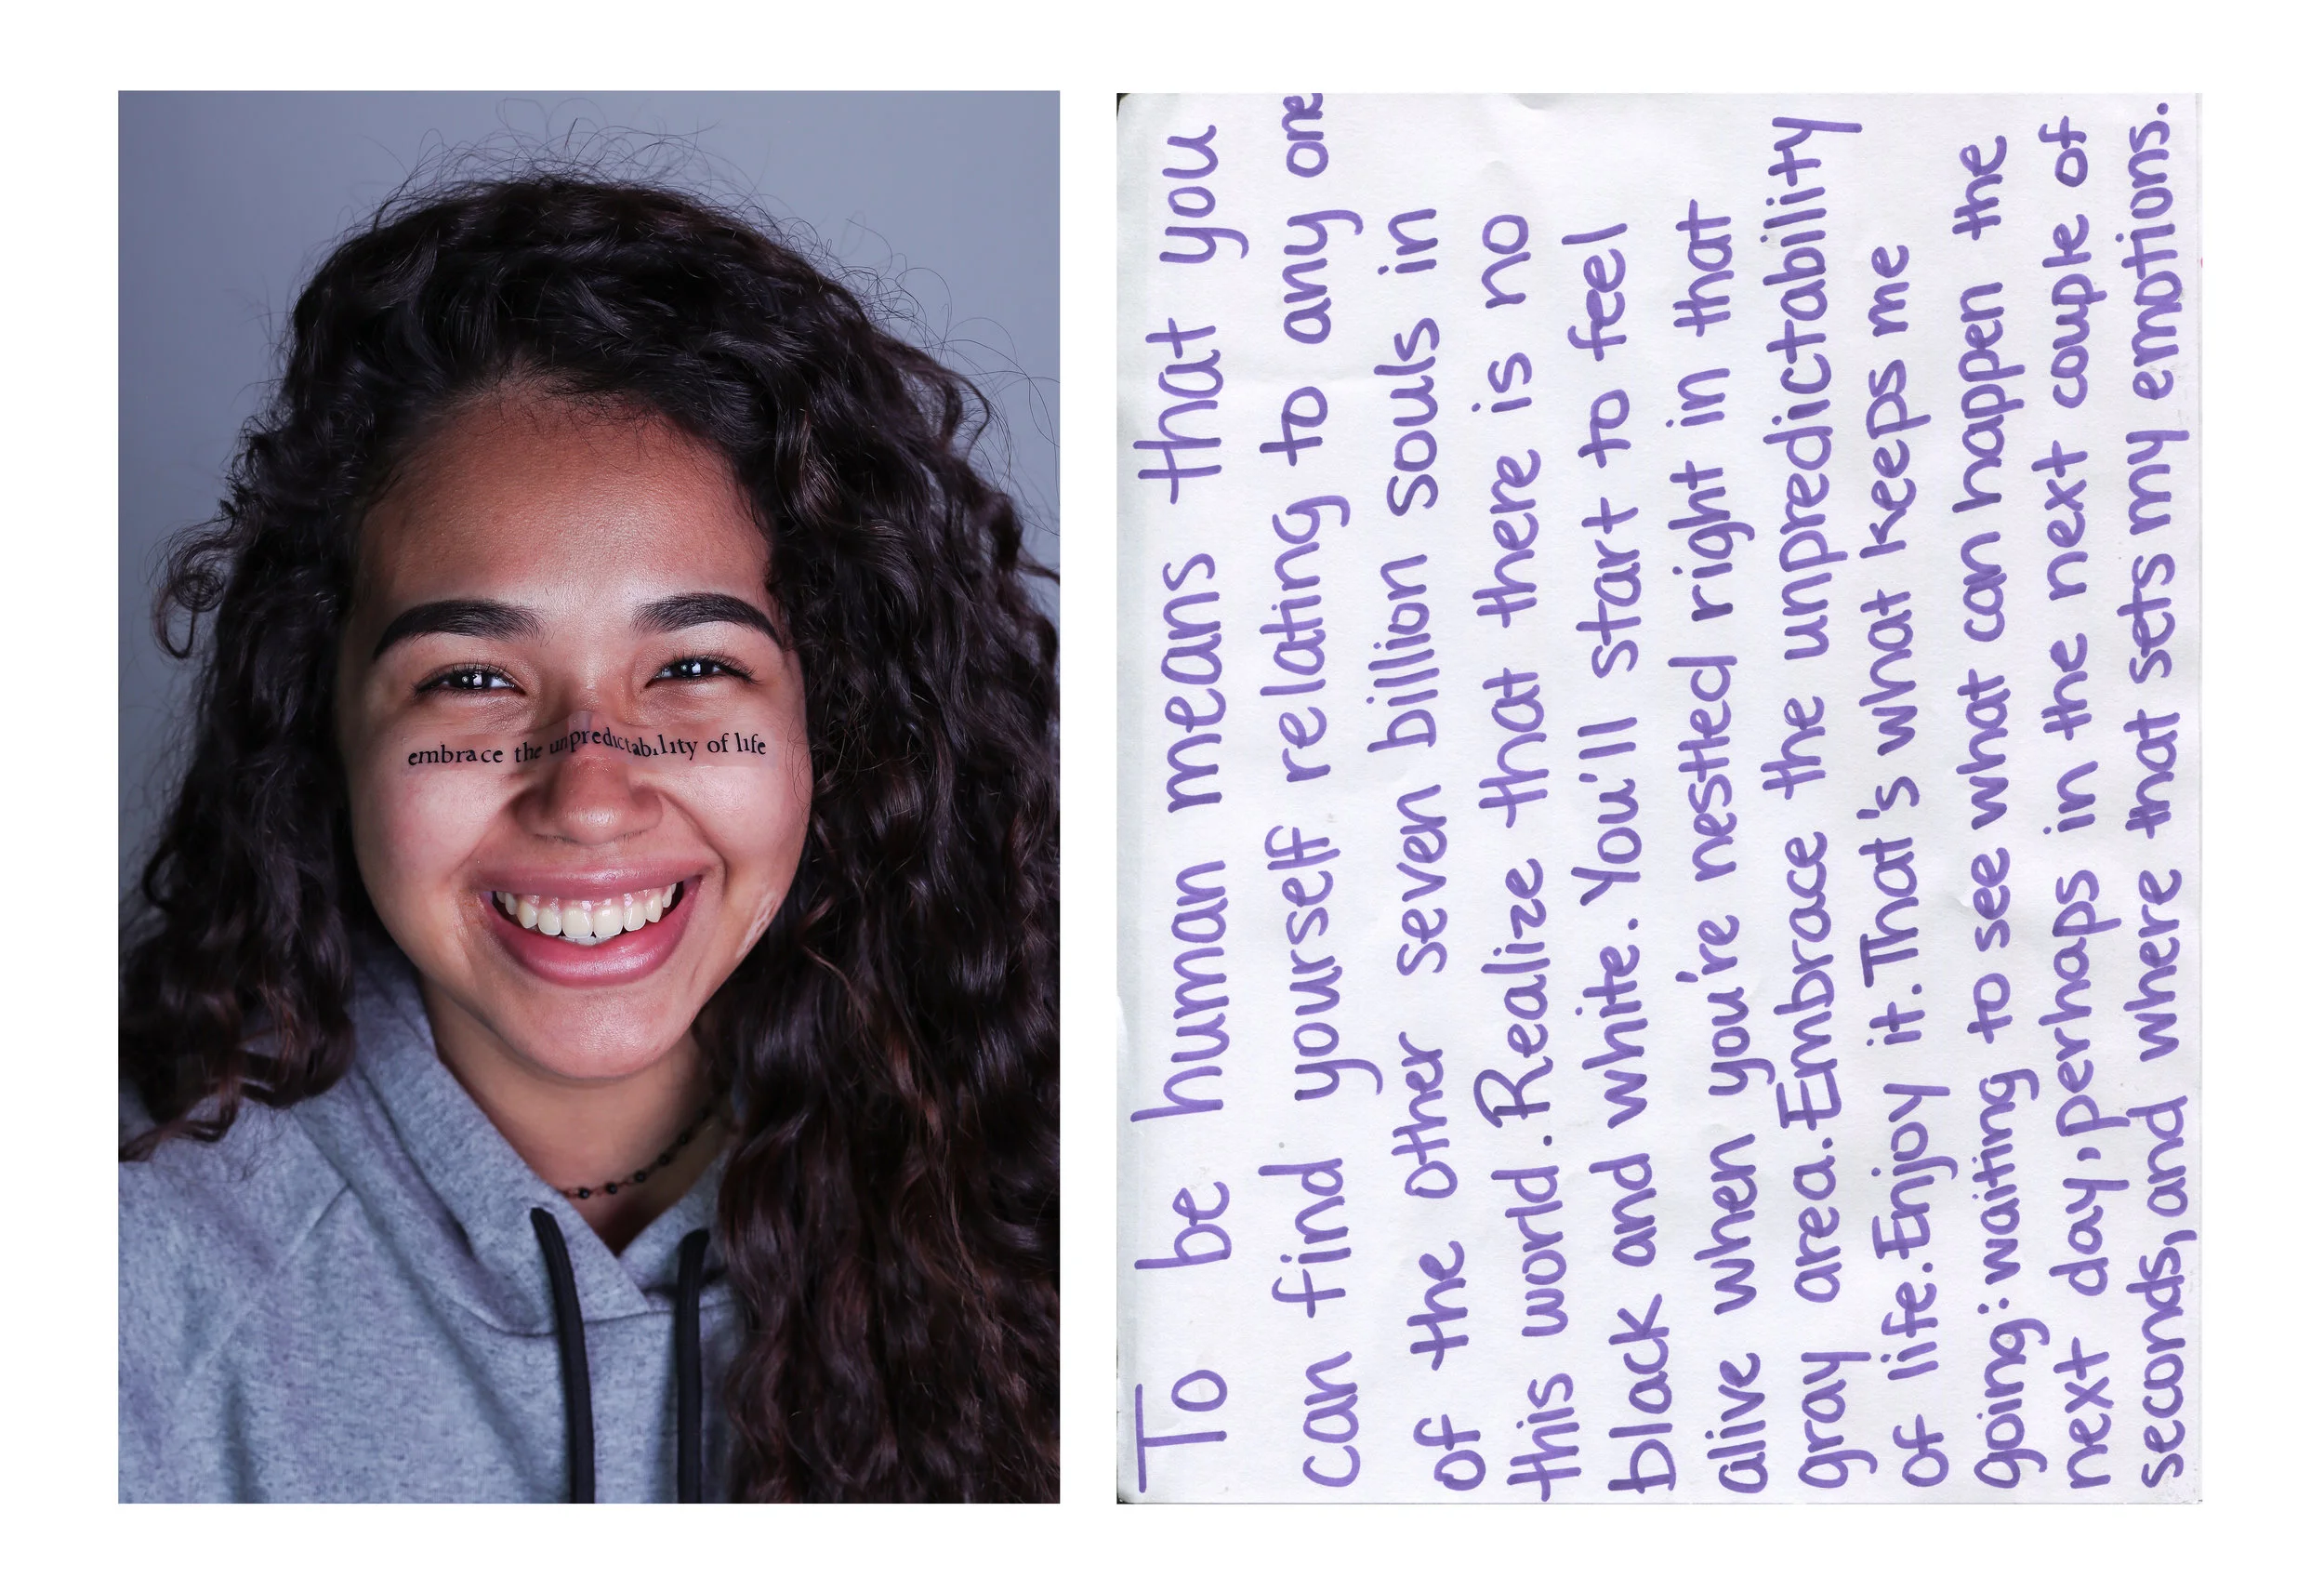
In this blog tutorial we are going to create pseudo temporary tattoos. Much like in the images seen above, temporary tattoos are very common because they can be customized, they’re easy to apply, they give a holographic projection look – creating cool images – and they’re a great alternative for getting the cool aesthetics of tattoos, but without the permanent aspect! I personally wanted to make this because I was inspired by the two photographers above and I think it's an interesting way for me to further portray people's stories in photographs.

This tutorial is a guide to recreating that look using a vinyl sticker cutter.

STEPS

step 1.JPG
  • Creating the Design

1. Use Inkscape to create the Design

2. Use Text tool to type the words you want to print.

3. Save the design as a PDF


  • Printing the design

1. Open the PDF on VinylMaster Cut

2. Make sure the design is the correct size (in inches or cm) that you want it to be.

IMG_6297.JPG

3. Place Vinyl paper in machine and make sure it is lined up

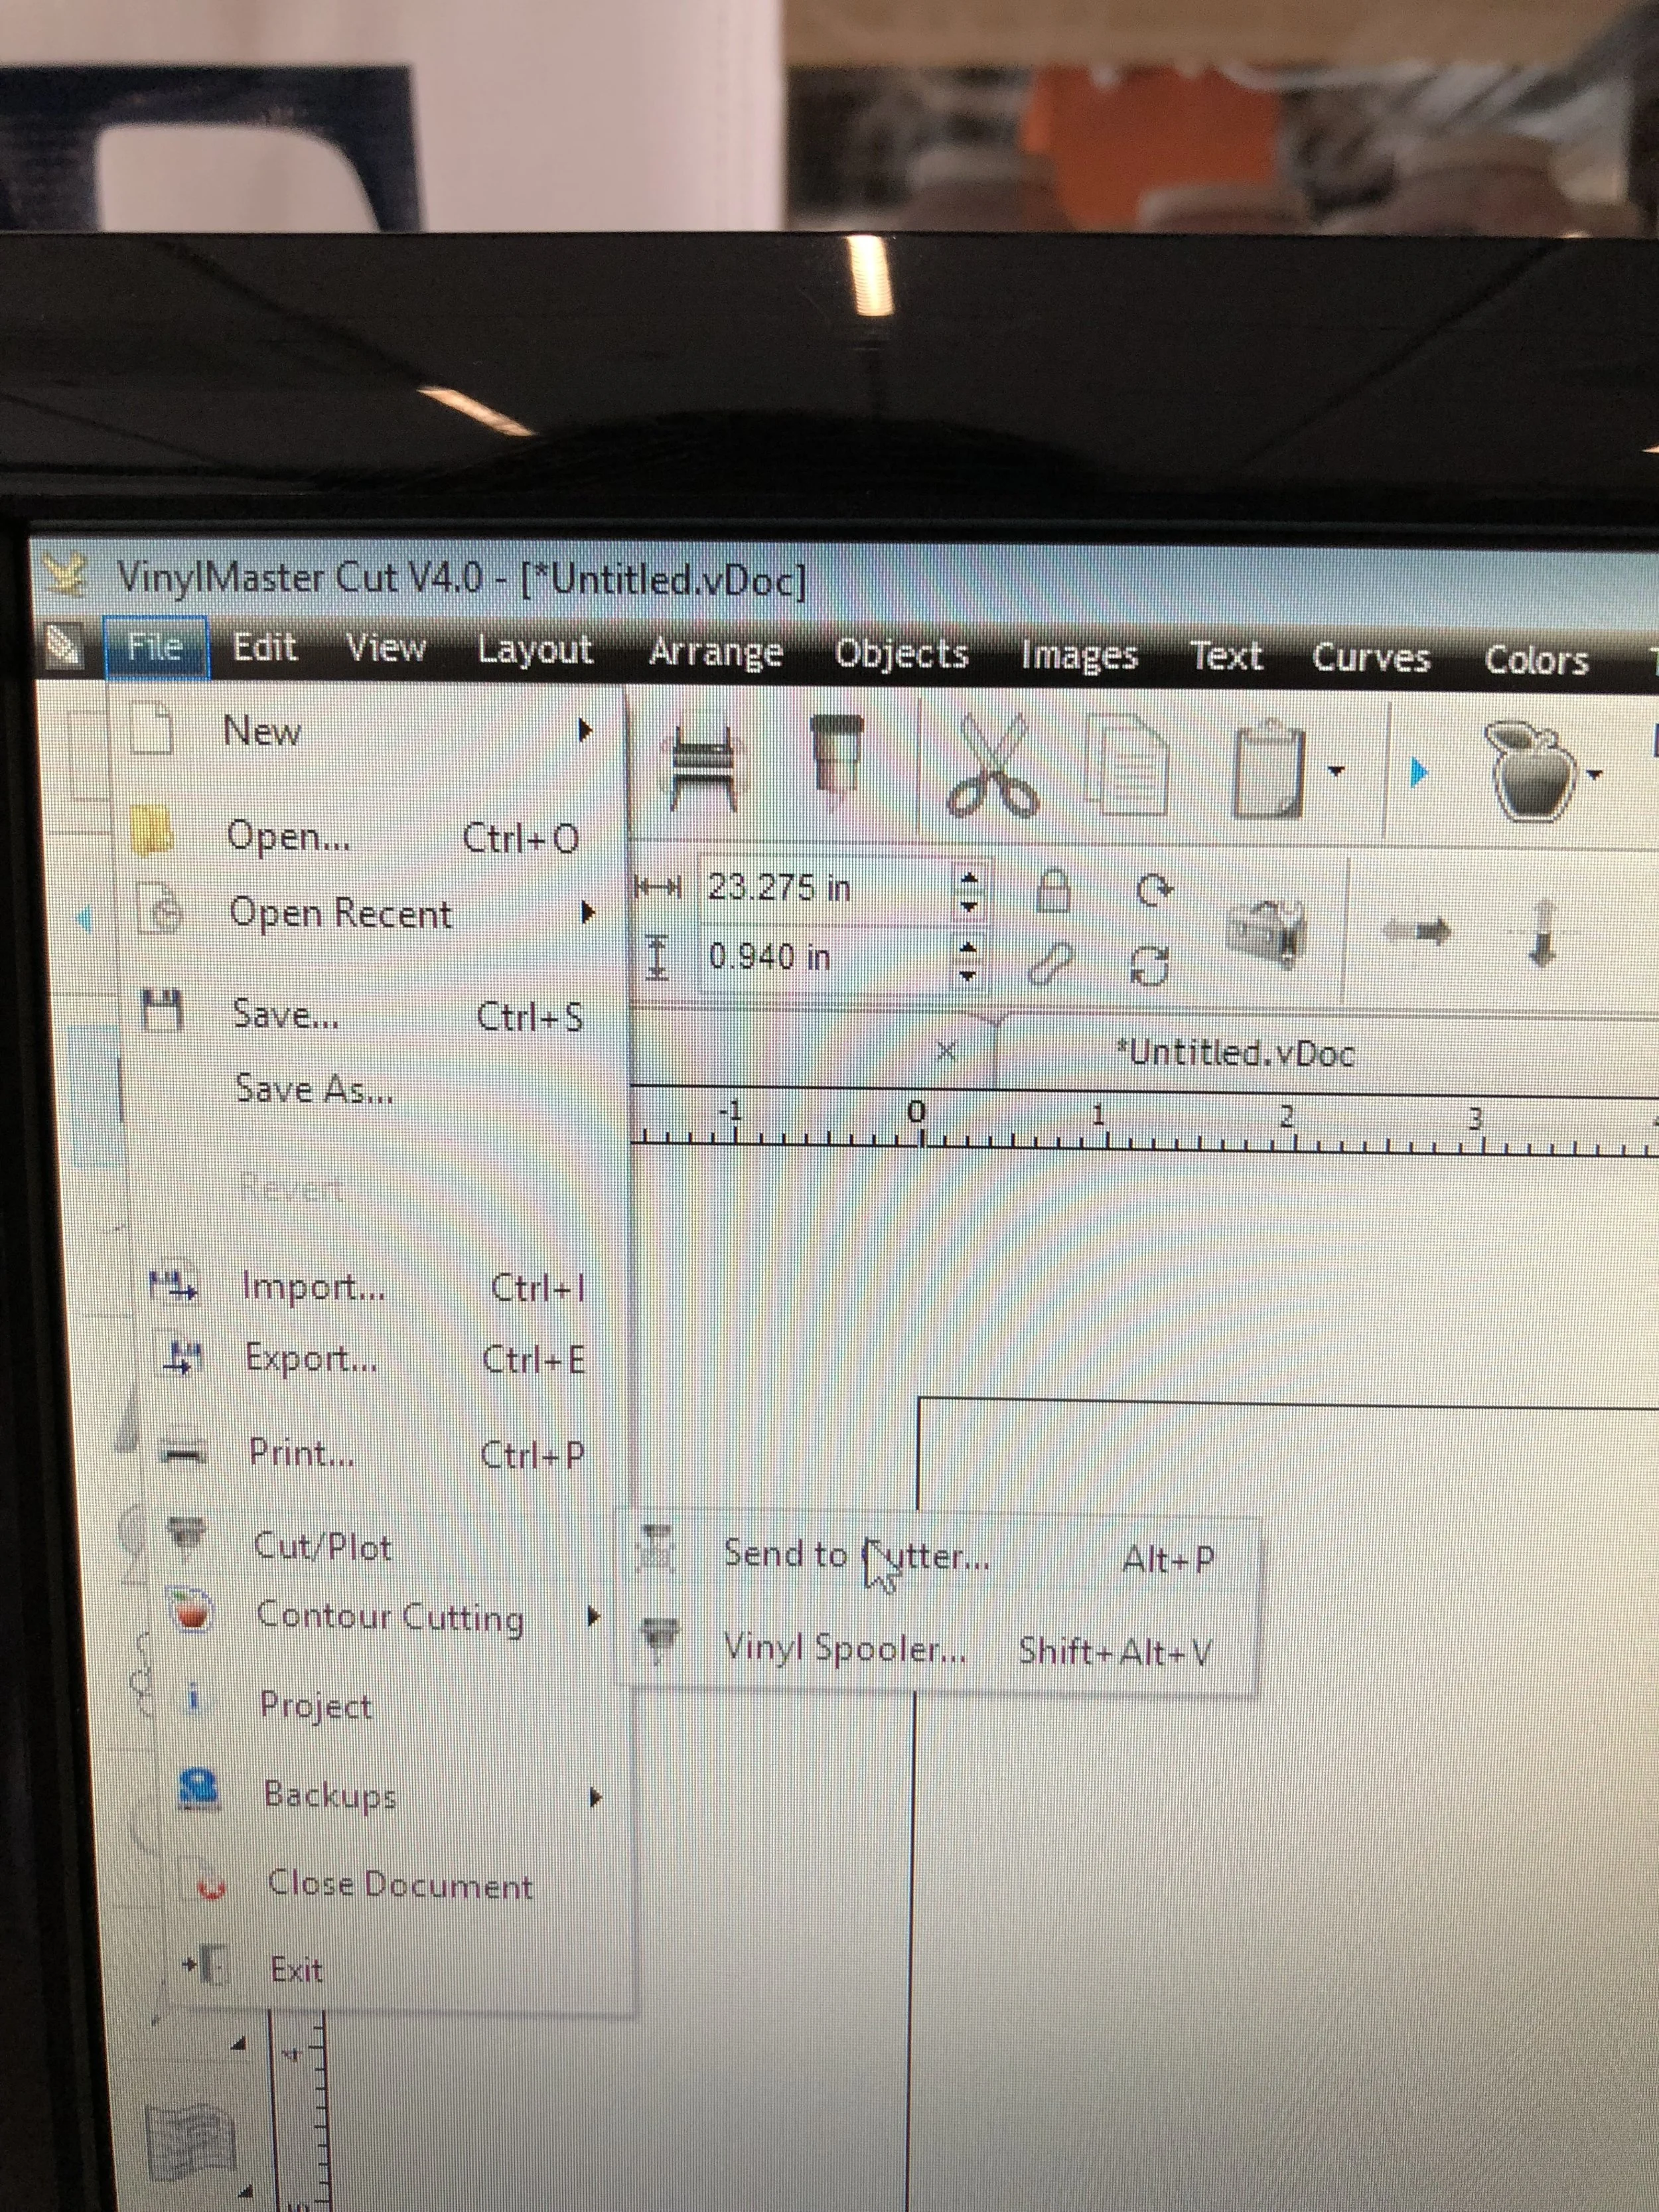
4. Send design to Vinyl cutter machine [File > Cut/ Plot > Send to Cutter]

IMG_3558.JPG


5. When you’re happy with the way the design looks, press “Cut Now” and watch the vinyl cutter create the design.


  • Creating the sticker
IMG_3184.JPG

1. Remove from vinyl cutter

2. Using a small pin, pick out the parts of the unwanted parts of the sticker, leaving  behind only the text (it will be easier to cut the sticker into a small size first and then pick it out)

3. With the text remaining, apply it onto sticker tape and cut the precise size so that it is ready to remove whenever needed to use.


When ready to use, peel the sticker tape off and the words will be left attached on the tape. Throw the white paper away and use the sticker to apply onto subject!

tags: Makerspace, Vinyl
categories: Tutorial
Saturday 05.05.18
Posted by Anh Nguyen
 

How to Transfer a Photo onto Studio Artists' Panel

By Kate Setteducate '19

FullSizeRender.jpg


The Project:

For my signature assessment I investigated how to transfer a photo onto a peice of wood. My goal for this project was to find an easy way to take a printed picture and copy it onto a piece of wood to create a fun way to display some of my pictures. To do this, I did research on the best ways to transfer a photo, and after a few failed attempts I found the right materials and the right procedure to succesfully transfer my photo. Here I will give you the step by step guide of how I printed my picture onto a piece of wood.


Materials:

    When doing this project it is important to make sure you have the correct materials, as using the wrong type of gel or printed photo can make it more difficult for the picture to stick to the wood. Here is a complete list of the materials I used while doing this project.

IMG_1980.JPG
  • A photo printed on a laser printer

  • A piece of Blick's Studio Artists' Panel (Prime canvas texture)

  • Golden Artist Colors soft gel

  • Foam paintbrush

  • Water

  • Credit card (optional)

  • Toothbrush (optional)


How-to:

FullSizeRender.jpg
IMG_4108.jpg


  1. First choose the photo that you want to transfer. I chose the photo shown above because I thought it would be easier to transfer because of the dark background. 

  2. Print the photo that you want to transfer on a laser printer

  3. Coat the wood in a light layer of the gel medium

  4. Press the photo face down on the wood covered in gel

  5. Use the credit card to press out the bubbles/bumps under the paper

  6. Let sit for one to two days

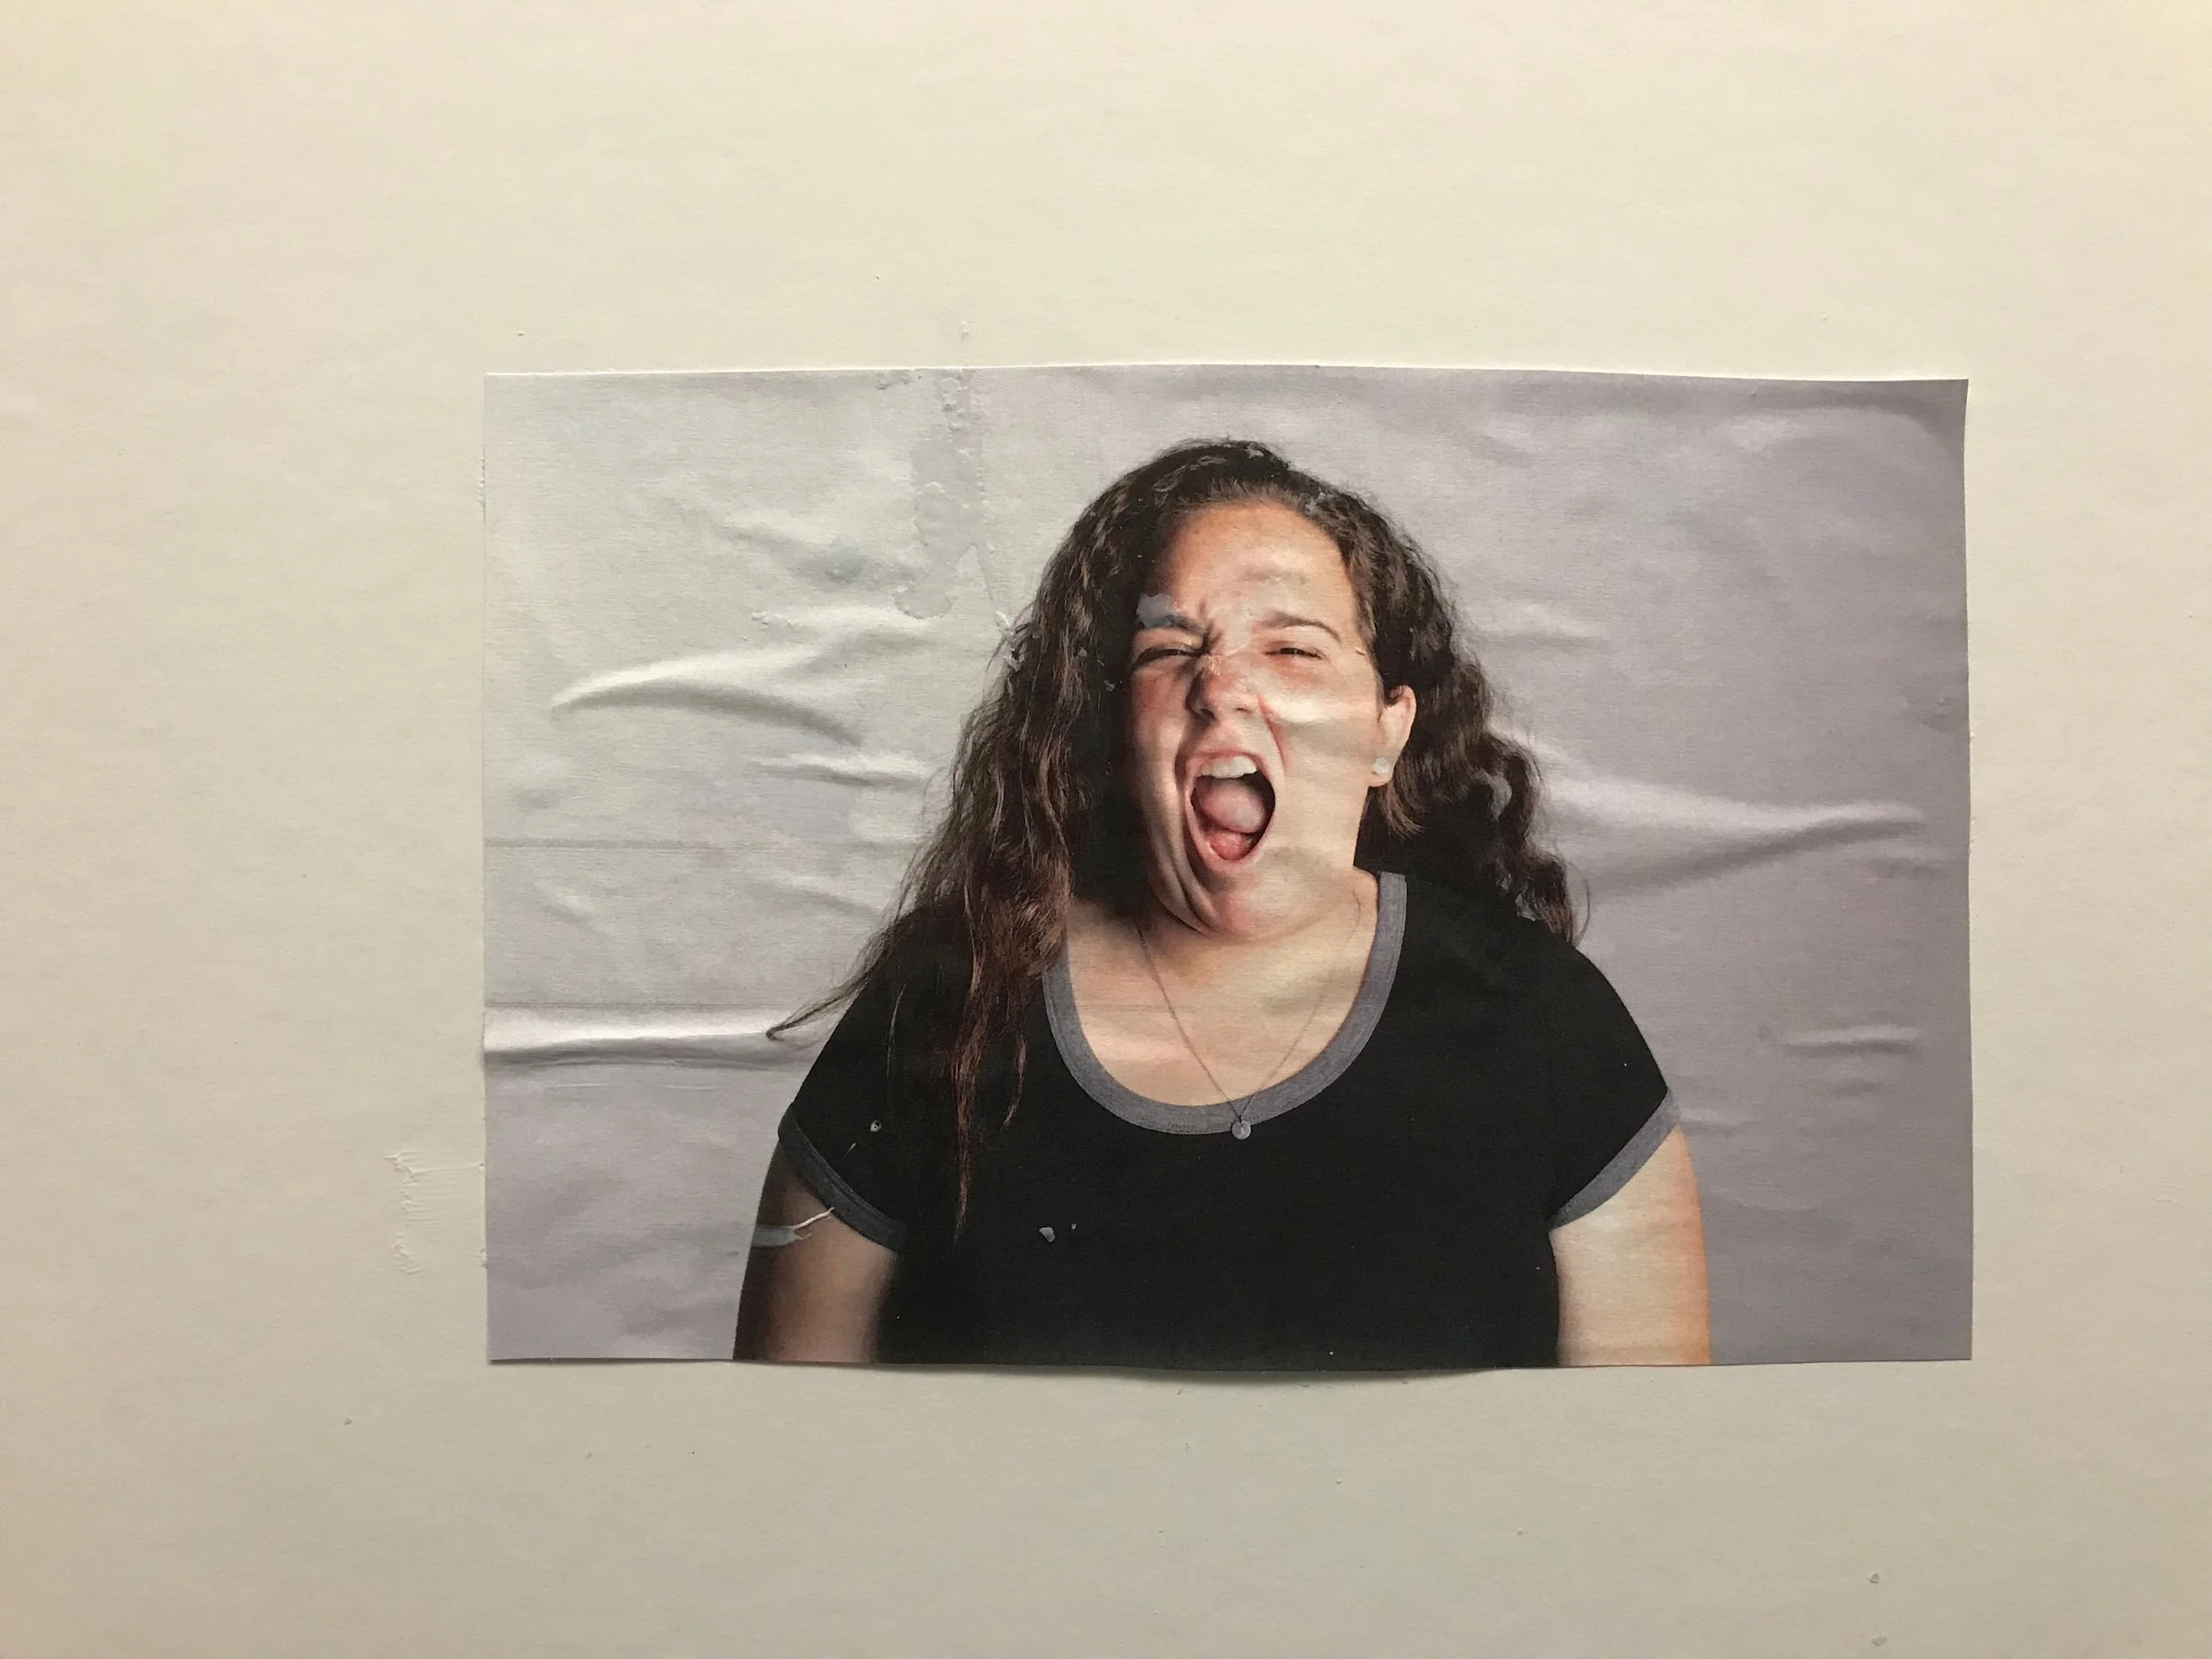
  7. To remove the paper, pour water on it until it is completely wet

  8. One the paper is wet, use either a toothbrush or your finger to remove the excess paper

    1. ** Be careful not to press to hard or the photo will not stick to the wood

  9. Once all the excess paper is removed, your photo should be transferred onto the wood

tags: Gel Medium, Wood
categories: Tutorial
Friday 05.04.18
Posted by Kate Setteducate
 

How to Make a Panorama Composite from Drone Photos

By Yingjian (Jason) Pan '18

屏幕快照 2018-04-25 上午10.41.27.png

Aerial Section

Step 1. Download DronePan, a free panorama app for DJI devices.

屏幕快照 2018-04-25 上午10.54.27.png

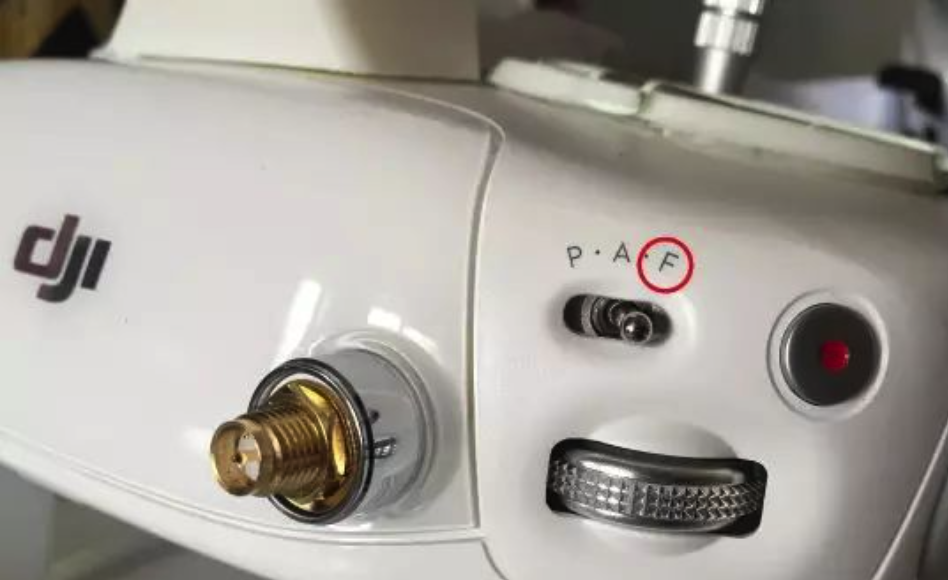
Step 2. Fly to the desired place and change the mode to F

Step 3. Open DronePan (make sure open DJI GO before using DronePan). Check if the drone model matches or not. Then hit the setting button on the top right.

Step 4. Change the number of photos per row. I usually set it to 8 or 12.

Step 5. Scroll down and change number of rows. Phantom models do not support Sky Row, so we need to add the sky on manually through photoshop. Hit “Save” when you done.

Step 6. Hit “Starting Pano”, then wait until it finishing taking all the pictures.

Step 7. Manually take a picture of the ground (facing directly downward). Now you should have (# of rows) X (# of pictures per row) + 1) pictures in total.

Step 8. When everything is finished, switch to mode P and fly back.

Editing Section

Step 1. Download photo stitching software, PTGui for Mac.

Step 2. Open PTGui, hit “Load Images”, select the images and then hit “Open”

Step 3. You can see all your images is uploaded.

Step 4. Hit “Align Images” to combine pictures.

Step 5. You can see the finished panorama picture pops out.

Step 6. Hit “Create Panorama”. Change the settings to size to 8000*4000, change he quality to 100%. Then create panorama.

Step 7. You will see a finished panorama pictures(in the format of .jpg) pops out.

Step 8. Open PhotoShop, drag the picture in.

Step 9. Drag the sky picture in, set it to the same width as the panorama picture. Create a mask

屏幕快照 2018-04-25 上午11.03.06.png

Step 10. Change the color accordingly. Use gradient tool on the left side and drag the center point upward to create a gradient effect.

Step 11.Combine Layers and export the picture.

屏幕快照 2018-04-25 上午11.03.28.png

WOOHOO!

                                     *** The End***


tags: Drone, Composite
categories: Tutorial
Thursday 05.03.18
Posted by Yingjian Pan
 

How to Laser Engrave a Photo onto Wood

temporary (17).jpg

By Jillian Rogers '19

To complete this please note that the laser engraver is in the basement of the CIC. When you use it for this purpose, you will need to coordinate with a faculty member in the Makerspace or work with a certified student to follow these steps. The Makerspace is always available from 8-10pm. 

1. CHOOSE A PHOTO YOU WANT TO PRINT (SIMPLE, DARK IMAGES WORK BEST)

thumb_IMG_1688_1024.jpg
temporary (17).jpg
thumb_IMG_9200_1024.jpg
thumb_DSC_0230_1024.jpg
temporary (1).jpg

Butterfly photo: I personally thought this photo engraved the best. The photo has great texture and a simple background which printed nicely.

Bridge photo: The negative space in this photo interrupted with the material I used and it engraved too dark.

Flipping hair photo: This photo worked well with being engraved because of the simple background and great texture in the hair.

Eyes photo: This photo also engraved well, but it made the face look washed out.

2. SET UP PHOTO ON ADOBE ILLUSTRATOR. 

The illustrator document needs to have a 40 x 28 canvas size. Make sure you size the image to match the material.

thumb_IMG_1689_1024.jpg

3. GO TO FILE, PRINT, PREFERENCES

thumb_IMG_1690_1024.jpg

4. TYPE IN THESE SETTINGS:

SPEED = 45%

POWER = 45%

DITHER = BRIGHTEN

(WORKS BEST ON CHERRYWOOD)

thumb_IMG_1691_1024.jpg

5. MAKE SURE THE PHOTO ALIGNS WITH THE DIMENSIONS OF THE MATERIAL YOU PRINT ON

thumb_IMG_1692_1024.jpg

6. GO TO FILE AND PRINT PHOTO

7. ENJOY YOUR PRINT!

thumb_IMG_1695_1024.jpg
tags: Laser Engraved Photo, Wood, Makerspace
categories: Tutorial
Friday 04.27.18
Posted by Jillian Rogers
 

Creative Portrait Collage Making

By Jessica Van Valkenburg '19

To create an effective collage combine photos that connect in certain ways that allow the photographer to highlight specific features of a photo, or simply add a little spunk and uniqueness to one's work. I chose to combine photos through separate collage techniques because I love capturing expression and detail through portraits, and combining images that connect in a certain way allow me to show contrast between expressions while also giving me the ability to emphasize certain areas of an image.

IMG_3469.jpg

To start, pick and print a few portraits that are different but connect in some way, such as photos that include the same subject but portray different expressions or are printed in different color schemes, etc. i used regular paper because i like the authentic look of the wrinkles it creates, but depending on smoothness preference photo paper can be used as well.

IMG_1074.jpg IMG_1070.jpg IMG_1059.jpg IMG_1080.jpg IMG_1066.jpg DSC_0261-2.jpg DSC_0261-3.jpg DSC_0717.jpg DSC_0715.jpg


You will also need a sponge brush, scissors, modge podge, and mat boards.  

fullsizeoutput_4cd2.jpeg


I chose to create three different types of collages with my photos. For the first one, I used two copies of the same portrait. I printed one in Black and white and another in color, although i printed the color portrait larger than the black and white one.  

DSC_0261-2.jpg DSC_0261-3.jpg

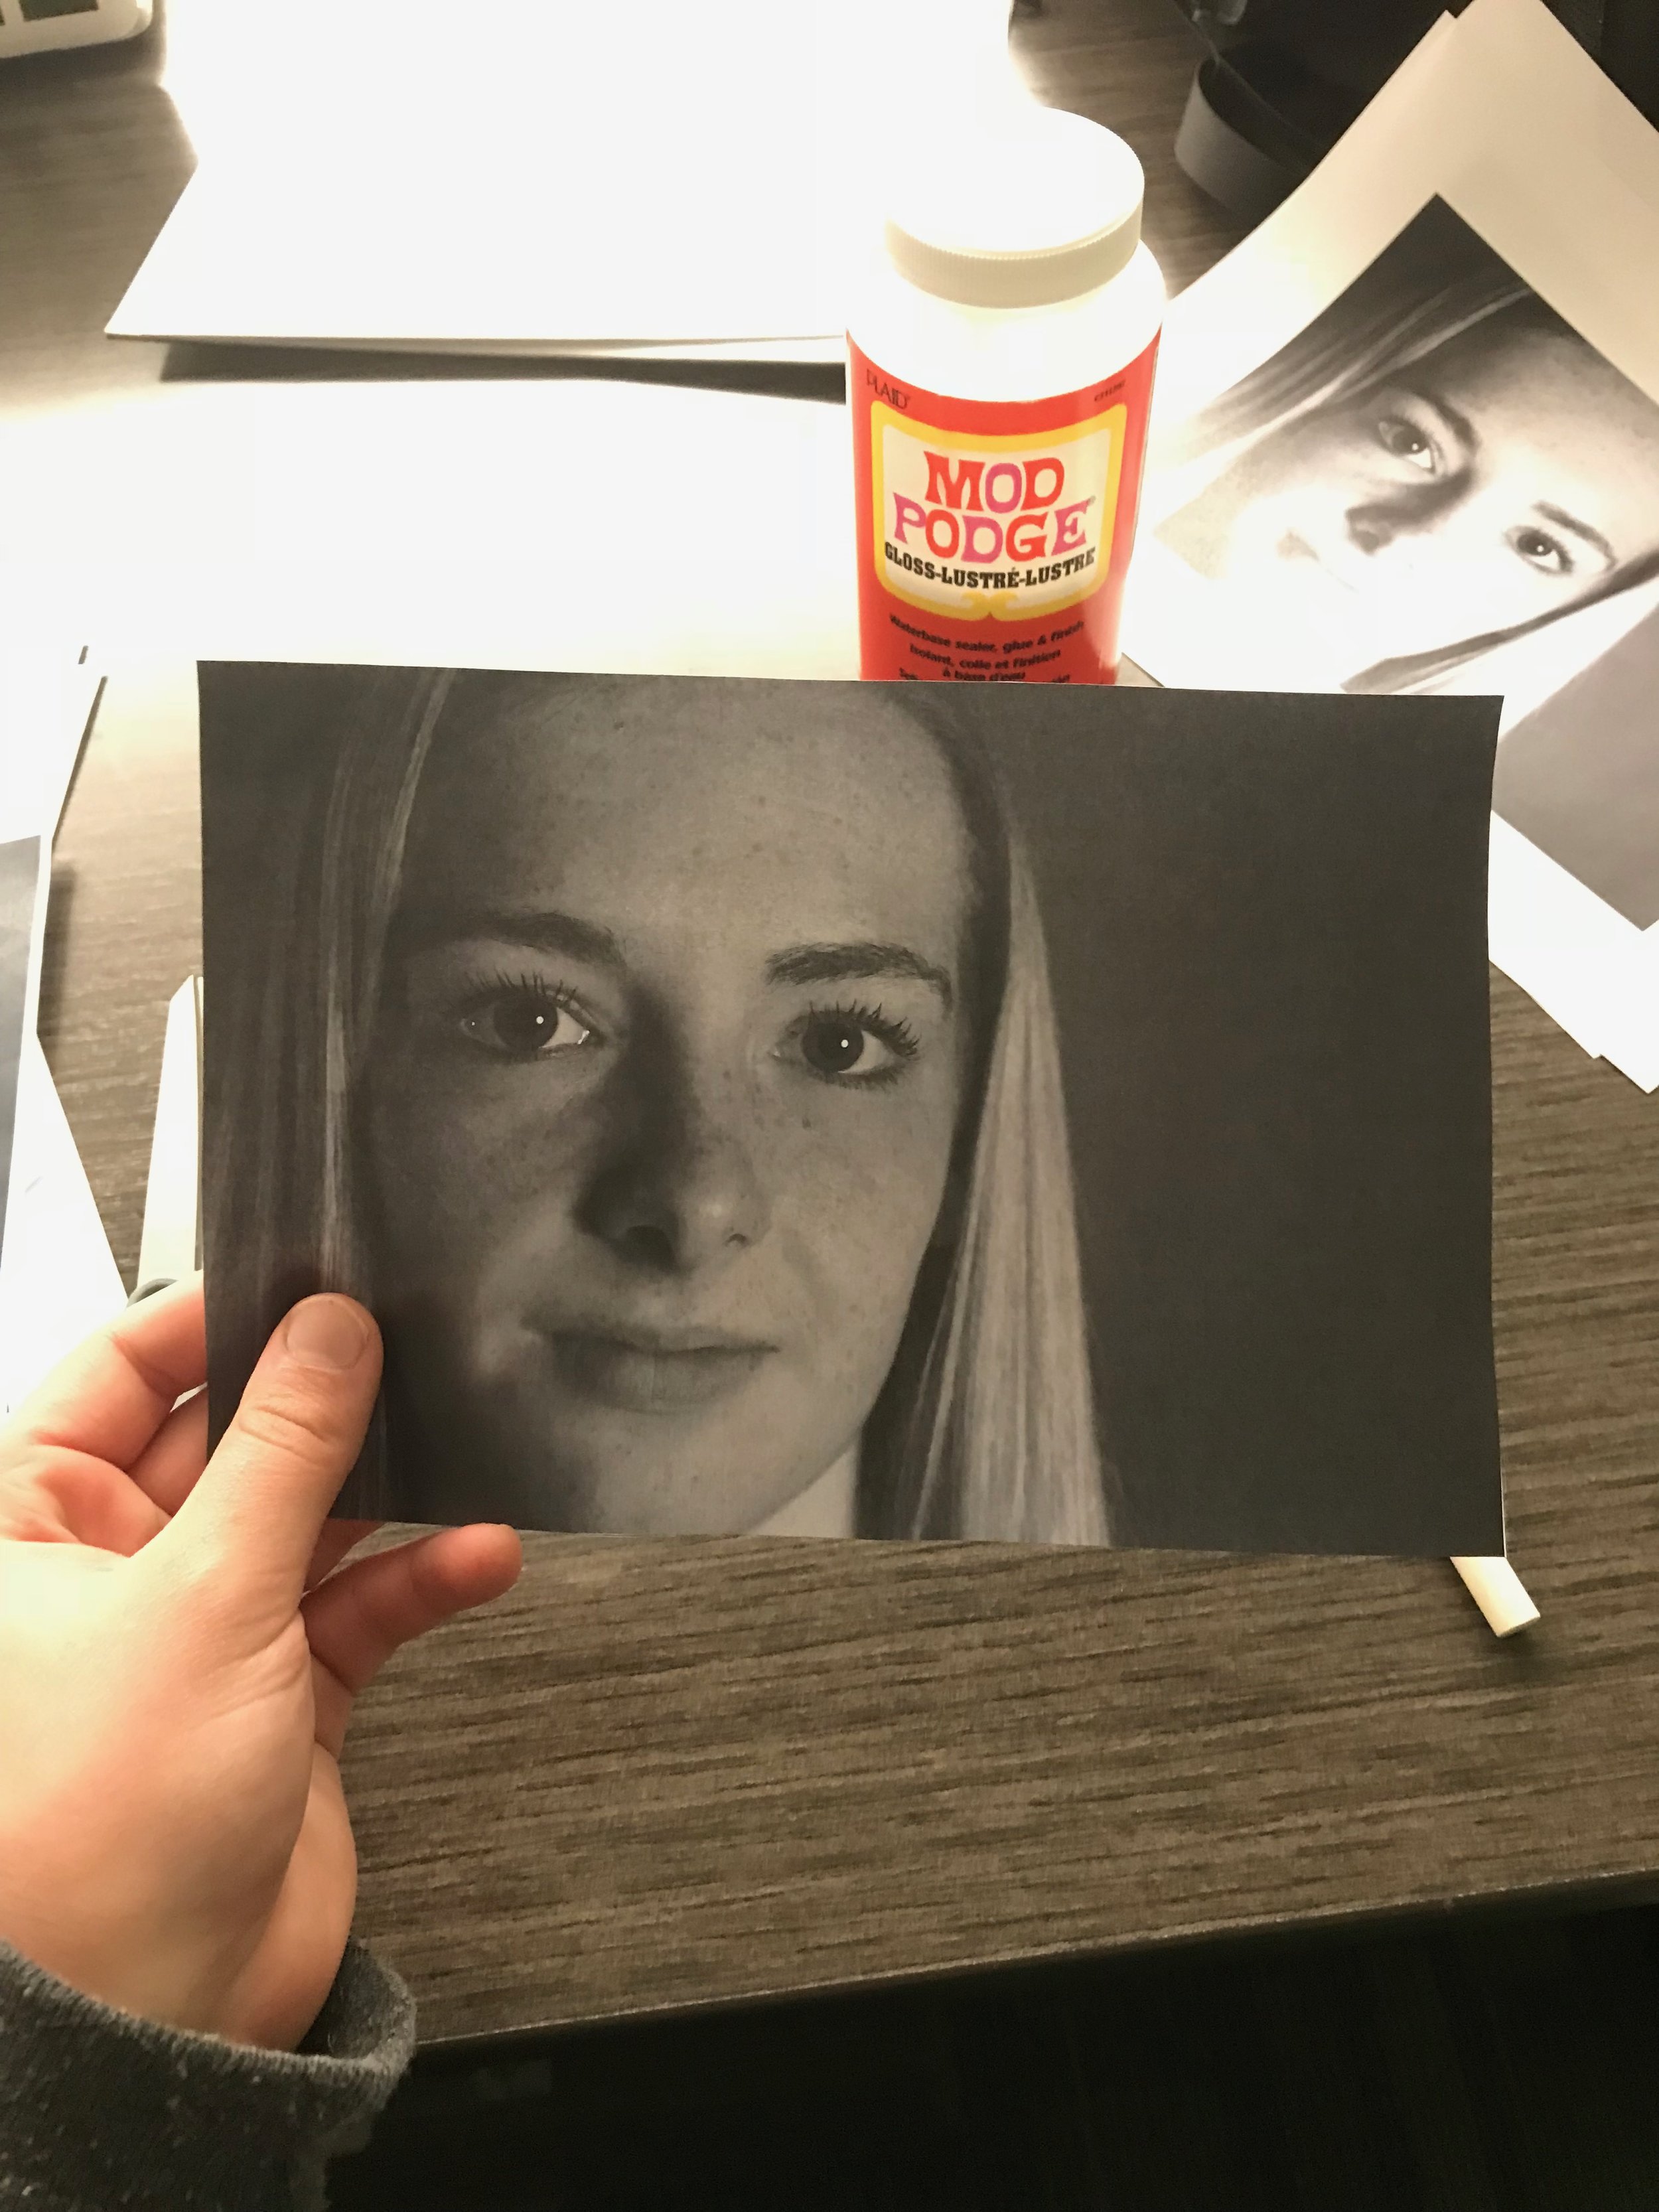
Next, i cut out the black and white portrait, covered the back in modge podge with the sponge brush, and placed it on one of the mat boards.  

IMG_3446.jpg IMG_3447.jpg

Then i took the color portrait and cut out specific features of the subject such as an eye, eyebrow, the mouth, and a piece of hair. I placed them on the black and white portrait in their respective spots so the features became enlarged and contrasted with the black and white background.          

IMG_3449.jpg IMG_3451.jpg

I glued the cut outs onto the black and white portraits using modge podge, and then covered the entire image in a layer of modge podge to give it a protective coating. After it dries completely, the modge podge creates a fun texture that adds to your collage(hard to see in the picture) while also keeping the image intact. Allow the image to dry for around 15-20 minutes or longer depending on how much modge podge was used.

IMG_3472.jpg

For my next collage, i used five different portraits of the same subject all showing different expressions.

IMG_1070.jpg IMG_1074.jpg IMG_1059.jpg IMG_1066.jpg IMG_1080.jpg

I chose one of the five to use as my base portrait, cut it out, and pasted it onto a mat board with modge podge.

IMG_3459.jpg

I had another portrait of my subject making the same face while holding her arms up, so i cut out two pieces of her right arm and pasted them using the modge podge onto the base portrait.

I cut out the left eye of one image, the top half of the mouth of another, and the right corner of the mouth of another for the remaining three images and pasted them onto the base image and covered it with another protective layer of modge podge. I allowed the image to dry for 15 minutes. This allowed me to show the contrast between expressions of the subject.    

IMG_3463.jpg

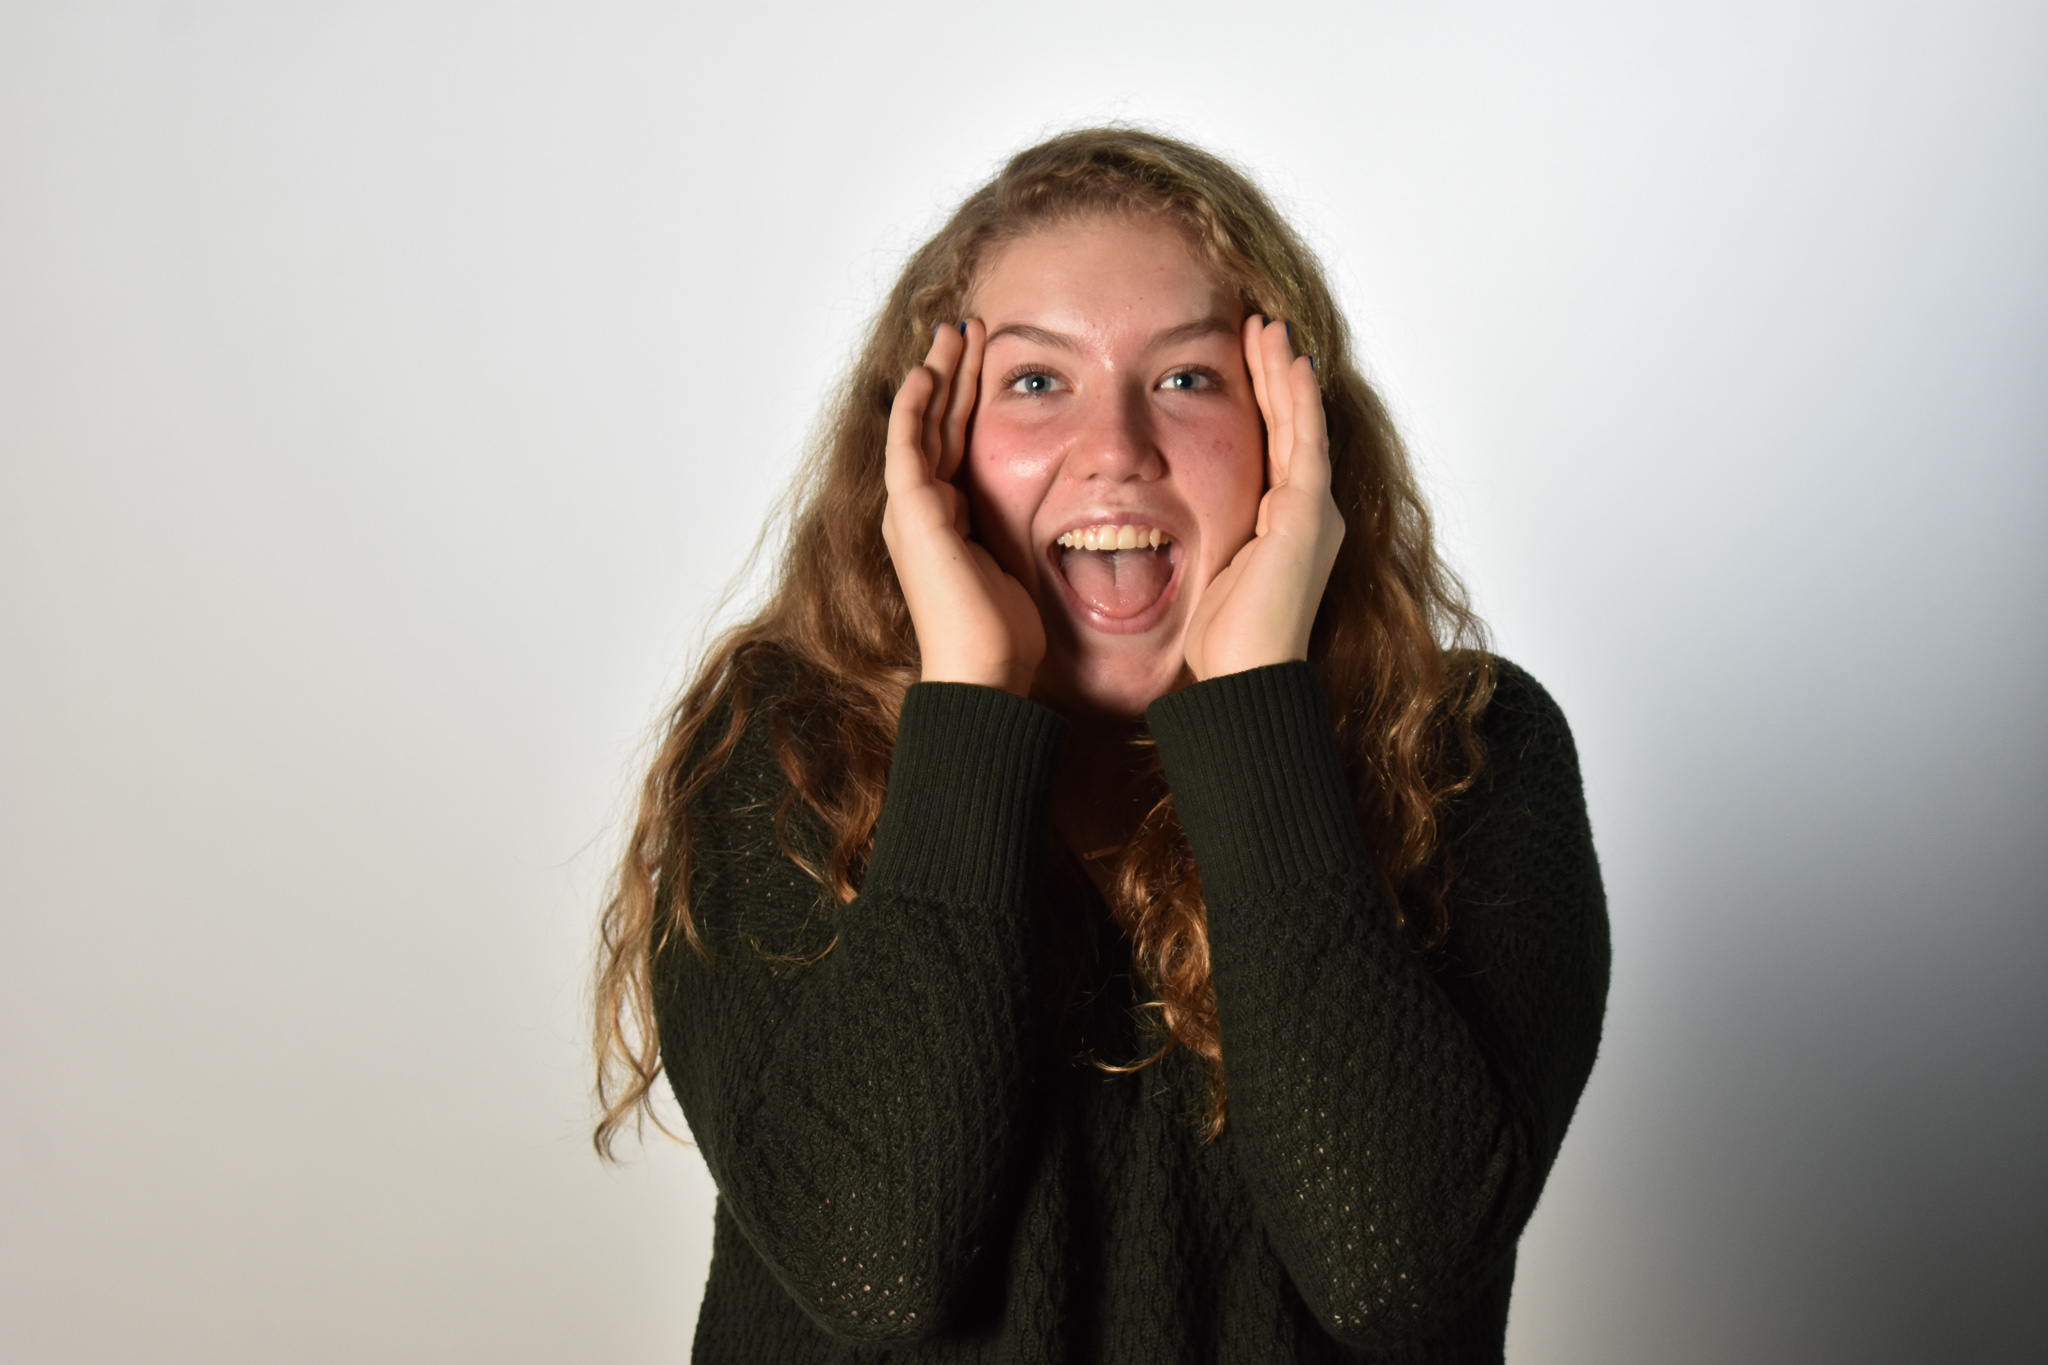
For my third collage, I used two different pictures of the same subject; one where her hands are covering her face and one where they are not.

DSC_0717.jpg DSC_0715.jpg

I used the image where the subject’s hands were not covering her face as my base image, and pasted it onto the mat board with the modge podge.

Next, i cut the image of the subject covering her face into many thin vertical strips. I then pasted three of these strips onto the base image to show the contrast between the subject covering her face and not covering her face, and covered the image with a protective layer of modge podge.

IMG_3457.jpg

I allowed the image to dry. Using the strips allowed me to show the difference between the subject covering her face and not covering her face in a unique way

IMG_3469.jpg

Now you know how to create three different unique projects! Happy Collage Making :)

tags: Collage, DIY
categories: Tutorial
Wednesday 04.25.18
Posted by Jessica Van Valkenburg
 

How to Mount a Photo on Foam Core

IMG_2044.jpeg

By Olivia Cruz '19

For many photo students, they have to submit a large photo into the student show, which needs to be mounted onto a larger poster board using spray adhesive or glue. In order to achieve a straight photo easily, follow these steps!

  1. After printing out the large photo in the CIC Makerspace printer, find a poster board with similar dimensions to mount your photo onto.

  2. After finding the corresponding poster board, bring your picture over to a window in the Makerspace and place it up against the glass. Tape the sides of the photo with masking tape so it sticks to the window without having to hold it up.

When the photo is placed onto the window, the light shines through the paper and displays the photo on the other side of the paper, which makes it easier when lining up the photo correctly. The window acts as a light box.

  1. Then, take the poster board and mark the outline of the poster board onto the photo with a pen. This shows where it should be placed. By marking this, it will help later during the mounting process.

  2. After marking where the poster board should go on the photo, take the photo down and bring it outside to the grass.

  3. Spray the adhesive on the back of the photo and bring the photo back inside.

  4. Tape the photo back onto the window, and line up the poster board to the pen markings made earlier.

  5. Take the photo with the board down from the window and place it onto the countertop. Then, smooth out the photo to make sure there are no air bubbles.

  6. After, cut off the excess portion of the photo that does not fit on the board with an X-Acto knife. Be careful and make sure to be cutting it on the cutting mat.


tags: Mounting, Cuba
categories: Tutorial
Wednesday 04.25.18
Posted by Olivia Cruz
 

Steel Wool Light Painting

Xavier Carbonaro '18

My favorite way to paint with light is to use steel wool.  Although it is time consuming and requires a few tools, the results are worth it.  Below are instructions on how to replicate some of the following images.

3F4A3007.JPG
3F4A3000.JPG

Tools Needed:

  • String

  • Egg Whisk

  • Fire Extinguisher

  • Steel Wool size 000

  • Lighter

  • Tripod

  • Camera

  1. The first step is really important.  Find the right area and weather! Since you will be creating sparks, it is important to not choose a dry day near anything flammable

  2. Put your camera on the tripod

  3. Set your ISO to about 200, your exposure to 15 seconds, aperture to about 5.6, and any white balance you want for varying results

    1. Your settings can vary depending on the time of day or place

  4. Cut about three feet of string and attach it to the handle of the egg whisk

  5. Open the steel wool and take a small 2-3 inch portion of it

  6. Start to pull apart/shred the wool with your hands so it is not compact .  This step should make it very fluffy

  7. Take your fluffy steel wool and insert it inside the whisk

  8. Have a subject stand in front of your camera and light the steel wool with the lighter

  9. Your subject should begin to swing the whisk from the string in any pattern you desire, just be sure to not move the camera

  10. After all the sparks fly and are captured through long exposure, make sure there aren't any sparks which created a threat i.e. fire.

tags: Steel Wool
categories: Tutorial
Wednesday 04.25.18
Posted by X'avier Pesqueira
 

How to fill an image of a mirror with another image using photoshop

By Cortney Klein '18

IMG_4076.JPG
  1. Find two images, one of which you want to fill a specific shape or mirror with the other

  2. Go onto photoshop and import the two pictures

  3. Take one image and select command a, and then command c

  4. Click the other image and select command v

  5. Unlock “layer one and background” on the right

  6. Select the layer that has the image of the mirror

  7. On the left select the lasso tool and begin to outline the mirror as precisely as possible

  8. For the curvy section around the fingers the lasso is best. You can only do that small section with this tool and then click the remainder of the shape with the tool below the lasso.

  9. Delete this section with the delete button on your computer

  10. Now your image should be showing in the mirror.

  11. Click the background layer to drag the image around into the correct positioning.

  12. Export image

IMG_4082.JPG
IMG_4083.JPG
IMG_4077 (1).JPG
IMG_4078.JPG
IMG_4076 (1).JPG
IMG_4081.JPG
tags: Photoshop
categories: Tutorial
Wednesday 04.25.18
Posted by Cortney Klein
 

How to Make a Creative Cut Up Collage Mashup

By Mia Abromitis '19

_MG_7355.jpg

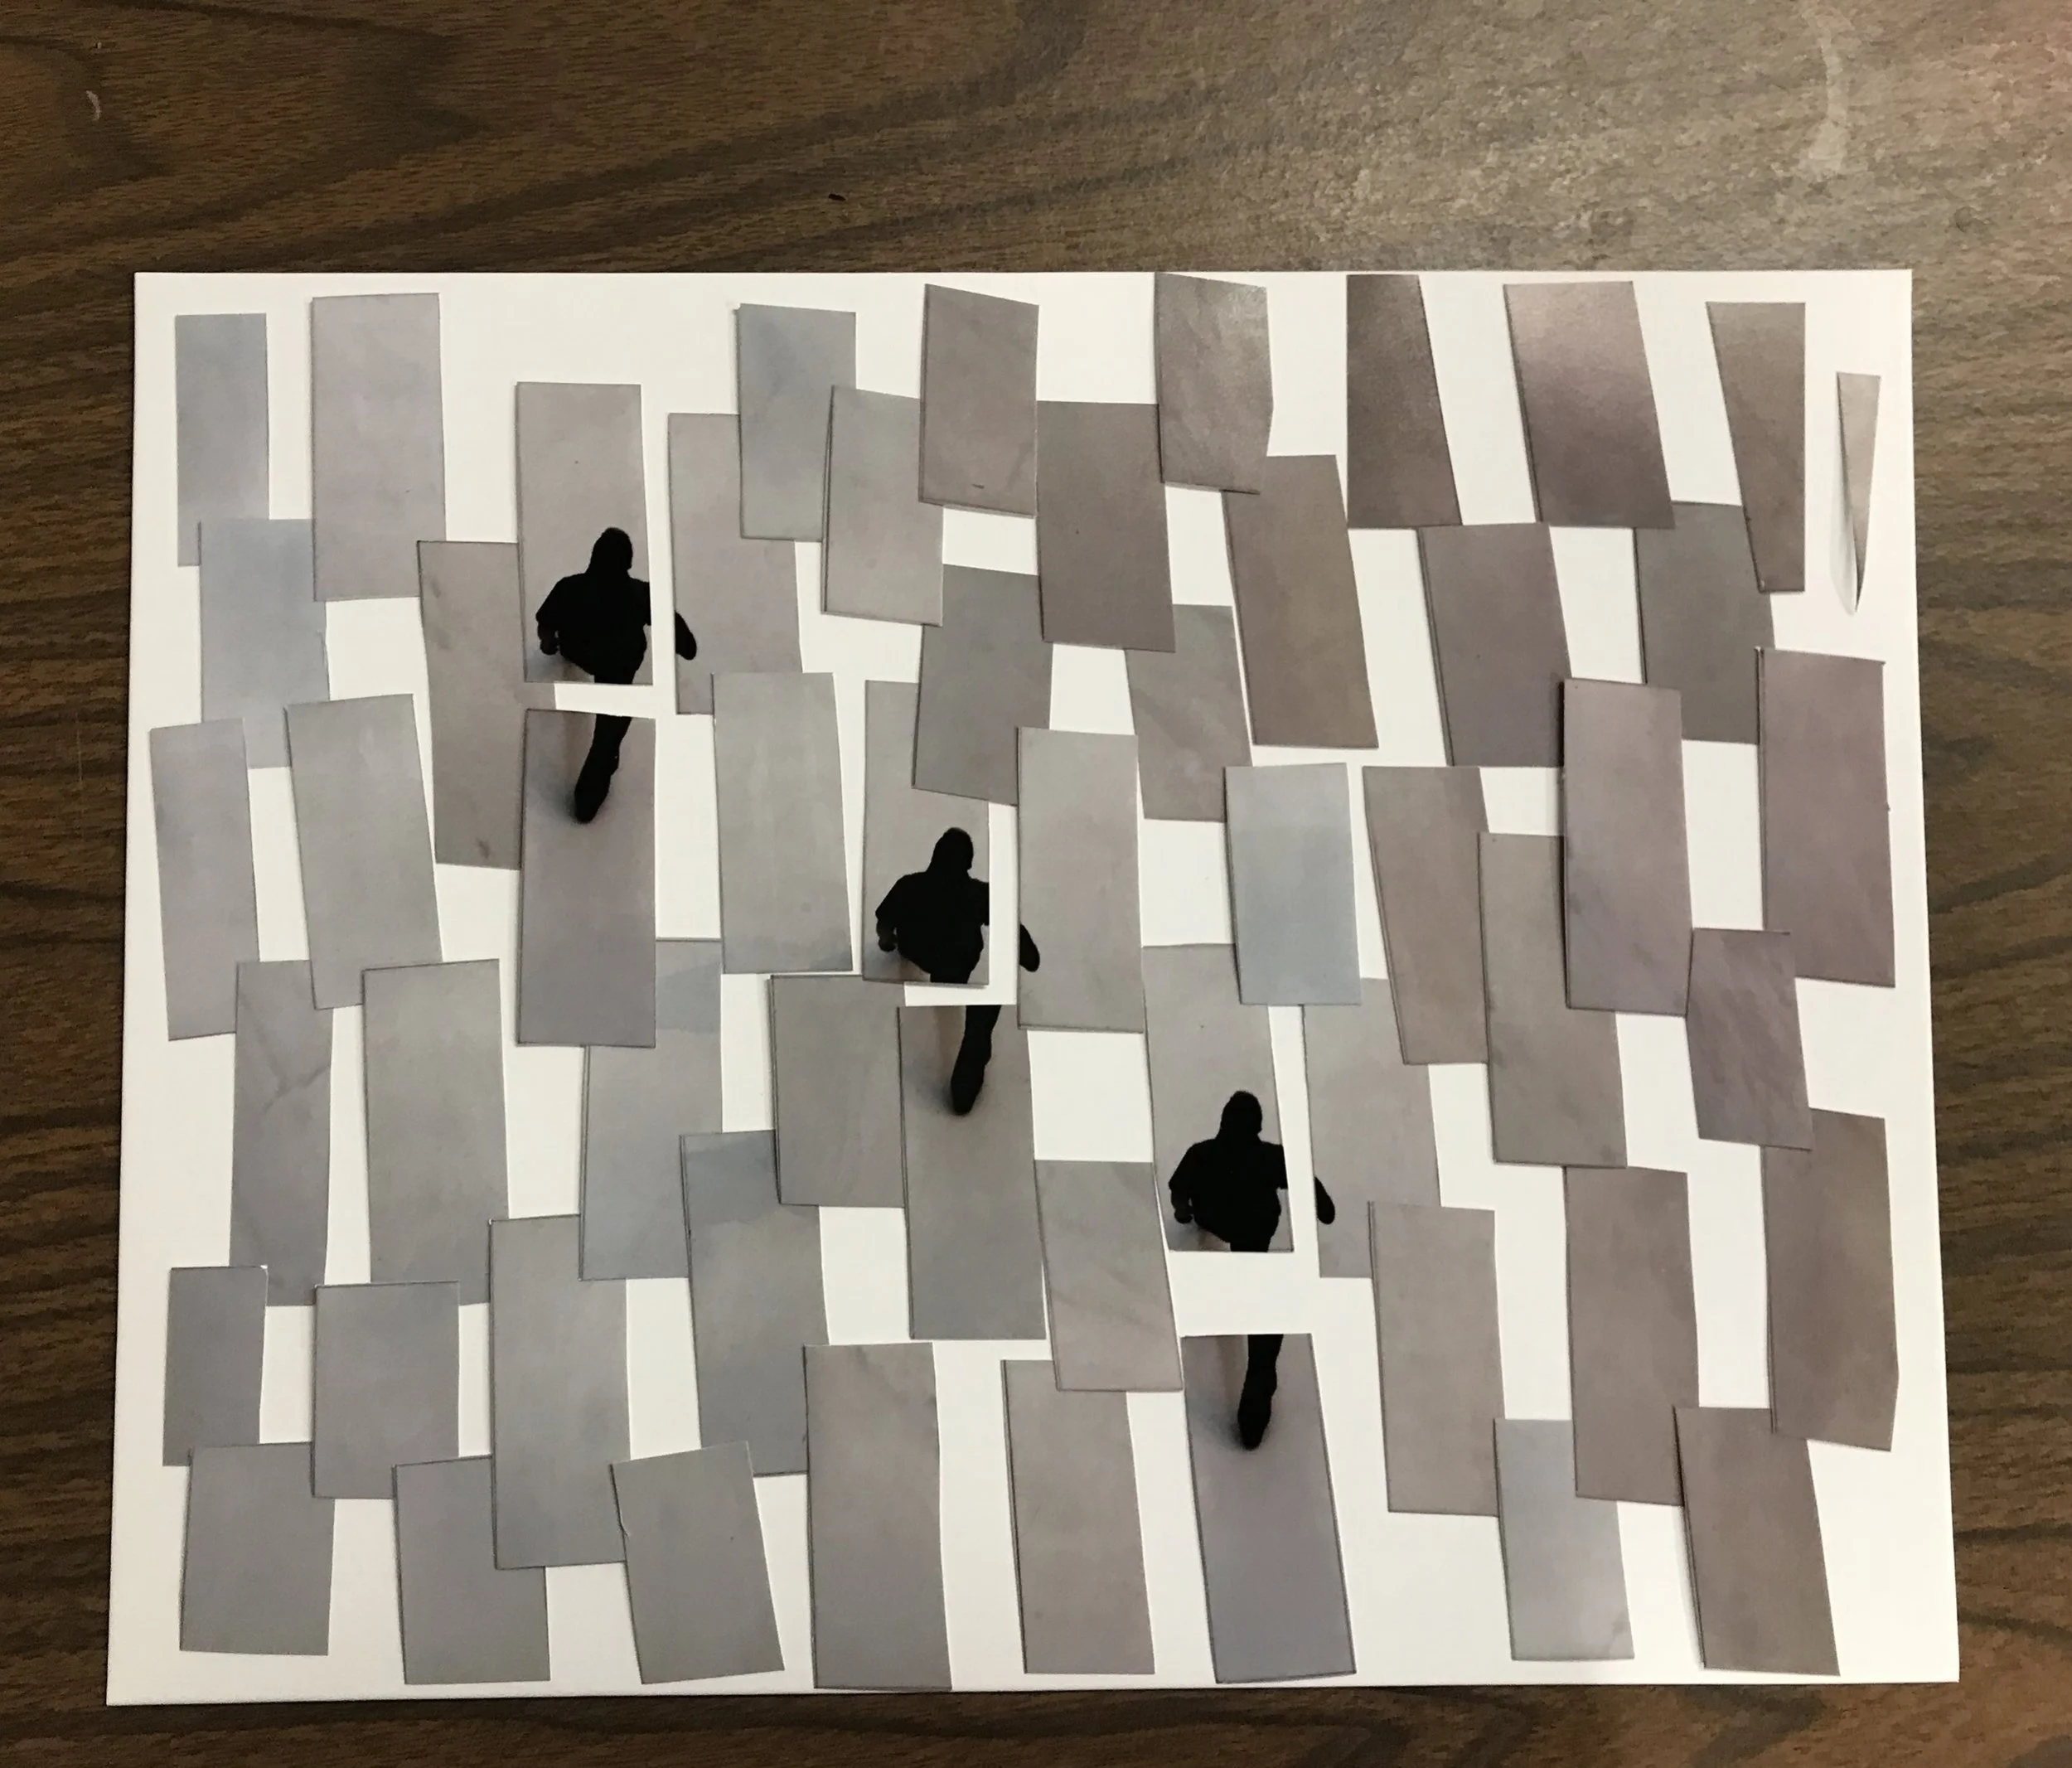
To start a photo collage, begin by selecting the desired picture. Photographs with geometric shapes make for interesting patterns, but the possibilities are endless. I selected this picture with geometric white tiles with a back figure walking in the middle.  

There are many options on how to manipulate the image. First, I began by cutting out each rectangle, regardless of whether the figure extends into other boxes. That way, the division of the figure will create a broken up appearance. I made several copies of the picture and only cut out the pieces with the figure, so that I could repeat the figure in a pattern for the collage.

IMG_5433.JPG

My first inclination was to form a mashup of the pictures on one board, forming a blank space pattern.

Then, I changed the pattern and form. I used one whole picture, and then used solely the pieces with the figure and placed them above the original photo. Either way works, as it is up to the creator to choose which direction works best with their photo(s).  Once the placement is as desired, use a coat of modge podge to paste it down. The messier, the better.

IMG_4061.JPG

It is finished once the modge podge dries thoroughly.

Tip: To create a weathered look, modge podge the pieces down when the ink is not completely dry. It will pick up some of the ink and give it a worn in, DIY look to it.

IMG_5611 2.jpg
tags: Collage
categories: Tutorial
Tuesday 04.24.18
Posted by Mia Abromitis
 

Blair Academy Photography Powered by Squarespace.