
By Andrew Brooks '19

1. Choose your image
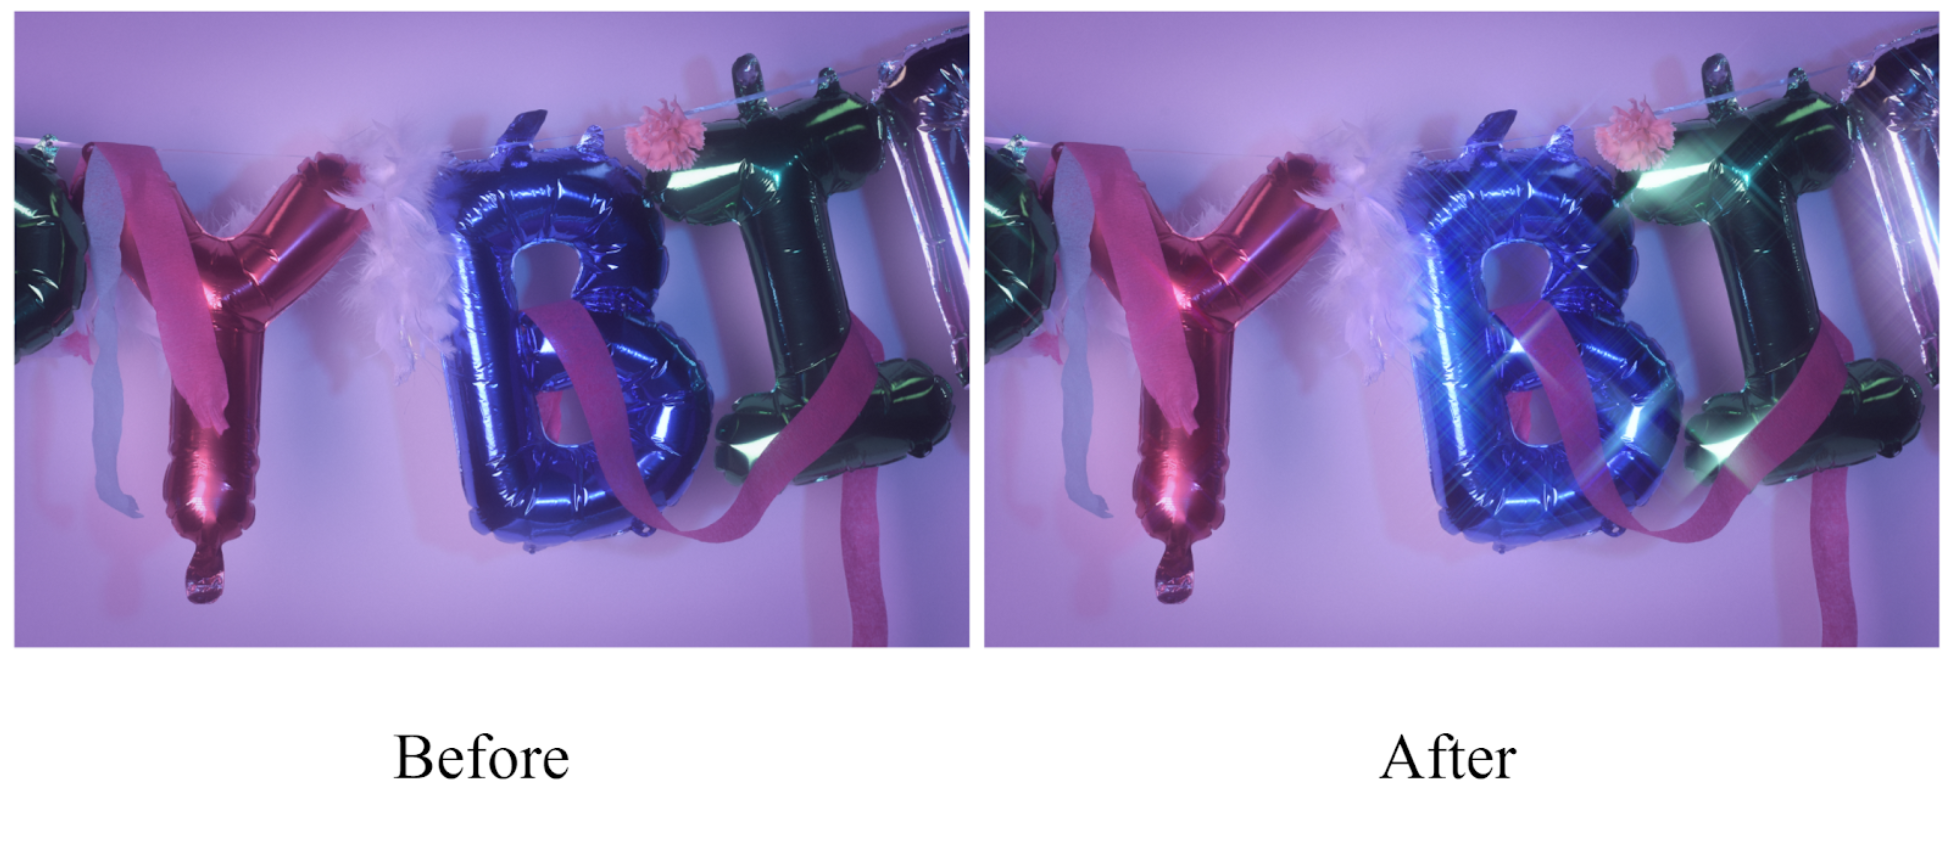
The best results with this technique come from images with clear bright points. (i.e. string lights)
2. Duplicate the layer
In the layers box at the bottom right of the screen, right click Background and then select Duplicate Layer.
3. Adjust levels
In the Adjustments tab above the layer box, select the icon for Levels

Adjust the level by sliding the leftmost arrow towards the right until only the brightest parts of the picture are visible.

4. Create a new layer
Using the New Layer button at the bottom of the layers box, create a new layer at the top of the list.

5. Cover up unwanted color
Using a black normal brush with 100% opacity, cover up any unwanted bright spots that you do not want the glitter to affect.

6. Create a Smart Object
Select all everything in the layer box besides the original background using Ctrl+left click. With everything selected, right click and select Convert to Smart Object.
7. Apply blur effect
With the new Smart Object selected, go to Filter → Blur → Motion Blur. Apply the blur at 45 degrees with the distance of your choosing. Repeat two more times to soften the blur effect.

8. Re-apply blur in other direction
Select your smart object (titled Layer 1 by default) and then select Duplicate Layer. This will duplicate the entire smart object, motion blurs included. On this new smart object, double click each motion blur and change the angle from 45 to -45 degrees. This is what creates the star effect.
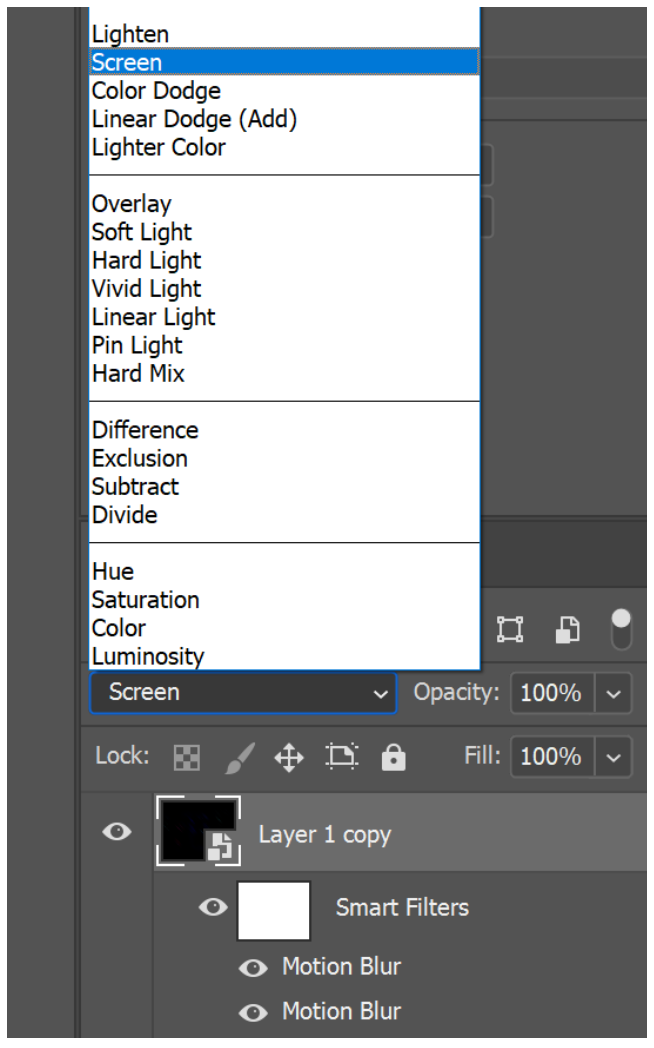
9. Set visibility to Screen
Select a single smart object, then in the drop-down menu above the layer box, select Screen. Repeat for the other smart object.
10. Re-adjust levels
At this point, the blur effect is likely invisible, or only slightly visible. To change this, we need to add a new level adjustment to both smart objects.
Select a smart object and then select Levels under the Adjustments tab as you did in step #3. Select the icon of a white box with an arrow pointing down, this makes the adjustment only apply to the object below it. Drag the right arrow to the left until the sparkle effect is to your desired visibility. Repeat with other smart object.

Make sure the layers are organized the following way:

Congratulations!
You just made your first glitter image!