To create an effective collage combine photos that connect in certain ways that allow the photographer to highlight specific features of a photo, or simply add a little spunk and uniqueness to one's work. I chose to combine photos through separate collage techniques because I love capturing expression and detail through portraits, and combining images that connect in a certain way allow me to show contrast between expressions while also giving me the ability to emphasize certain areas of an image.

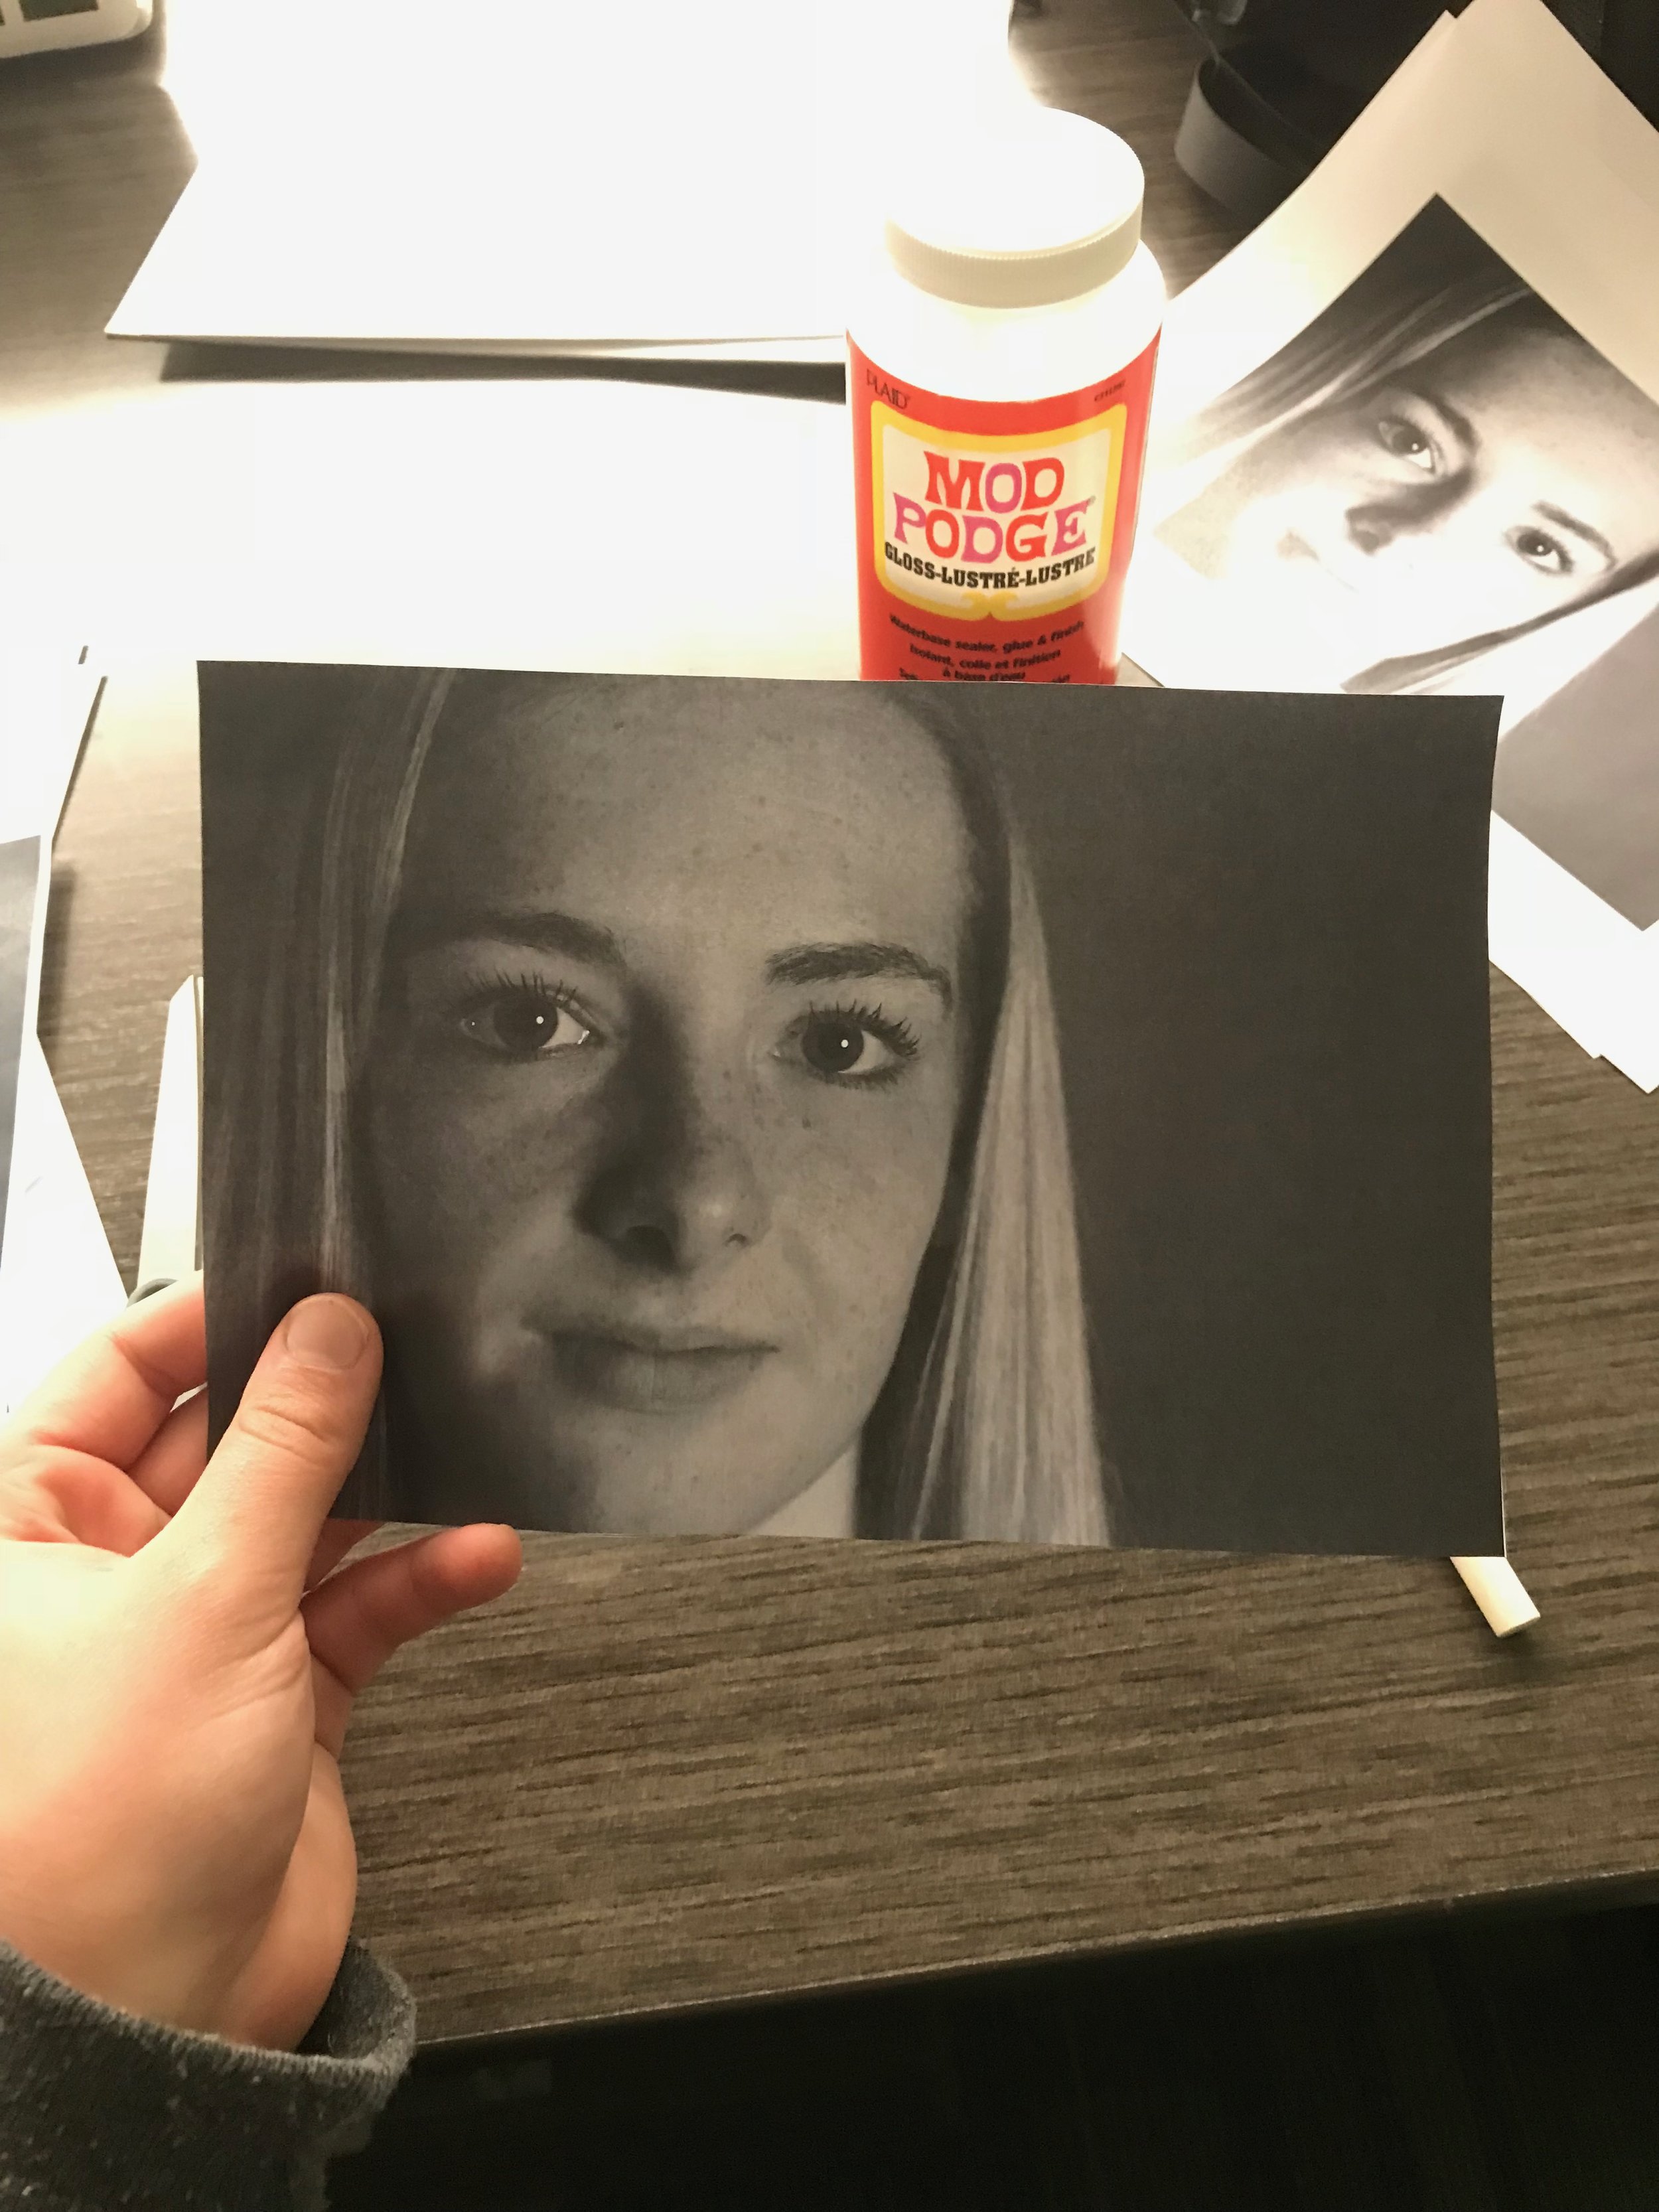
To start, pick and print a few portraits that are different but connect in some way, such as photos that include the same subject but portray different expressions or are printed in different color schemes, etc. i used regular paper because i like the authentic look of the wrinkles it creates, but depending on smoothness preference photo paper can be used as well.


You will also need a sponge brush, scissors, modge podge, and mat boards.

I chose to create three different types of collages with my photos. For the first one, I used two copies of the same portrait. I printed one in Black and white and another in color, although i printed the color portrait larger than the black and white one.


Next, i cut out the black and white portrait, covered the back in modge podge with the sponge brush, and placed it on one of the mat boards.

Then i took the color portrait and cut out specific features of the subject such as an eye, eyebrow, the mouth, and a piece of hair. I placed them on the black and white portrait in their respective spots so the features became enlarged and contrasted with the black and white background.


I glued the cut outs onto the black and white portraits using modge podge, and then covered the entire image in a layer of modge podge to give it a protective coating. After it dries completely, the modge podge creates a fun texture that adds to your collage(hard to see in the picture) while also keeping the image intact. Allow the image to dry for around 15-20 minutes or longer depending on how much modge podge was used.

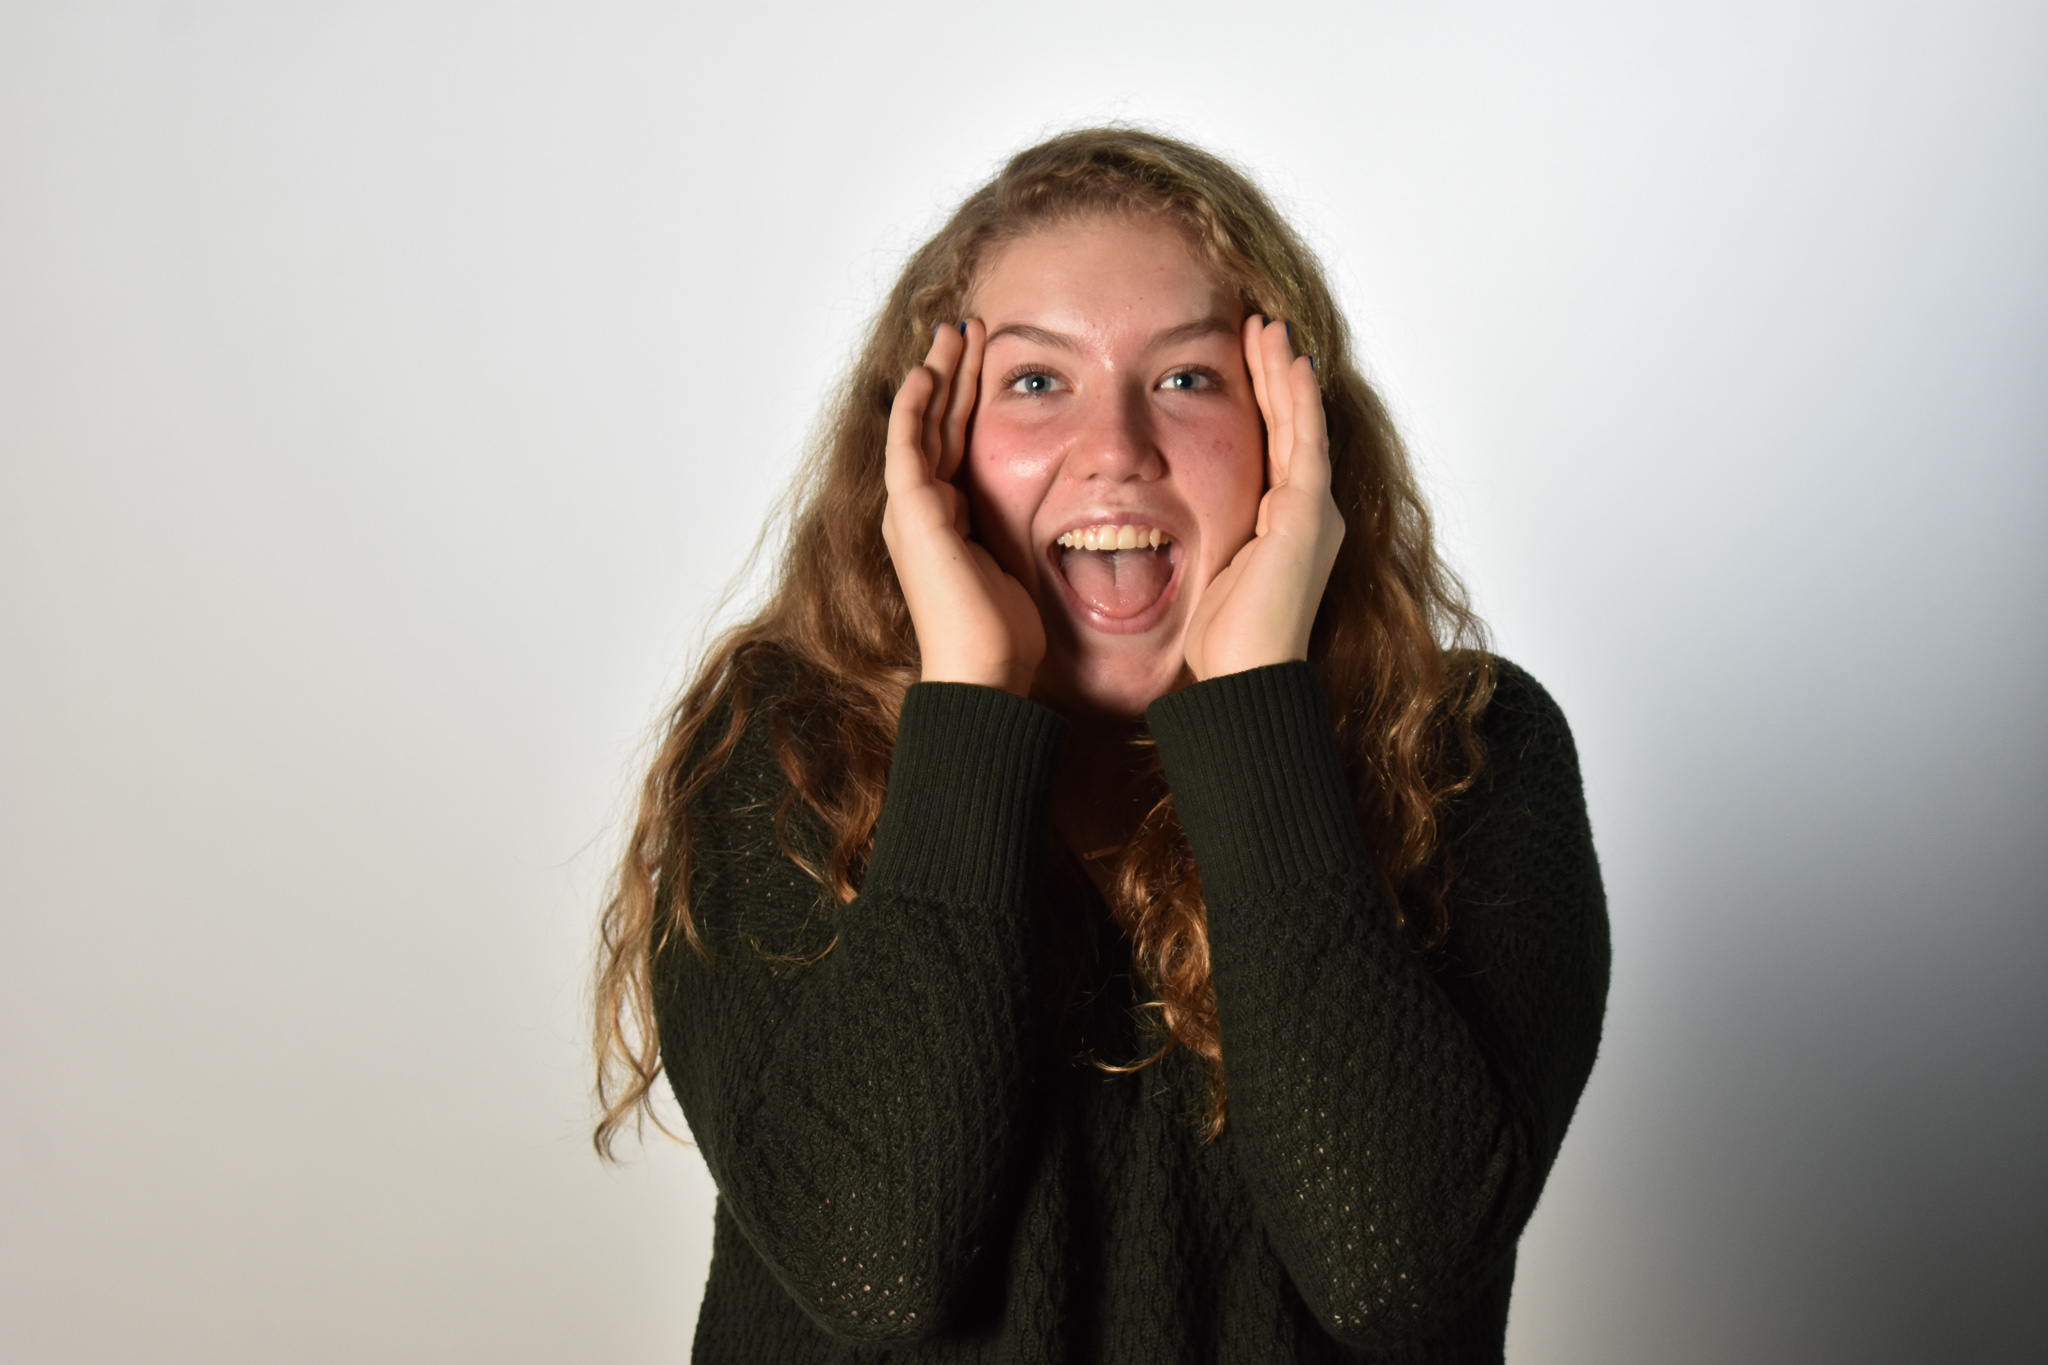
For my next collage, i used five different portraits of the same subject all showing different expressions.


I chose one of the five to use as my base portrait, cut it out, and pasted it onto a mat board with modge podge.
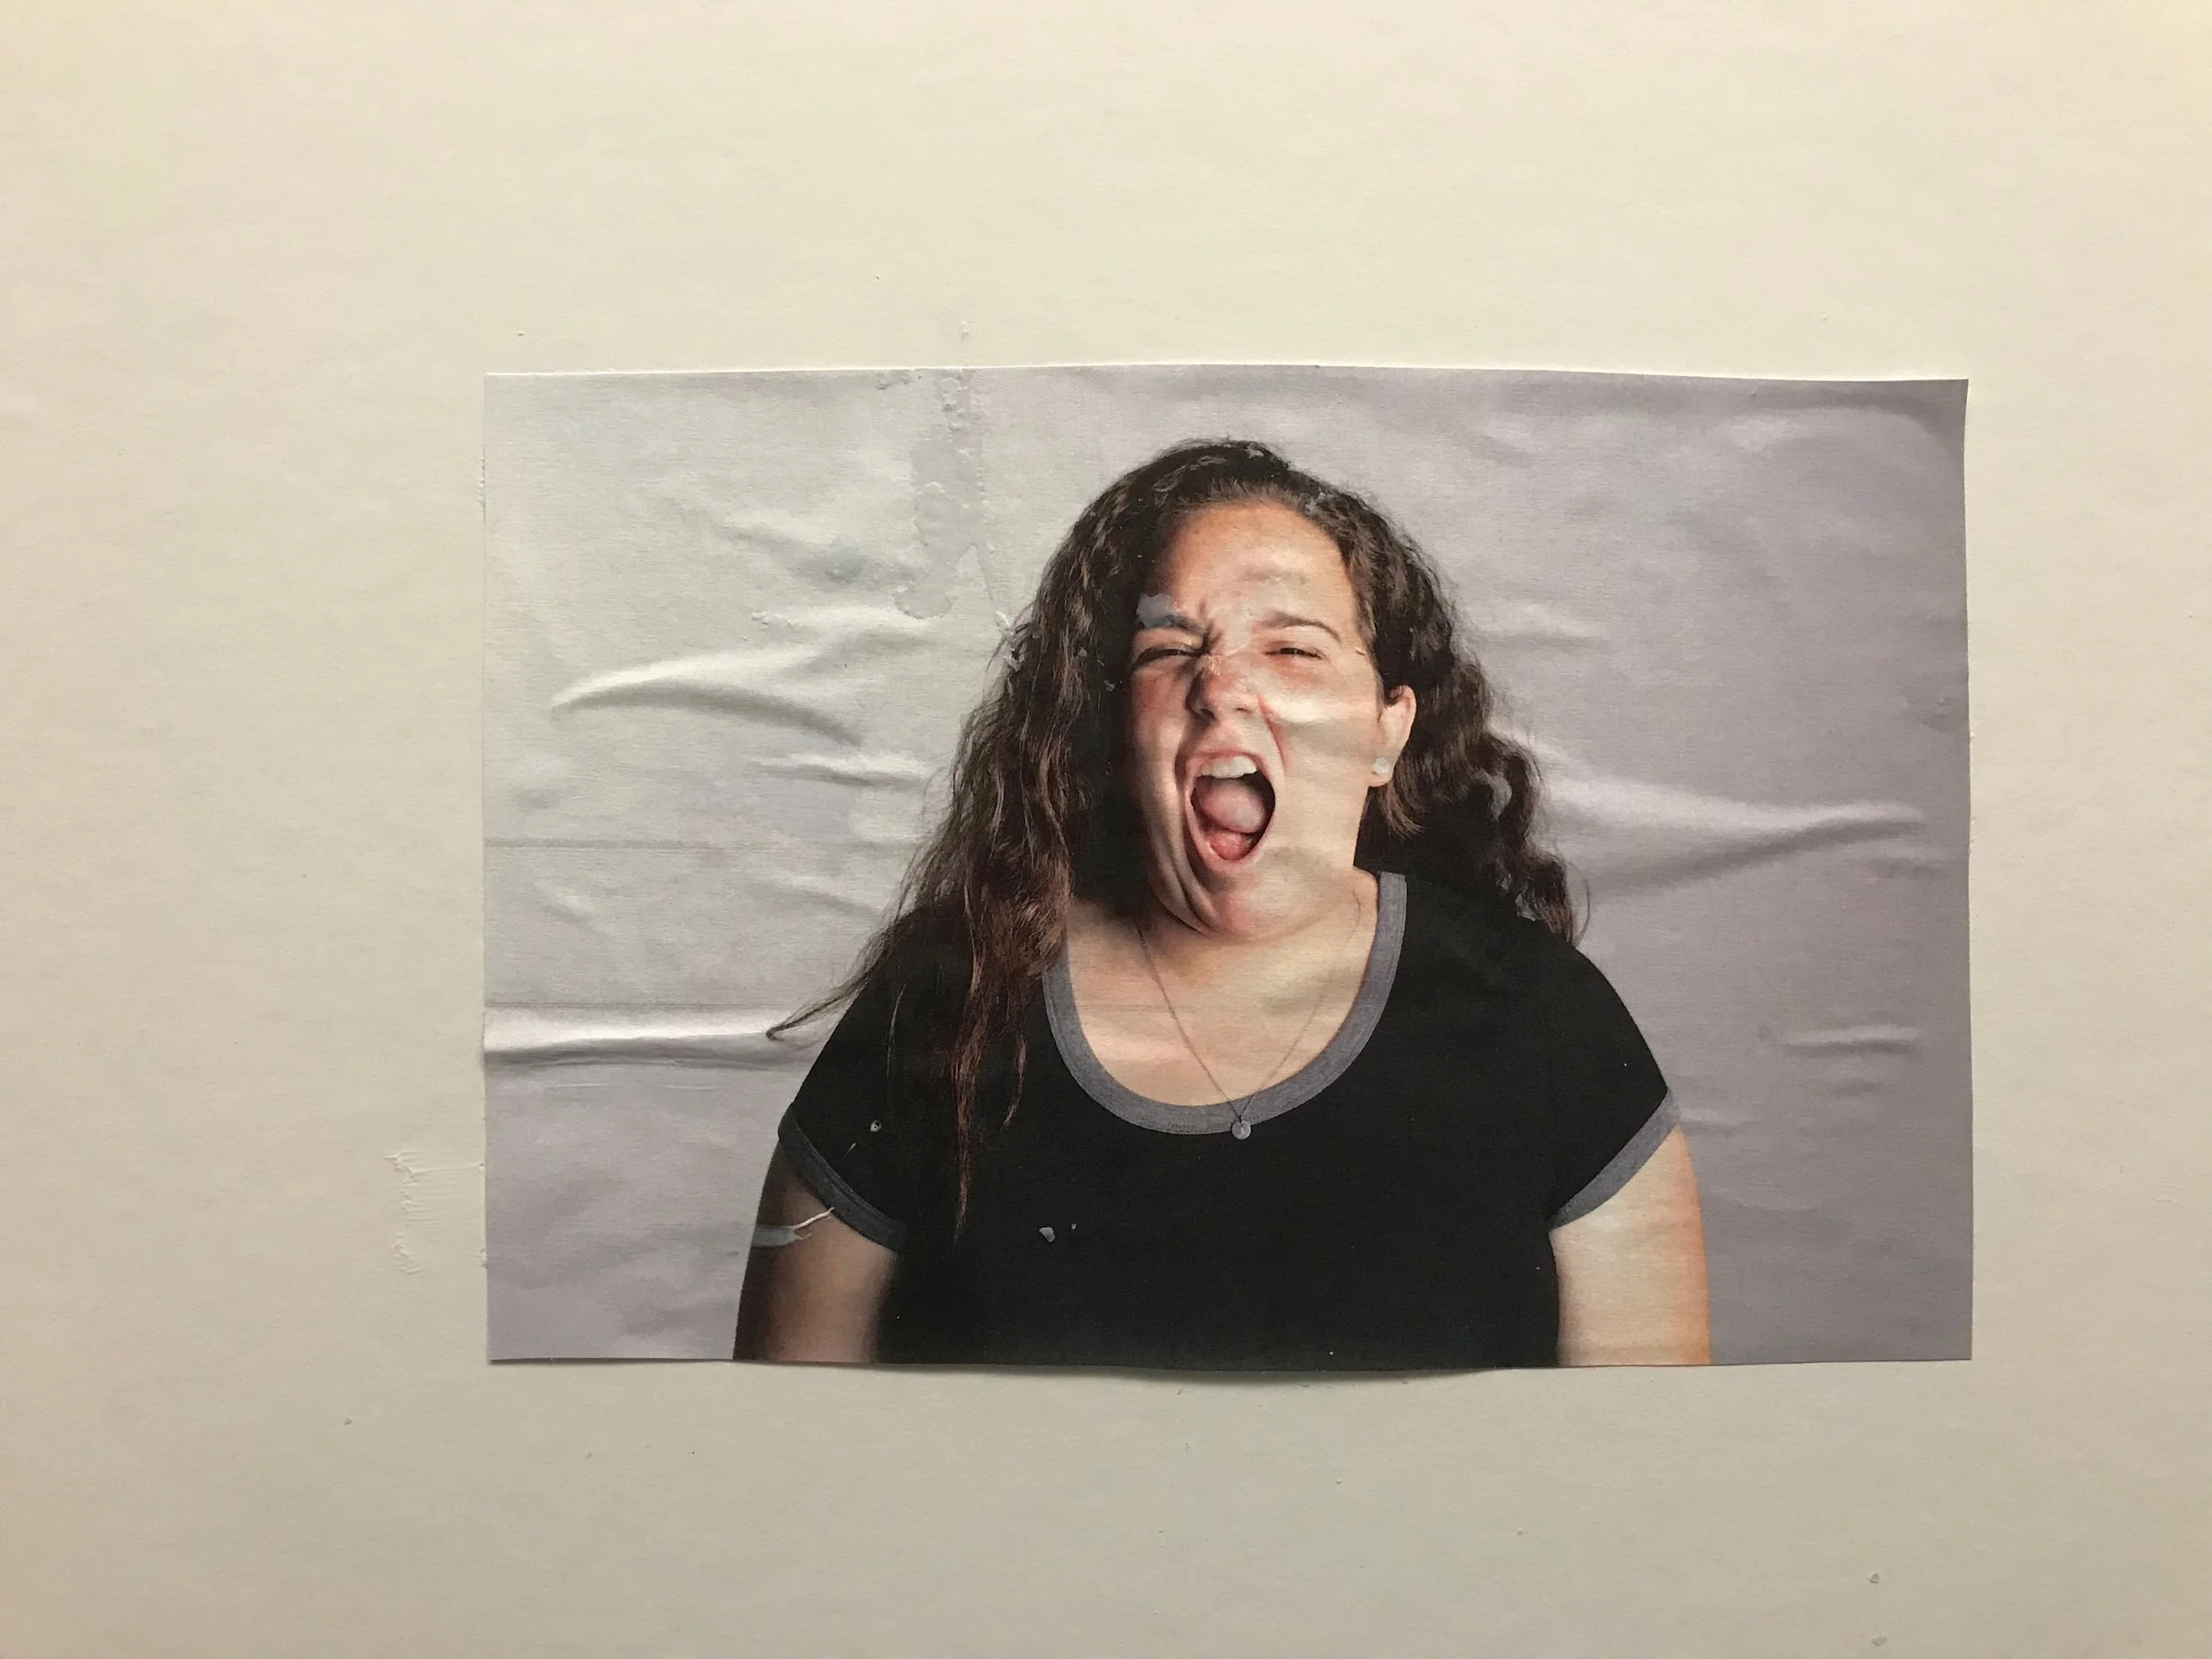
I had another portrait of my subject making the same face while holding her arms up, so i cut out two pieces of her right arm and pasted them using the modge podge onto the base portrait.
I cut out the left eye of one image, the top half of the mouth of another, and the right corner of the mouth of another for the remaining three images and pasted them onto the base image and covered it with another protective layer of modge podge. I allowed the image to dry for 15 minutes. This allowed me to show the contrast between expressions of the subject.

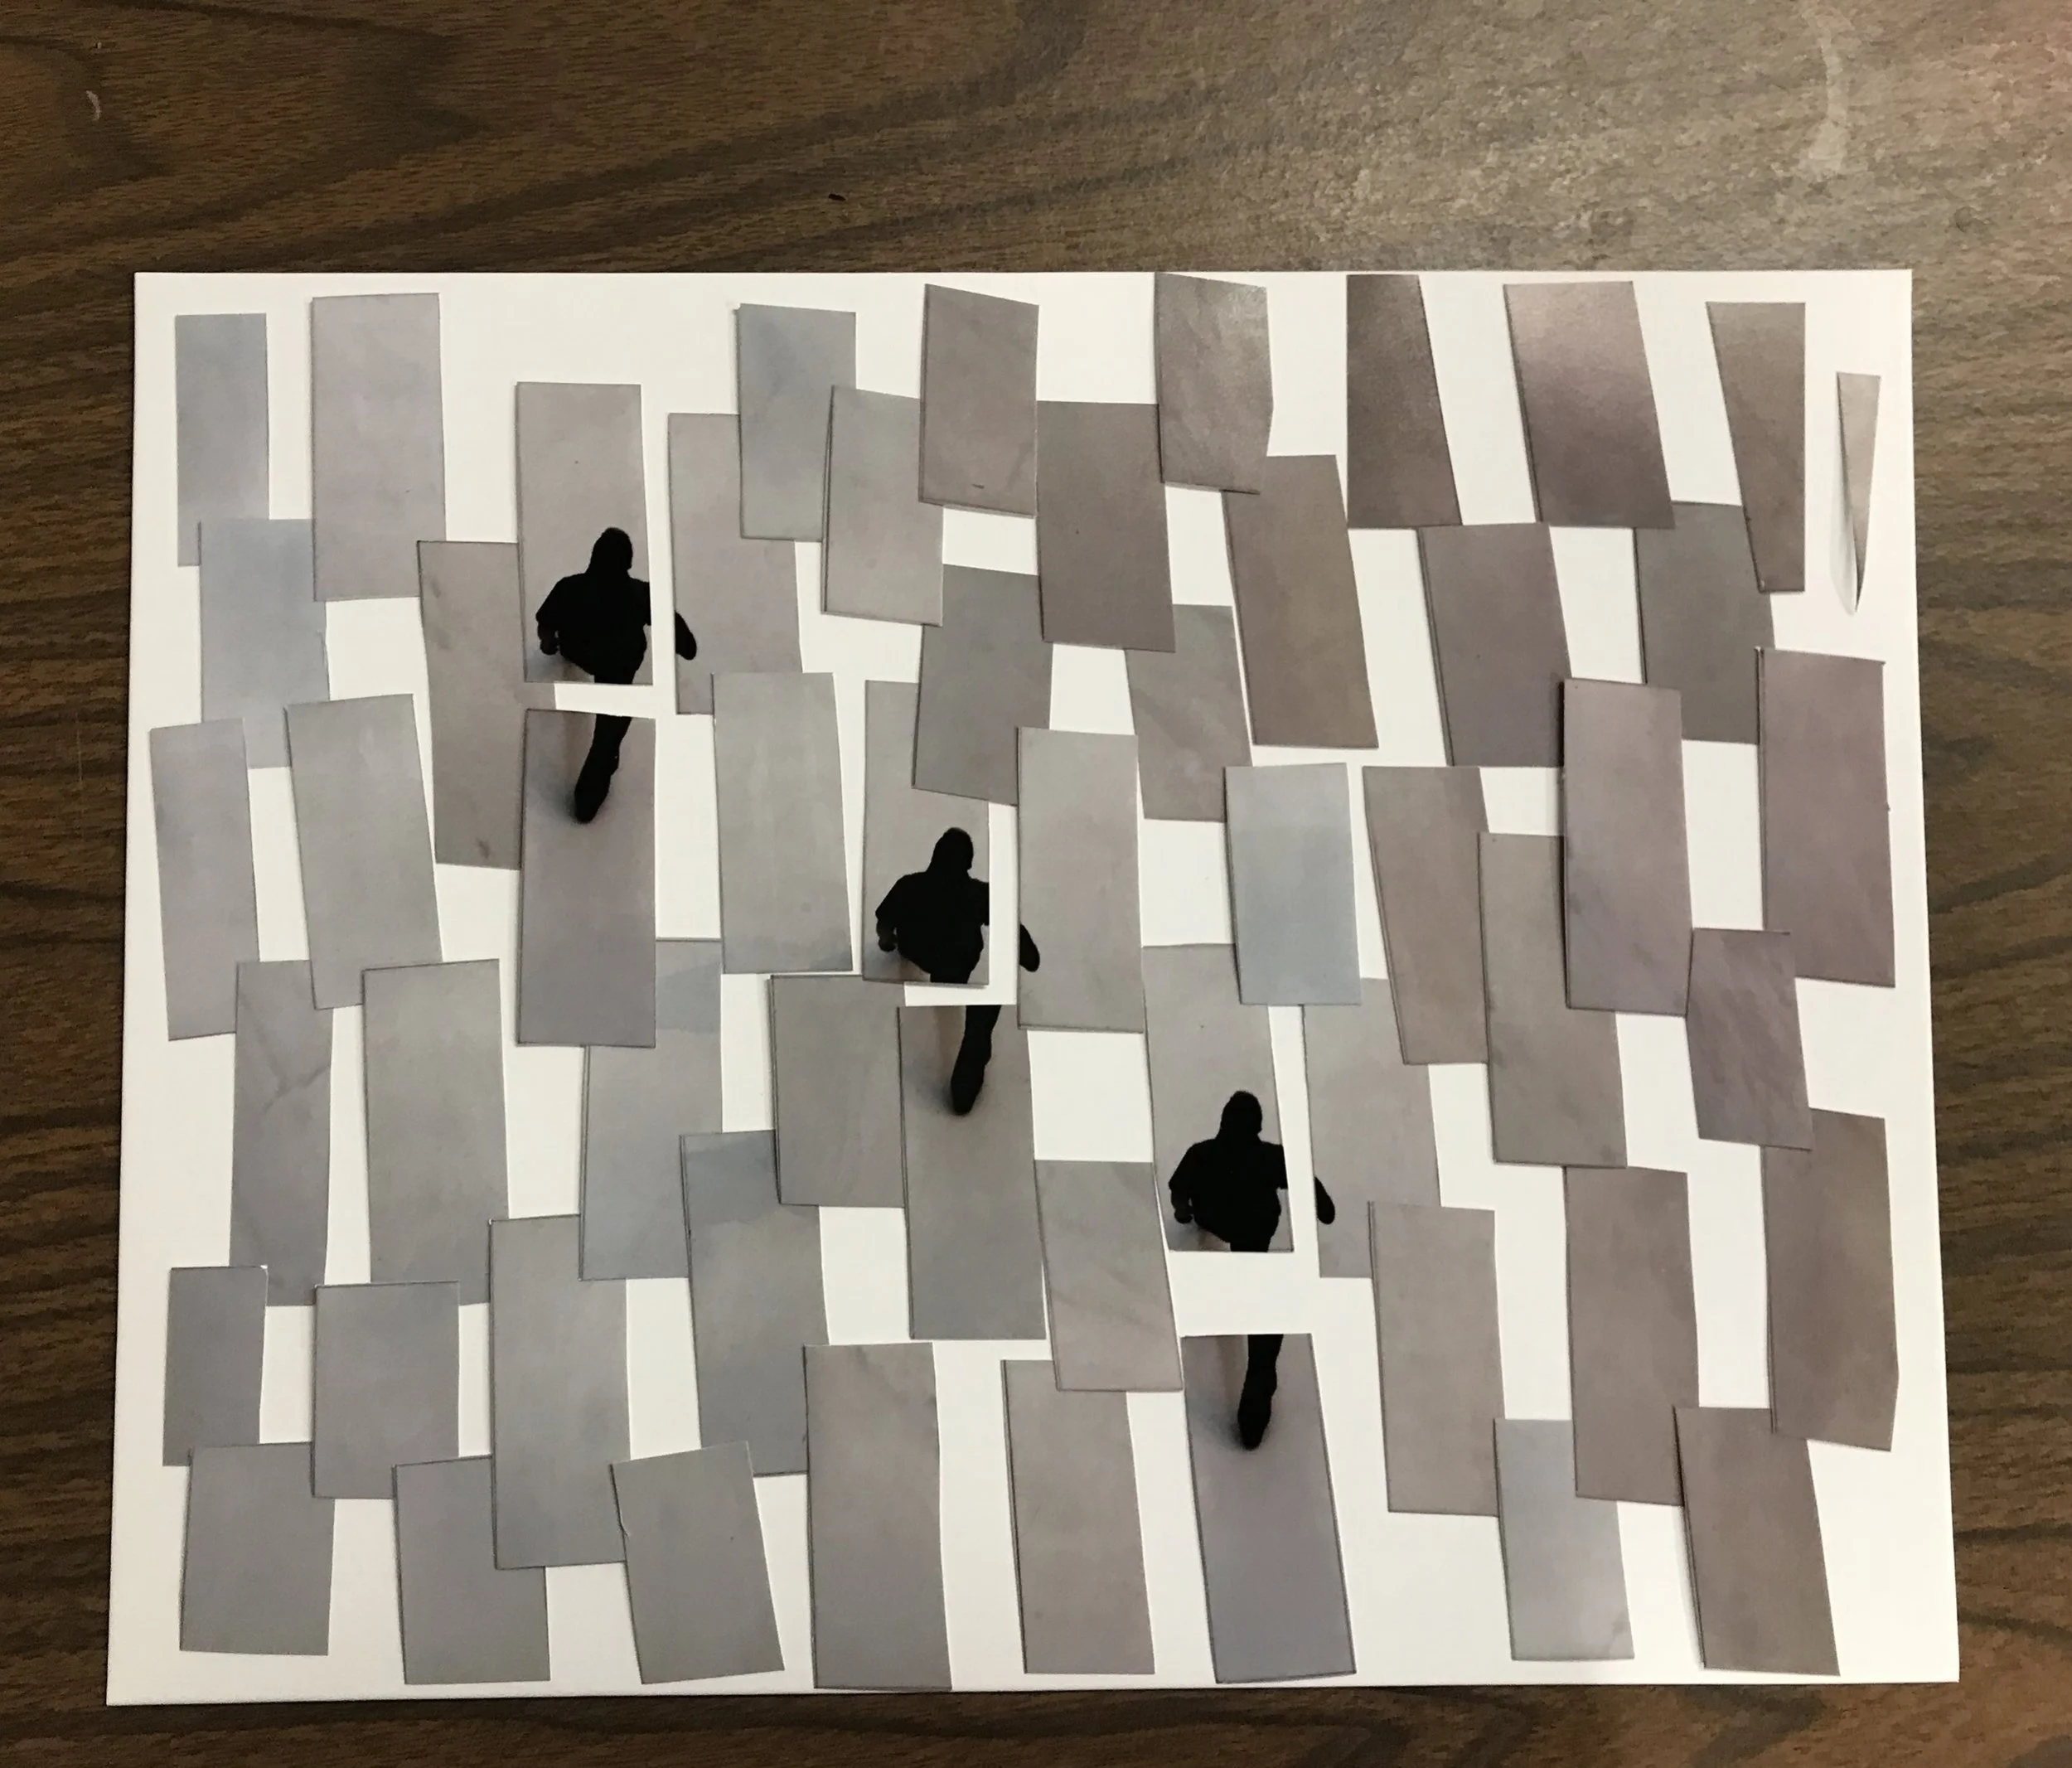
For my third collage, I used two different pictures of the same subject; one where her hands are covering her face and one where they are not.

I used the image where the subject’s hands were not covering her face as my base image, and pasted it onto the mat board with the modge podge.
Next, i cut the image of the subject covering her face into many thin vertical strips. I then pasted three of these strips onto the base image to show the contrast between the subject covering her face and not covering her face, and covered the image with a protective layer of modge podge.

I allowed the image to dry. Using the strips allowed me to show the difference between the subject covering her face and not covering her face in a unique way

Now you know how to create three different unique projects! Happy Collage Making :)