• PORTFOLIOS
  • AP Portfolios
  • Tutorials
  • Instagram
Blair Academy Photography

Blair Academy Photography

  • PORTFOLIOS
  • AP Portfolios
  • Tutorials
  • Instagram

How to Shoot Star Trail Night Photography Photos using

By: Clare Grant '19

IMG_5388.JPG
Fast shutter speed

Fast shutter speed

As you can see, it is all black, but if we adjust a few settings, it will start to show the light, in this case, the stars.

To get a lot of stars and to have the star trail longer we would need to keep the shutter open than the numbers given to us. To achieve this, we would need to turn the shutter dial to bulb mode. This will keep the shutter open as long as we have the shutter button held down. Now, who wants to keep their finger on their camera for 10+ minutes? No one that I know. To get around this obstacle, we will need an intervalometer. This allows us to keep the shutter open without us needing to do anything; we just need to flip the switch.

To show the difference in the time that you choose, I took 5 different photos at different intervals.

3 minutes:

3 minutes:

In this photo, it was left alone for 3 minutes. As you can see, there are stars with some movement, but not as much as we would like. Because of this, we move to the next photo
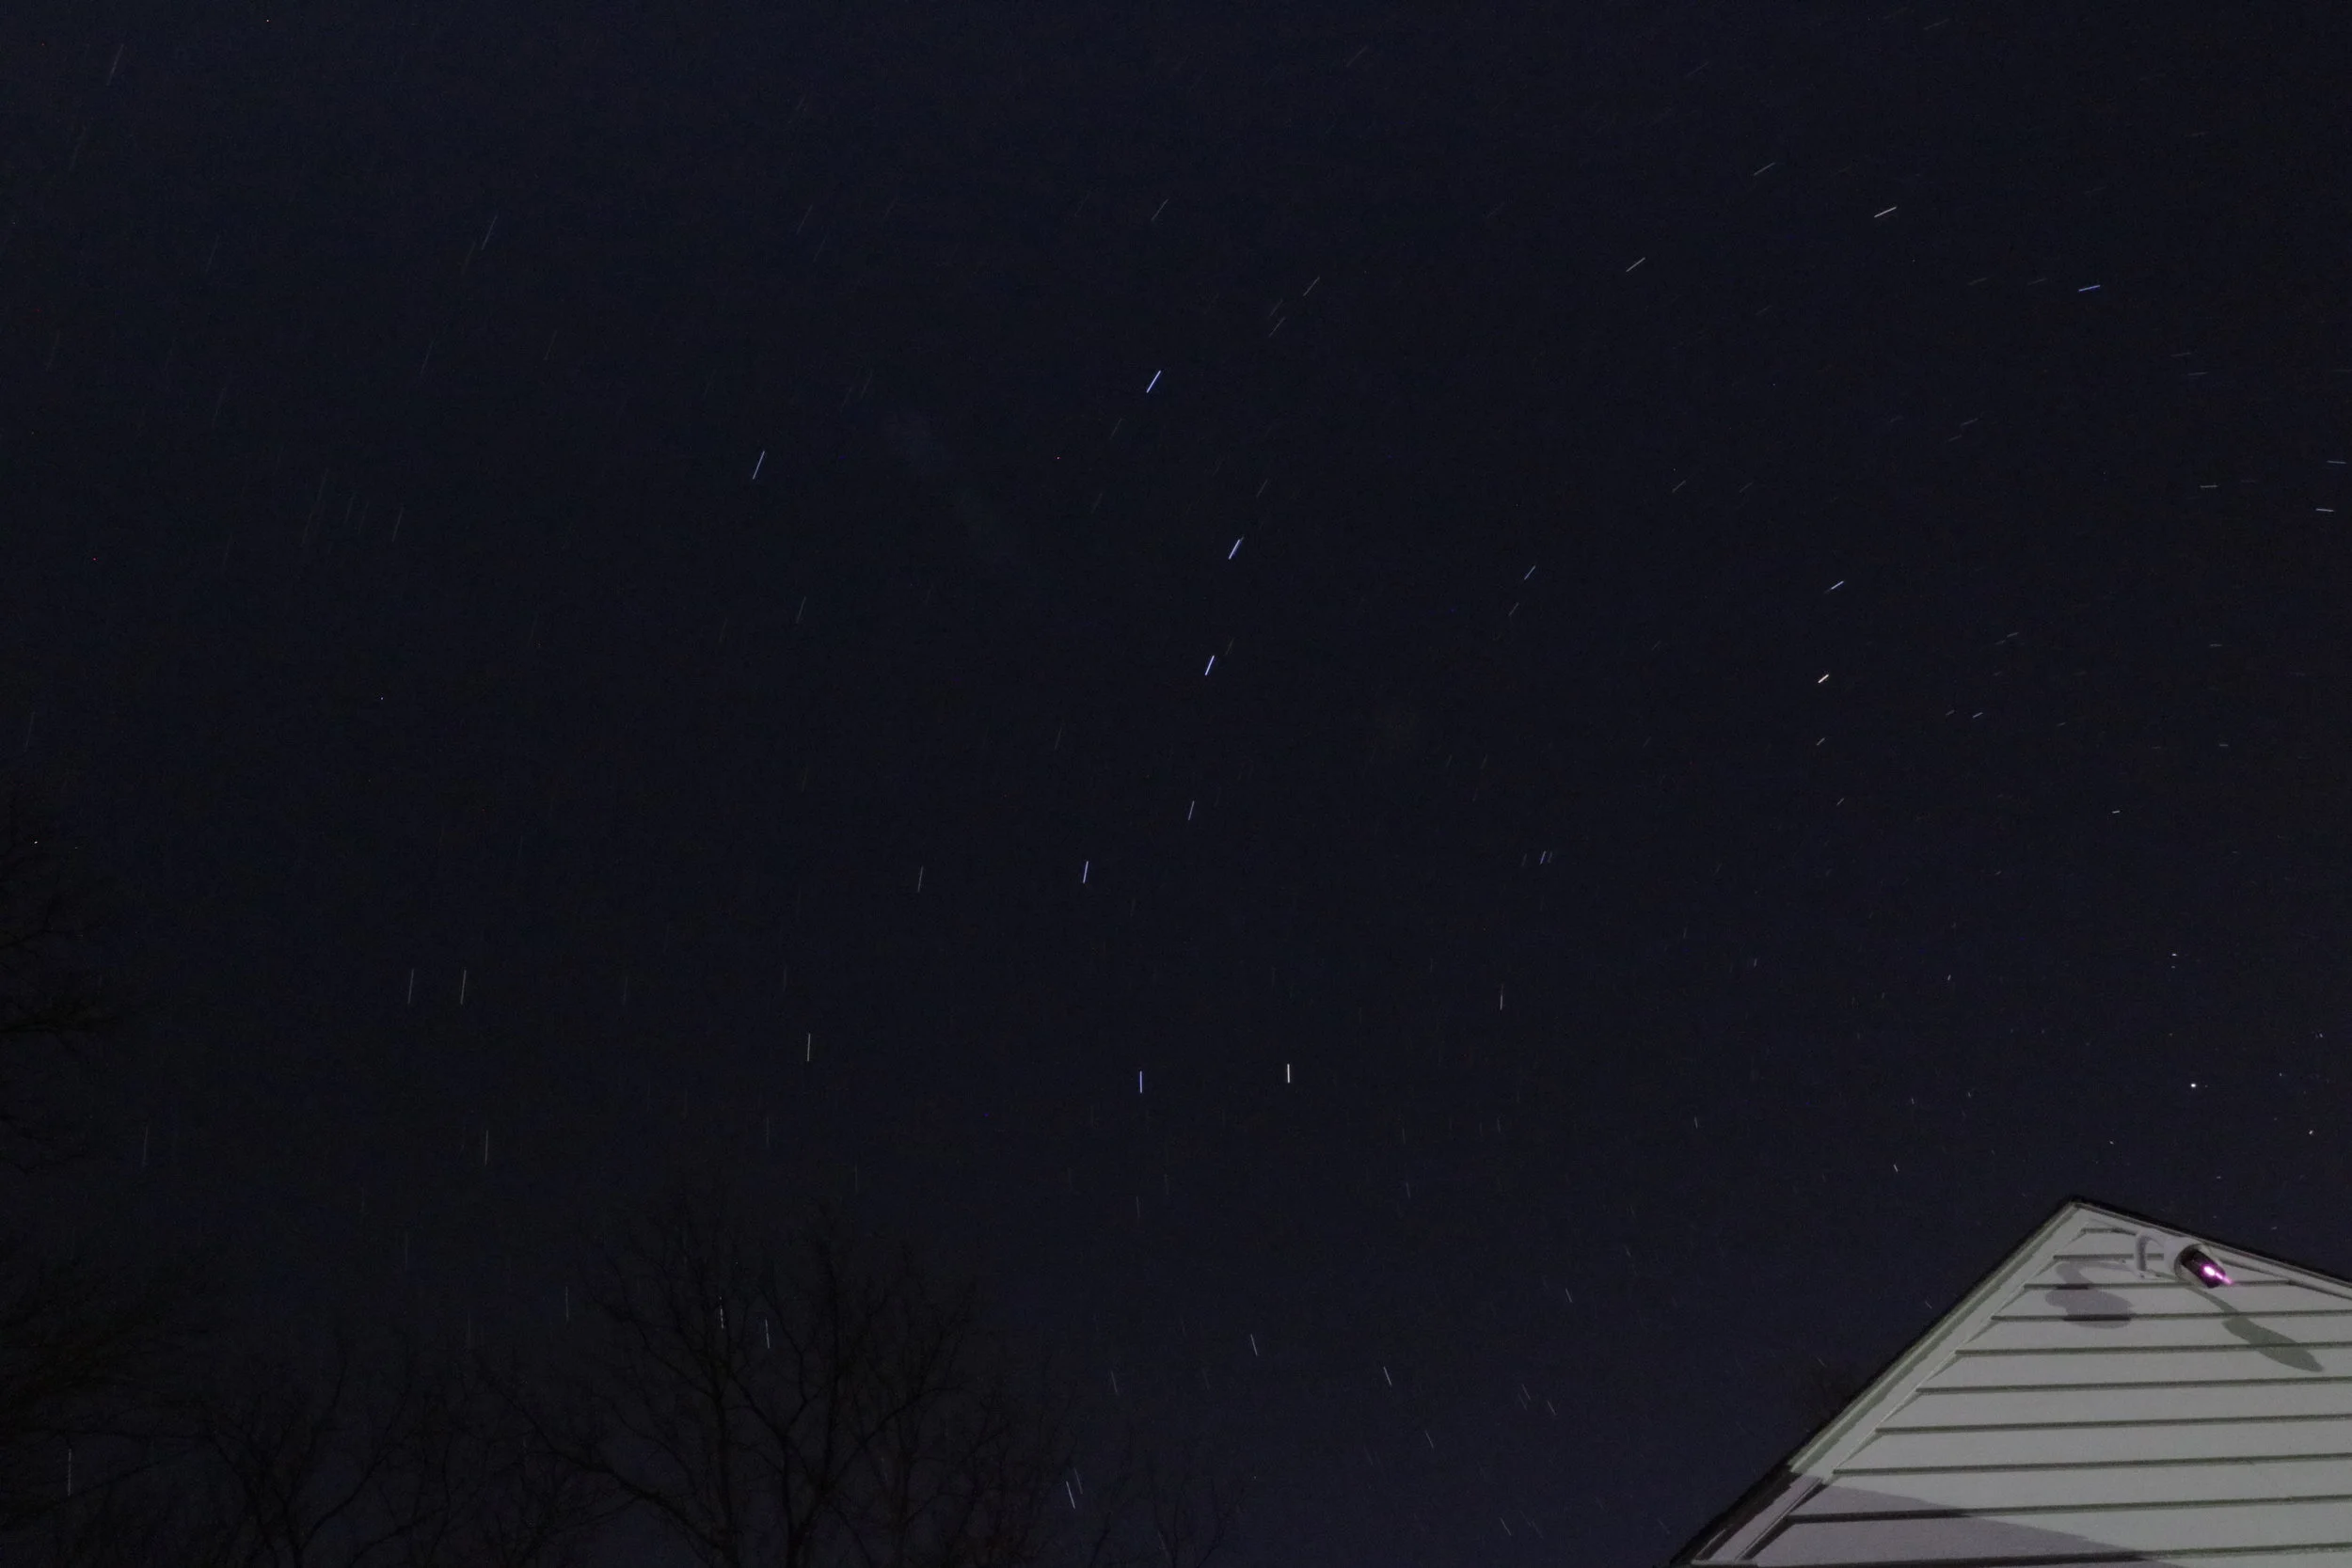
15 Minutes

15 Minutes

The trails are getting longer and more defined, but it could still use some more time

40 minutes:

40 minutes:

This is after 40 minutes. The area that I chose didn’t have many stars in it, but as you can see the star trail for the stars that are in it are long, and that is a good amount of time to have a good long star trail.

1 hour

1 hour

In this photo, you can see a lot of the stars and you have a good length of the trails. The exposure is too bright, so for this photo, and all photos with a long exposure, depending on the surrounding light, you would have to compensate with the exposure aperture of your camera.


tags: Shutter Speed, Stars
categories: Tutorial
Saturday 05.12.18
Posted by Clare Grant
 

The Importance of Shutter Speed for Sports Photos

By: Nami Hoffman '18

Screen Shot 2018-04-25 at 5.00.53 PM.png

As my activity this semester is to take photos of spring sports, I thought it would be interesting to explore just how much shutter speed can affect photos, but more specifically, sports photographs. Often when looking at sports images there is a variant of techniques used to produce successful photographs, yet it seems to me shutter speed is the most important technique.

For this post, I decided to go to a baseball game and focus on the pitcher. This is because I noticed his body position while throwing the baseball stayed pretty constant, which would make my images easier to compare. Once I decided on my subject, I found a good place with a clear background to take my photos. The overall process of taking the photographs probably took around thirty minutes because they kept on changing positions, but other than that it was all really smooth.

For my setup, I used a Canon EOS 5D Mark IV camera paired with a 70-200mm f/2.8 lens. I did not use a tripod while taking these photos because I had not planned to shoot slower than 1/30 for my shutter speed. Any slower than 1/30, I would have had to use a tripod or else my images would turn out completely out of focus. Furthermore, I captured all my sports images in manual mode. This is because I prefer to shoot in manual as I like to have more control over my settings, however Tv mode would work just as well.

Below are my images, the settings that were used to take each of them, and a small description of each image.

ISO: 200                    Aperture: 22                    Shutter Speed: 1/30As you can see in this image, the pitcher is almost complete…

ISO: 200                    Aperture: 22                    Shutter Speed: 1/30

As you can see in this image, the pitcher is almost completely blurred due to his fast motion and the slow shutter speed. Details are hard to spot.

ISO: 200                    Aperture: 22                    Shutter Speed: 1/50For this image I made my shutter speed faster by 1/20 of a s…

ISO: 200                    Aperture: 22                    Shutter Speed: 1/50

For this image I made my shutter speed faster by 1/20 of a second. I would not say it is clearer than the 1/30 image, but it is darker as less light was let in due to the faster shutter speed.

ISO: 200                    Aperture: 22                    Shutter Speed: 1/80At the shutter speed 1/80, the image starts becoming slightl…

ISO: 200                    Aperture: 22                    Shutter Speed: 1/80

At the shutter speed 1/80, the image starts becoming slightly clearer. It is easier to spot details on the subject and less of his movements are captured.

ISO: 200                    Aperture: 13                    Shutter Speed: 1/200Once I moved the shutter speed to 1/200 I had to also chang…

ISO: 200                    Aperture: 13                    Shutter Speed: 1/200

Once I moved the shutter speed to 1/200 I had to also change my aperture. If I had stayed at the exact same settings as the previous three, my image would have become overexposed. In addition, the image of the pitcher is getting clearer, but not in complete focus.

ISO: 200                    Aperture: 10                    Shutter Speed: 1/400This was the last image I shot of the pitcher. Similar to w…

ISO: 200                    Aperture: 10                    Shutter Speed: 1/400

This was the last image I shot of the pitcher. Similar to when I shot at 1/200, I had to change my aperture in order to get a regular, exposed image. At this speed, it is clear to say from 1/400 and faster, any photo taken of the pitcher would be without any blur of prior movements.

After downloading and comparing the images I took I confirmed an opinion I have always had: I enjoy clear sports photos. While there are many successful images with slower shutter speeds, that is just not the style of sports photography I enjoy taking. Personally, my clear-cut, focused sports images always seem to be better to me than the alternative.

However, I am not here to tell you that you should agree with my opinion. If you want to test this out for yourself and decide what shutter speed you like to take sports photos at, this comparison test is really easy to do! All you have to do is pick up your camera and find a subject to focus on. Once you do that, all you need to do is take photos from a variety of shutter speeds and compare. I would recommend staying towards the lower shutter speeds as it is easier to see the effects at numbers from 1/200 and lower. In addition, I would suggest taking more than one photo at each shutter speed just in case you want more options to choose from.

tags: Shutter Speed, Sports
categories: Tutorial
Friday 05.11.18
Posted by Nami Hoffman
 

The Power of Slow Shutter Speeds

By Caroline Wolfe '18

Why Slow Shutter Speeds?

Using slower shutter speeds as part of your photos can be a powerful tool in expanding your portfolio and creating images that are very intriguing and give the sense that the subject is moving. While stop action is a way of stopping time and only capturing a fraction of a second, slower shutter speeds give the viewer a true sense of the object or person in movement which can transform a photo entirely. Here are a few examples.

DSC_0053.jpg

The slow shutter speed as fluidity and softness to the picture. It makes the picture come alive as you can see the movement of the hands playing the piano. Taken at an ISO 100 at 1/16 shutter speed. 

This is one of my favorite slow shutter photos I have taken because of the contrast of the people who are moving and the people who stood still. Taken at an ISO 100 at 1/60 shutter speed.

DSC_0119+(1).jpg

How to: During the Day

Taking slow shutter speed photos during the day can be challenging because of the excess light. The shutter speed is a way of controlling exposure, so a longer shutter speed adds the risk of your photo because overexposed. One way to control this is by increasing your aperture. It will make the little opening which lets light in the camera a lot smaller. Sometimes though, if it is a very sunny day and you are shooting in direct sunlight, this will not work. The best time to take slow shutter photos is when it is cloudy or in a shady location so you capture what you want to without the photo being overexposed. I never recommend taking photos with over a 1 second shutter speed while the sun is out, though, because even in a shady location or on a cloudy day it will still most likely be overexposed. I usually take my photos with a 1/16-1/25 shutter speed.  

The photo below was taken at around 4pm and it was a cloudy day. Taken at 1/80 shutter speed with an ISO of 100.

DSC_0338+2.jpg

This photo was also taken during the day but indoors. Taken with 1/25 shutter speed and 100 ISO.

DSC_0086.jpg


tags: Shutter Speed
categories: Tutorial
Monday 05.07.18
Posted by Caroline Wolfe
 

Blair Academy Photography Powered by Squarespace.