
Blair Academy Photography
This tutorial will show you how to create a photo that has a mirror effect by using Photoshop. Before you begin the tutorial, be sure to have one or more high-resolution portraits to use to create the effect. Here are some examples of the mirror effect using photoshop:


Now to begin the tutorial, first open Photoshop.

Next, insert the image you want to mirror by going to FILE, OPEN, to insert an image into Photoshop.

Once the image is inserted as your background layer, you have to unlock the background layer.
To do this, go to the adjustments section and you should see the layers to your photo.

You should see a lock beside your background layer indicating that the background layer is locked, double click it to unlock the layer. The layer should now be renamed “Layer 0”
The next step is to crop your photo, to do this select the crop tool located on the toolbar.
Inside the crop tool, there is an option to resize your image. Select the 16:9 ratio and change the numbers to 1920x1080.

Once your photo is centered, click enter to confirm your crop.
Now that your photo is cropped, we can begin working on creating the mirror effect.
First, we are going to create a copy of the image, so click COMMAND + J to create a copy of “Layer 0”.

Next, rename “Layer 0” to “backup” in case you make a mistake (which is ok!!).

Next, you have to create a blank layer to go underneath your photo. Inside of the layers column, click the second to last icon on the bottom (be sure to have “Layer 0” selected!!). Then drag the new layer you created underneath “Layer 0”.

Next, make “Layer 0” and the “backup” layer invisible by clicking the eye icon next to each layer. You should be left with just the blank grid.

Now on the toolbar, right-click the paint bucket tool and select “Paint Bucket”. Make sure your top color is selected to be black and click on the blank grid to fill it.


Next, make “Layer 0” visible again by clicking the empty square. Next click on “Layer 0” and right-click the Marquee tool on the toolbar.

Now select a part of the image to marquee it.
The section should be a small part of the portrait, the hair for example. Now right-click on the part of the image you selected and click “Layer Via Cut”. This should create another layer.
Mask the new layer you created, and reselect “Layer 0” and repeat this to cut the next piece of the portrait.

Do this until you reach the end of the portrait’s hair or ears. (be sure to but the whole eye instead of splitting it up because then it won’t look as good.)
After you have cut out pieces of the portrait, you should be left with no subject in the photo.

Your photo should be in separate layers now, and most of the hard work is done!
The “Layer 0 copy” layer is useless now, so feel free to delete it by selecting it and clicking the trashcan in the right-hand corner.
Now turn back on the visibility of all of the layers you cut before, so you are able to see them again.
Next, it is time to begin moving each piece, begin with “Layer 2” and select it, but first, select the move tool in the toolbar.

While holding the shift key, drag “Layer 2” and drag it to the end of the canvas. Now select your “Layer 3” and drag it towards “Layer 2” but leave a little black space in between each. (be sure you are still holding the shift key!”
Continue this until all of your layers are evenly spaced on the canvas.

Now, most of the hard work is done (yay!). Next, select “Layer 2” and mask the black background so you are left with the layers and in between them a blank grid.

Now shift-click on all of the layers and create a group by clicking the third to last icon on the right-hand toolbar. Click on one layer within the group and select “search by name” and you should find a folder named “Group 1”.

Now drag each layer that you want in the group into the folder and rename the folder “top”. To duplicate the “top” folder right-click and select duplicate group and rename the copy “bottom blur”

Right-click on the “bottom blur” group and convert it to a smart object.

Click on filter, blur, and then Gaussian blur.

Drag the radius pixels to be 7.5 and select OK.

Now drag the blurred group under the group you originally created. Then shift-click to move the blurred layer and line it up with the original layer. Now you should have a mirror effect! Finally! Adjust the photo as you please but now you’re done!

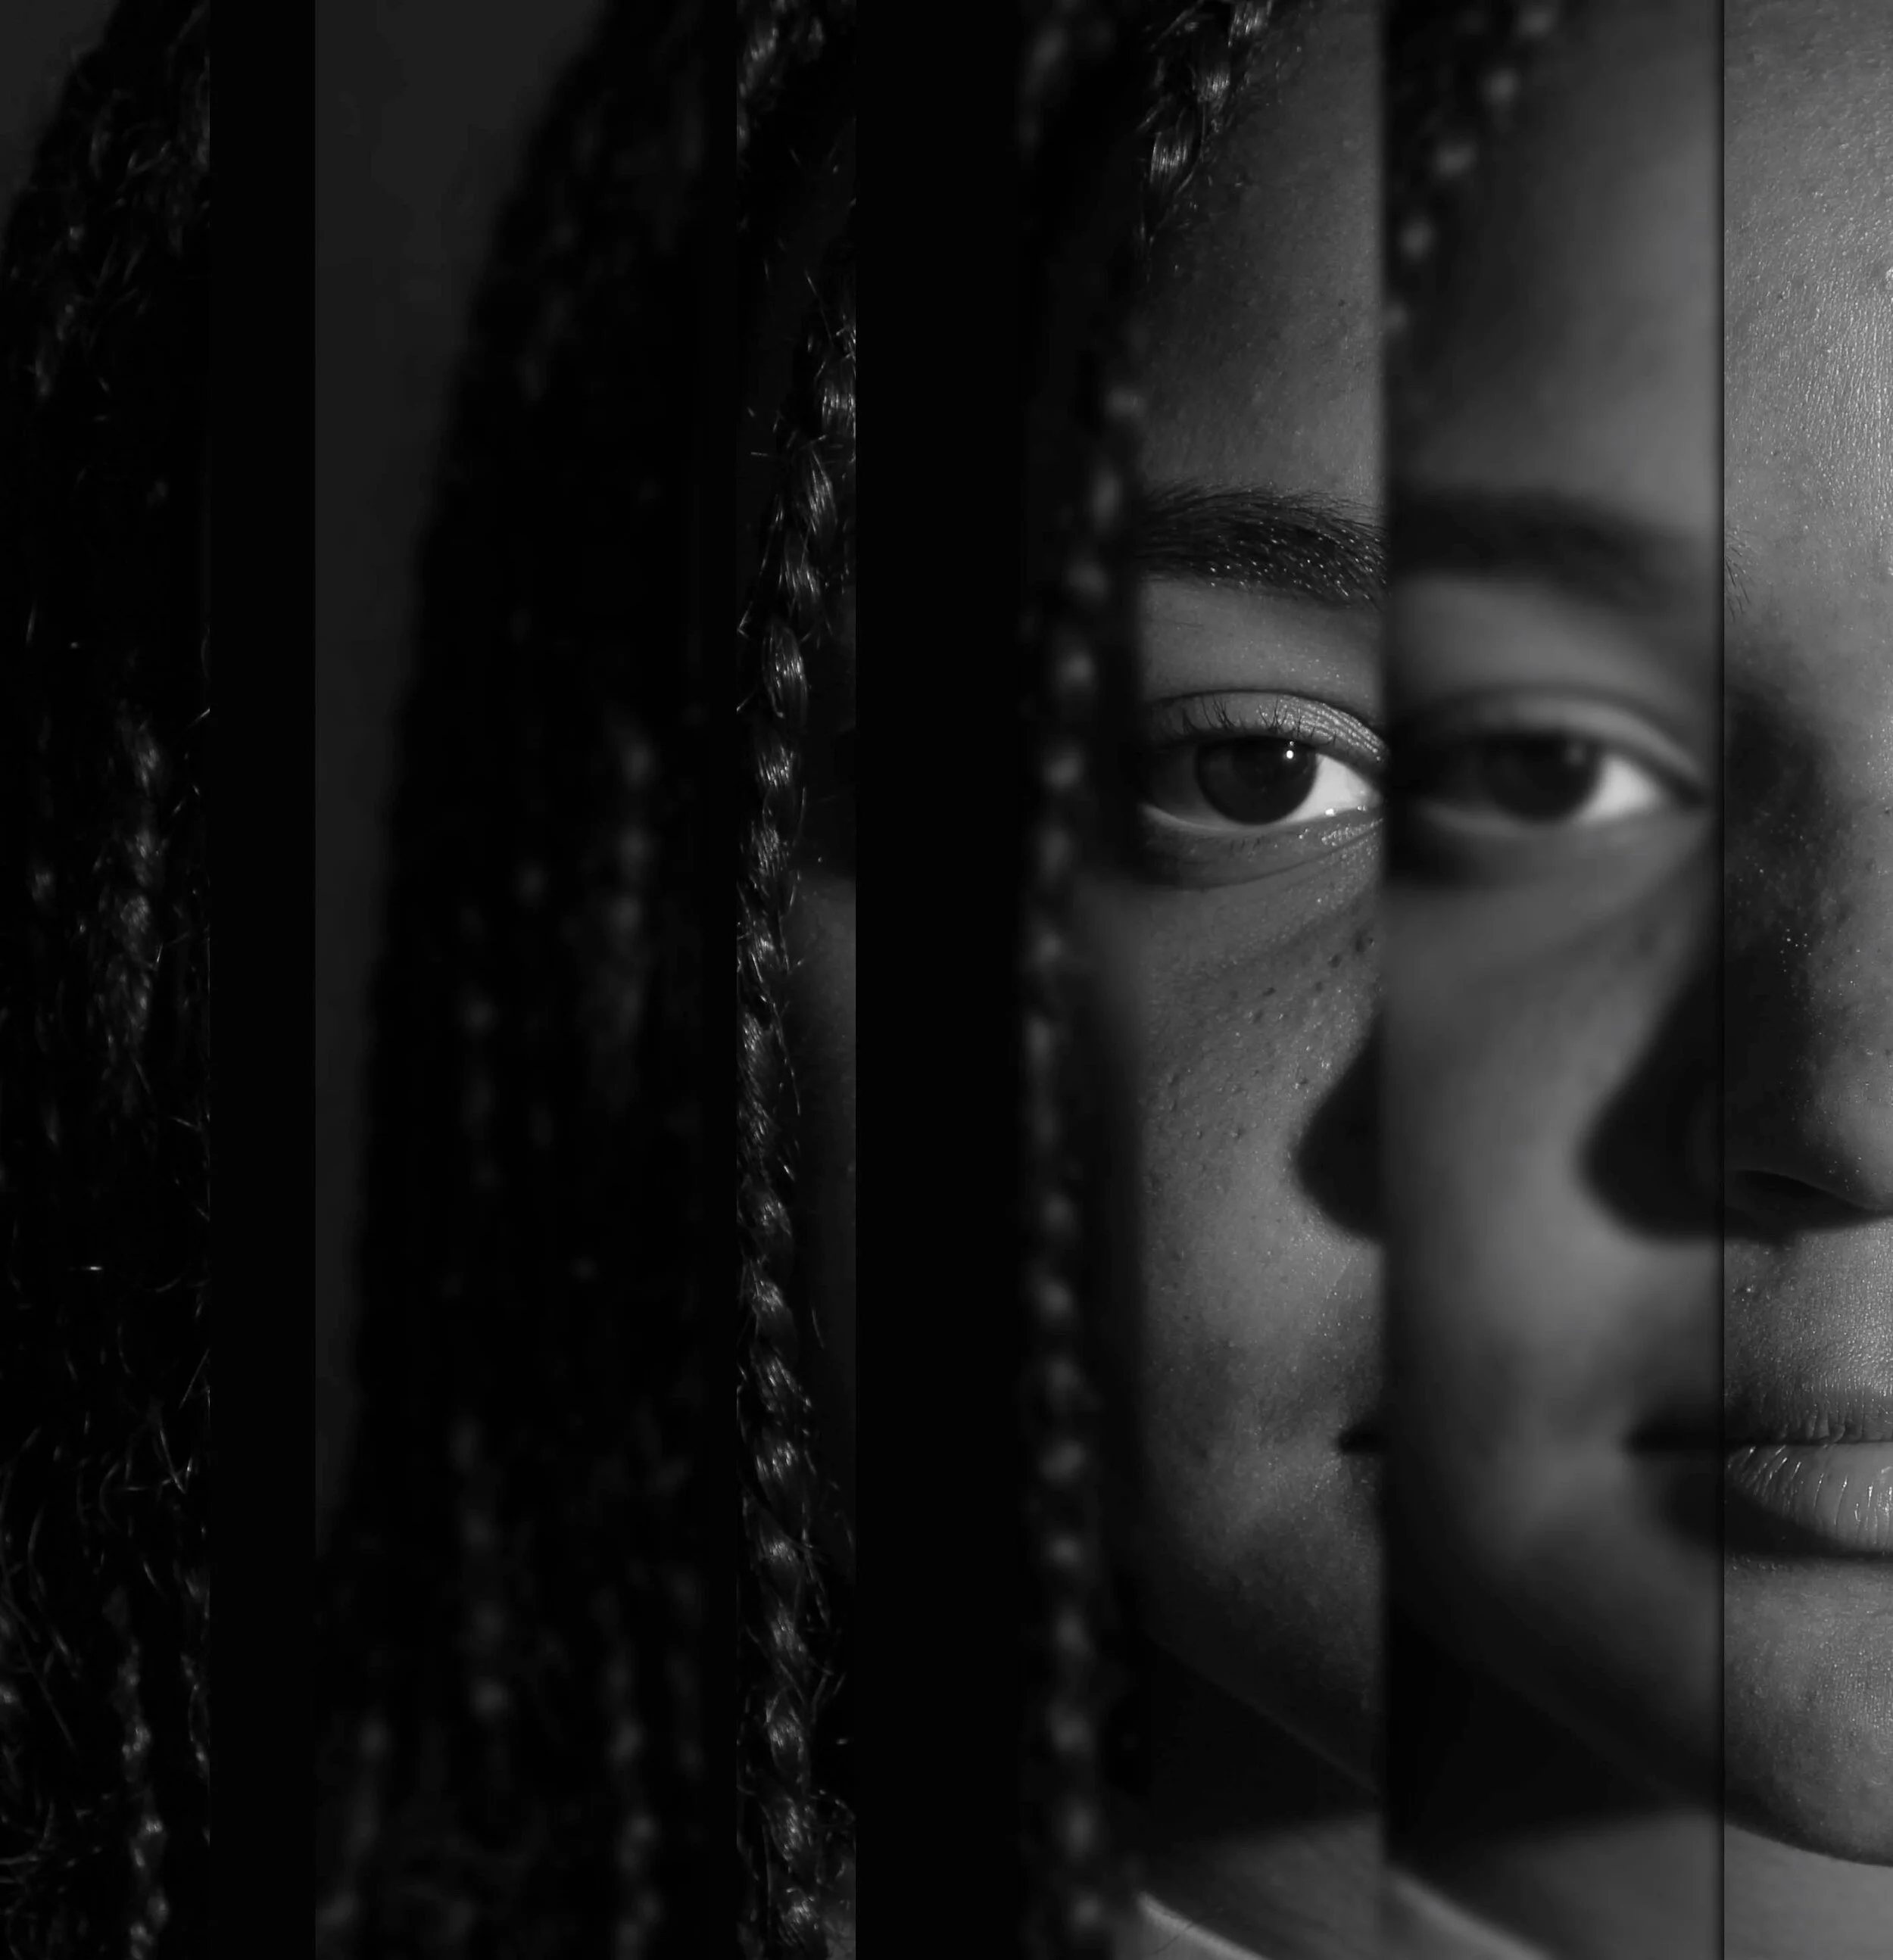
Final image after editing:
If you are still having trouble, here is the tutorial I followed:
https://www.youtube.com/watch?v=4OFXhNuB0cU