Blair Academy Photography
________________________________________________________
What you will need to make a collage is a matting board, Modge Podge, a camera, scissors, and least two photos that work well together.
________________________________________________________
Step 1:
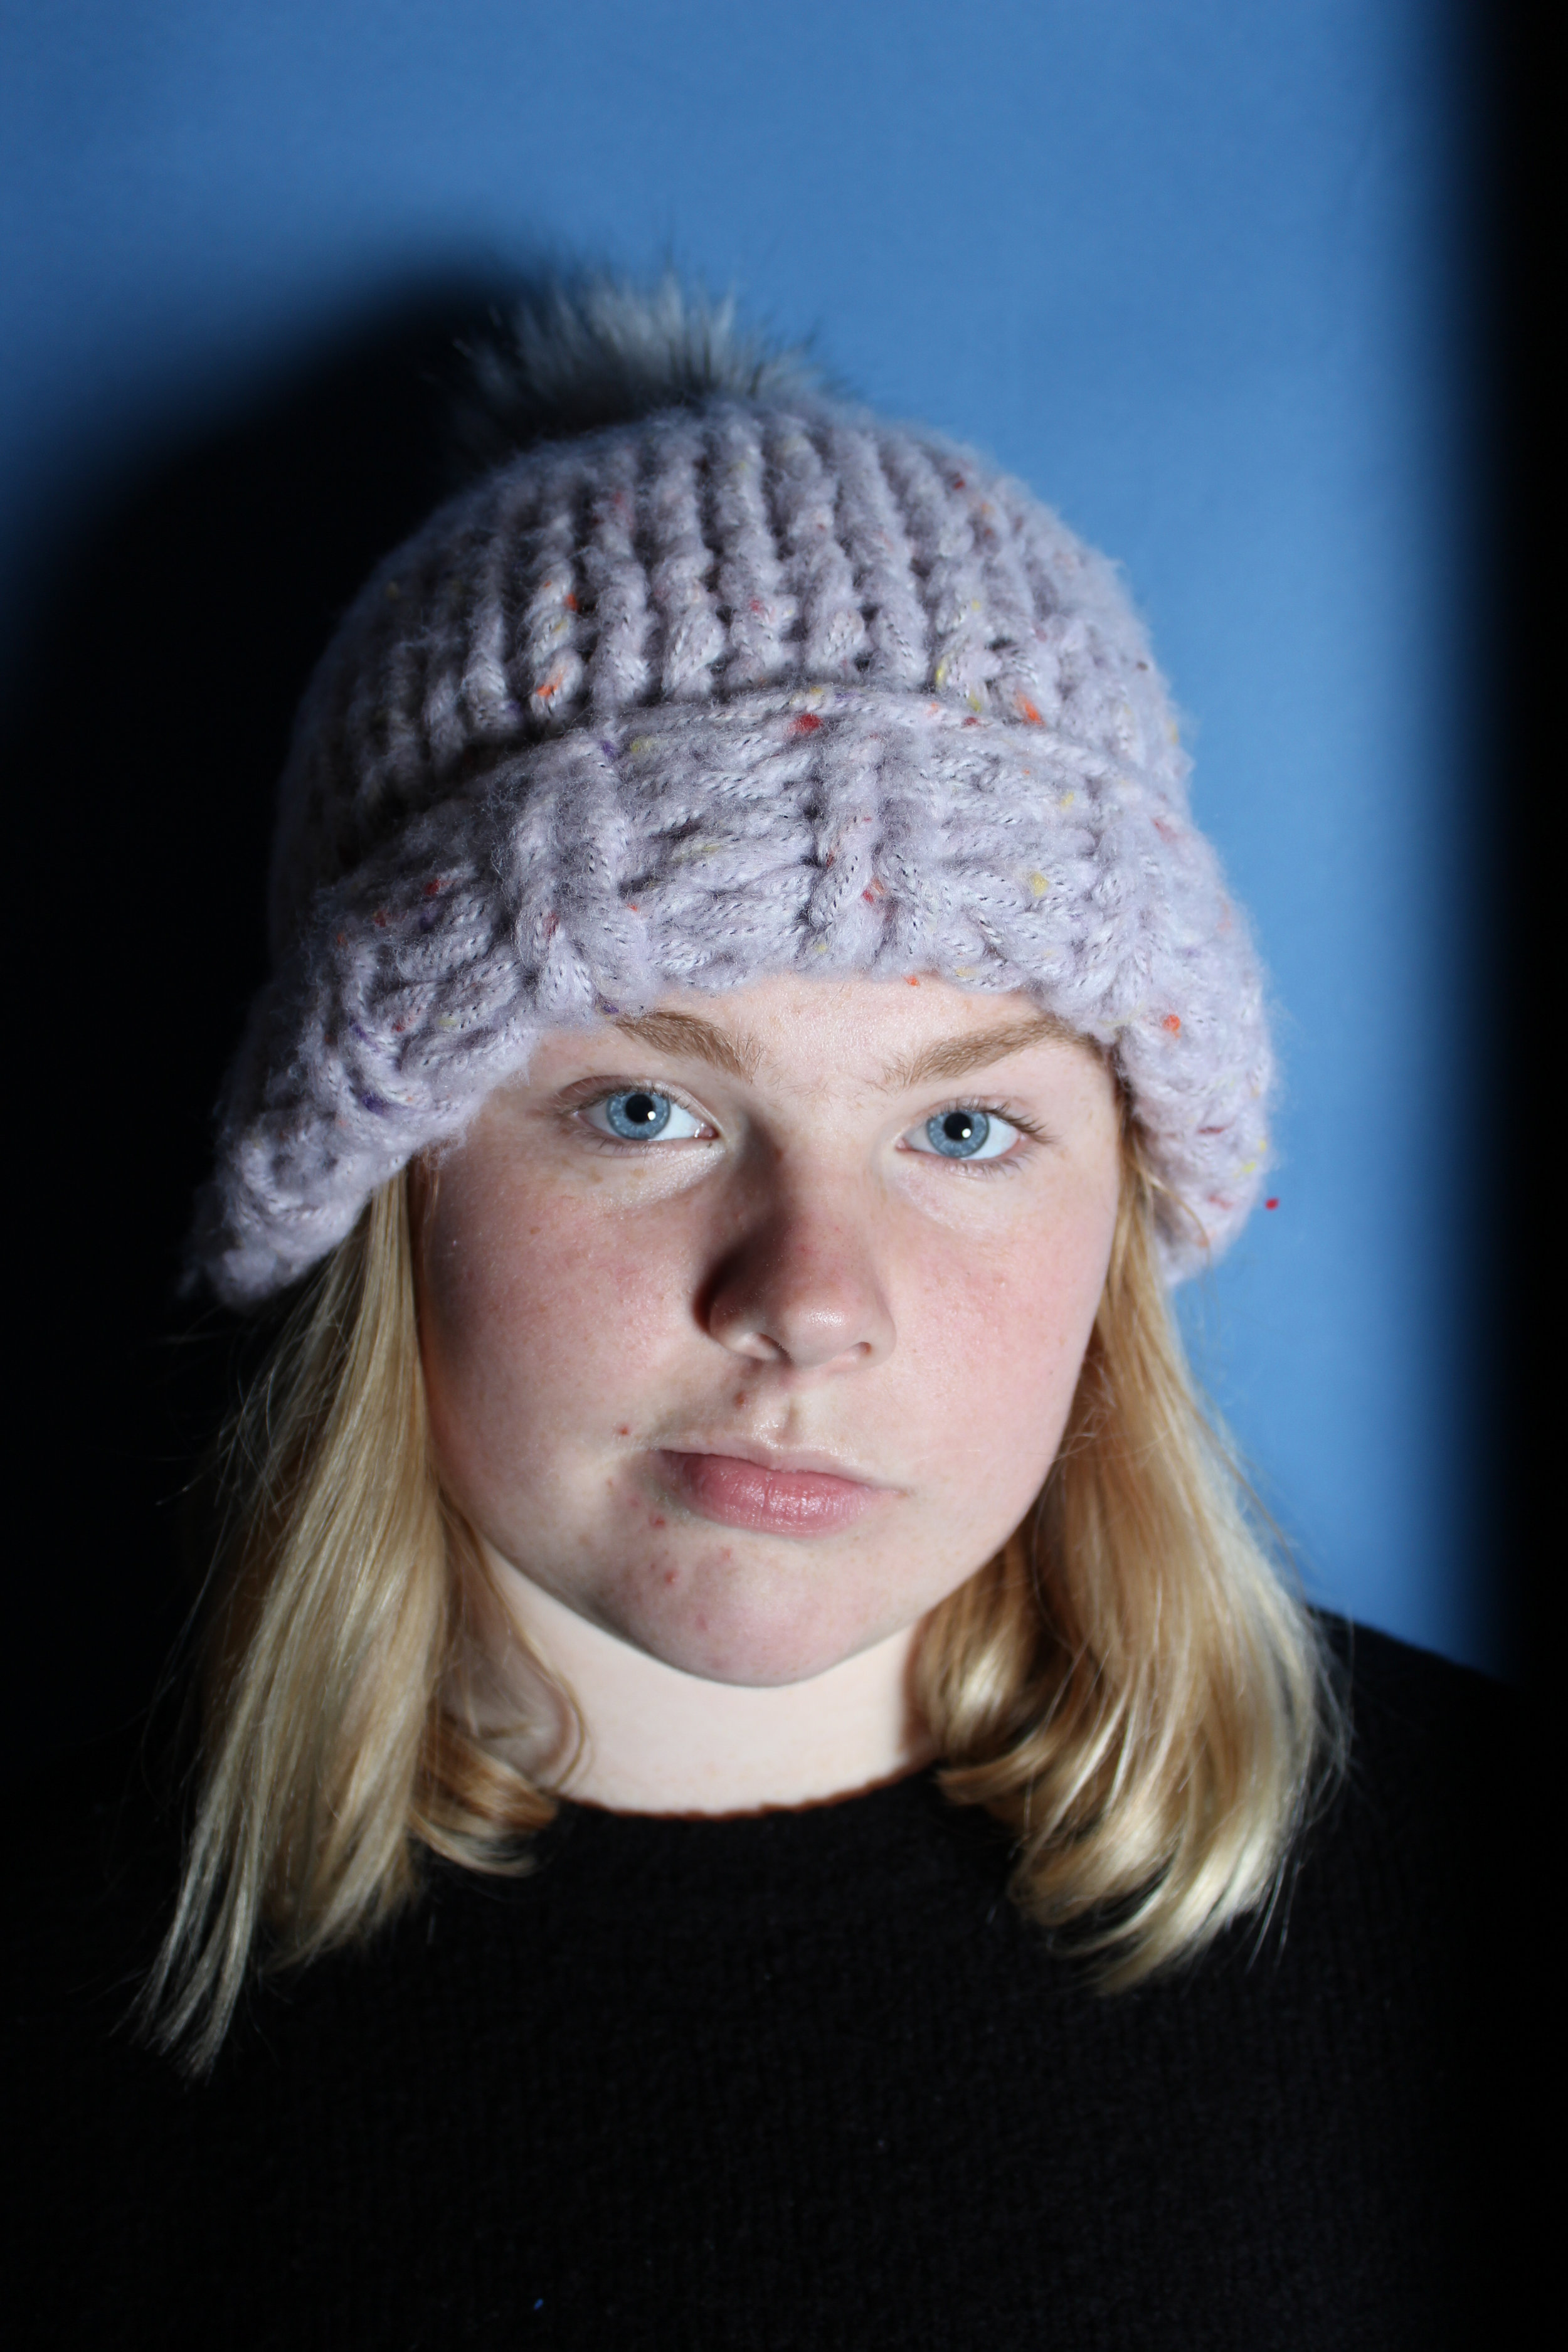
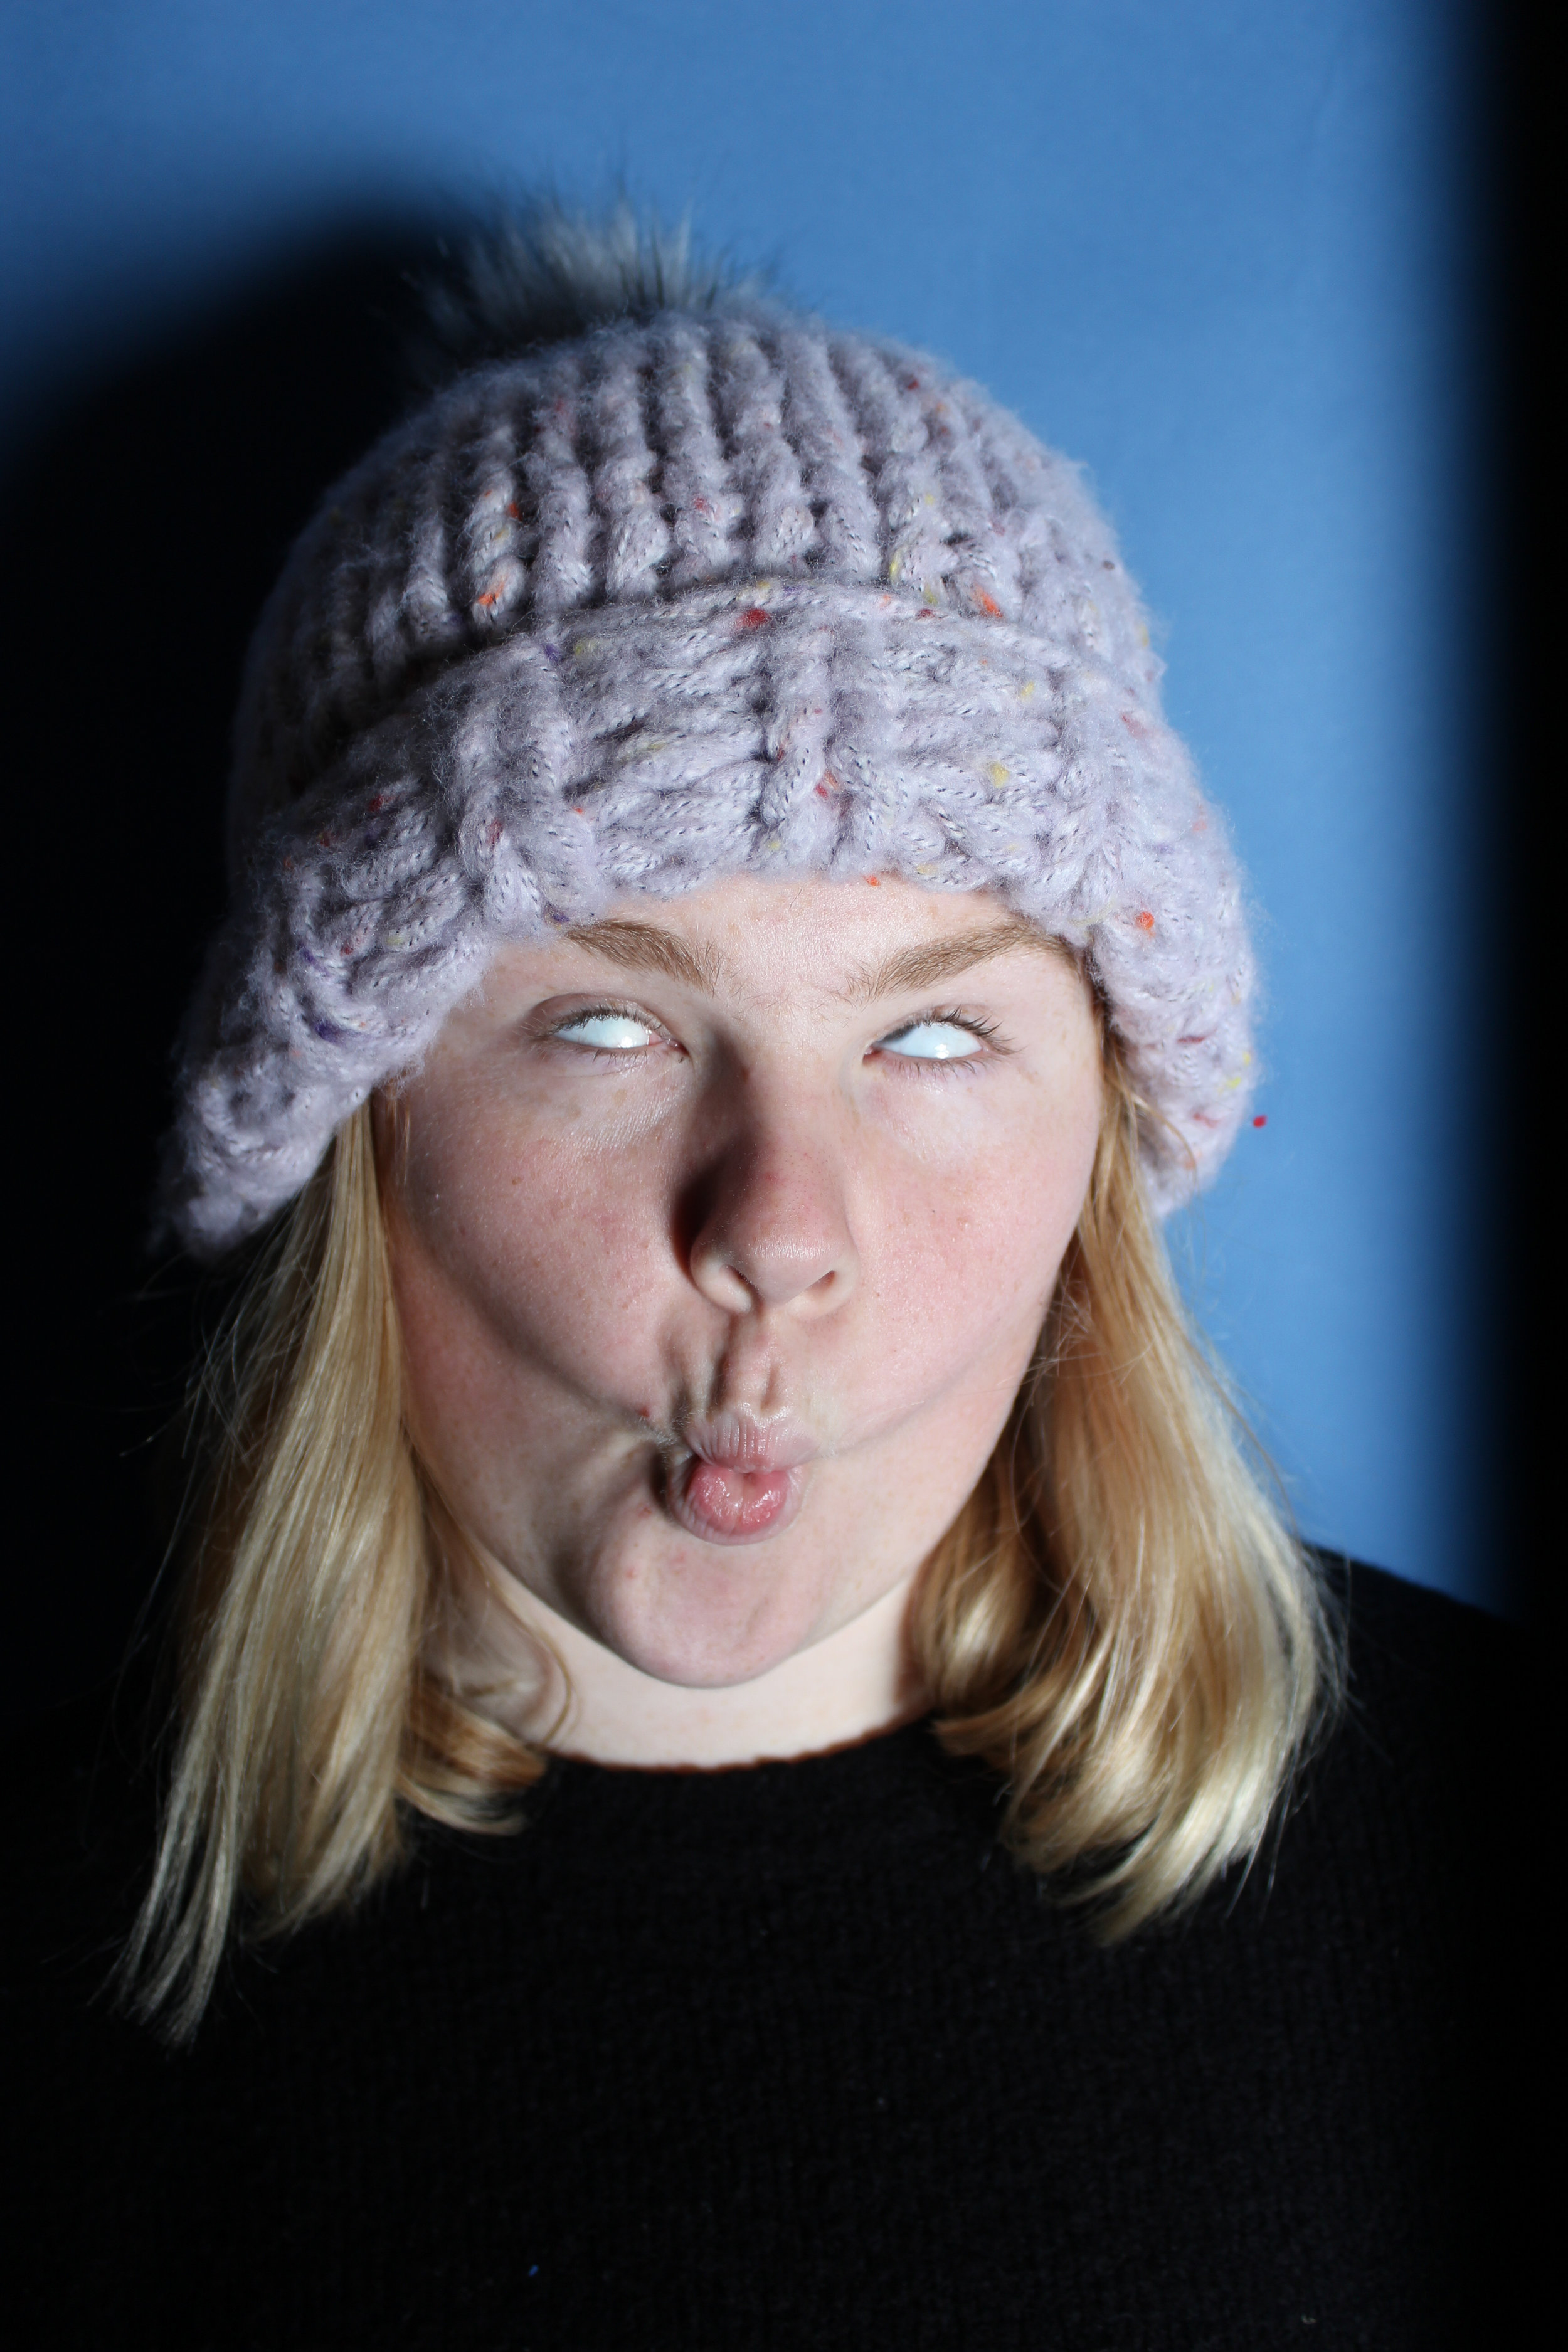
Take photos of your subject making many different faces. Contrasting expressions makes the collage more interesting in the end, but an important piece is to make sure your subject’s face staying in similar angles for a few pictures. Also a simple background for the pictures helps the viewer focus on the face of the subject. Finally, pick at least two out of the pictures you took that face different expressions but similar angles to use for the collage.
Step 2:
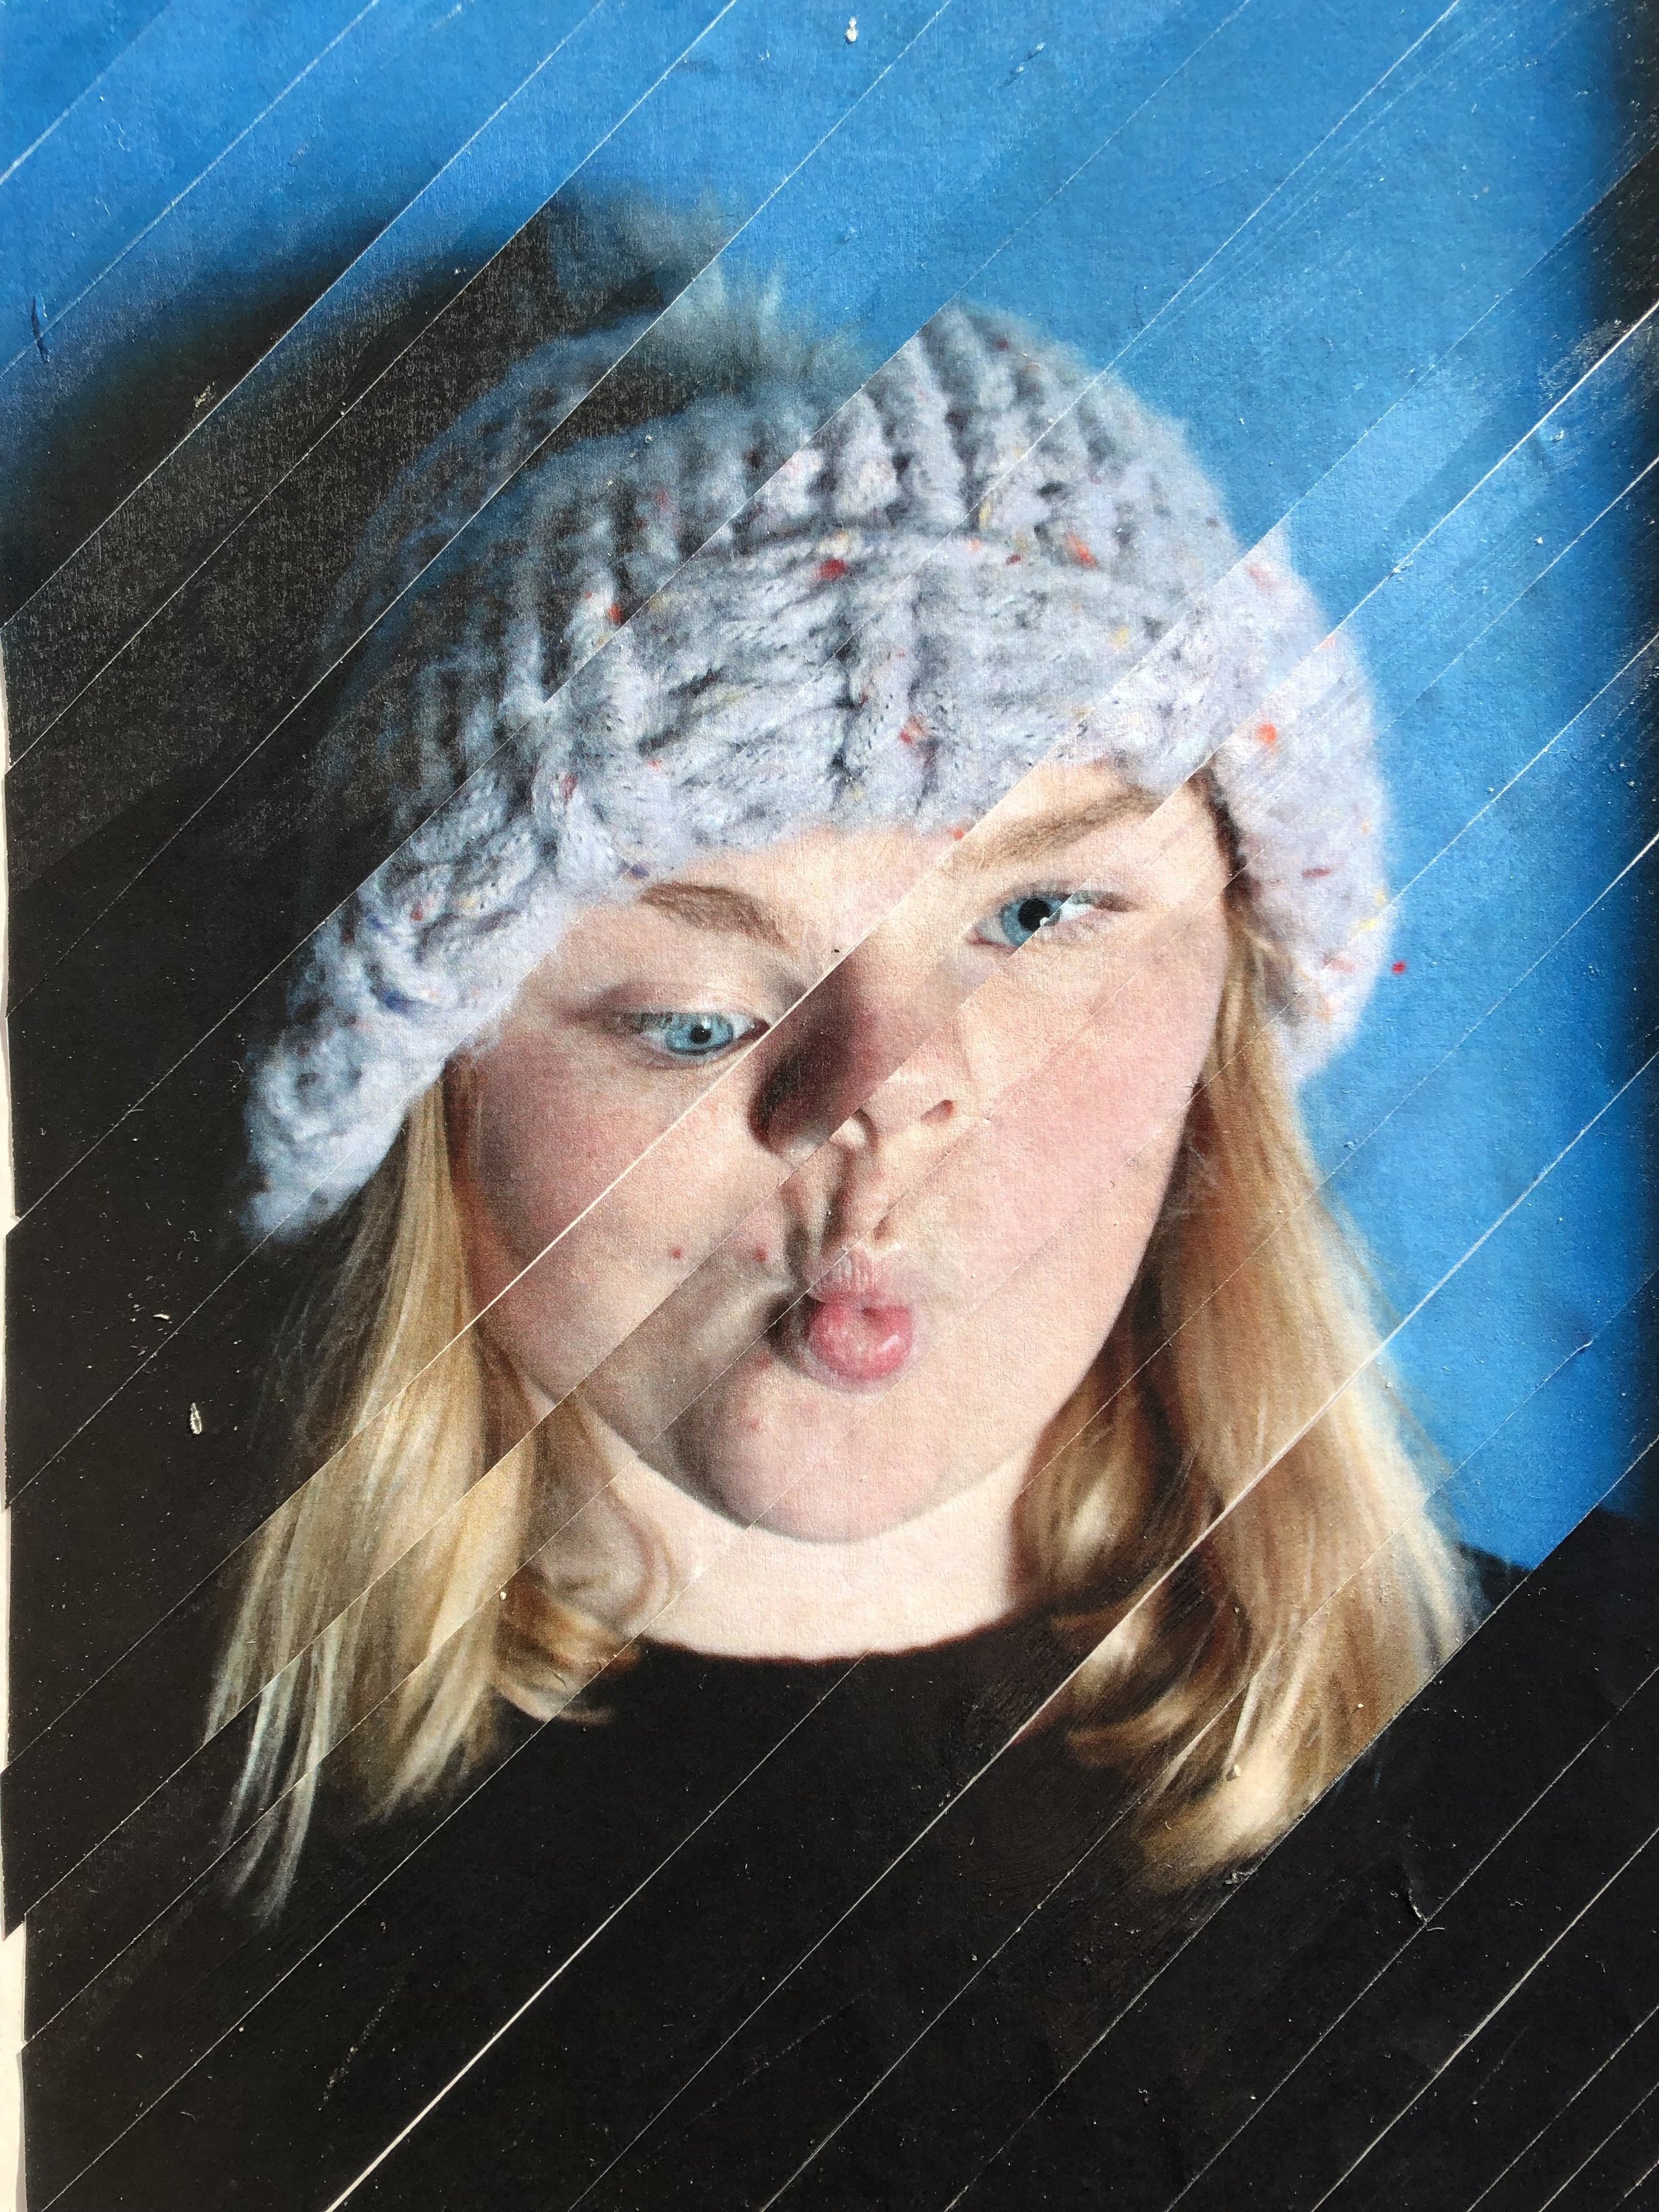
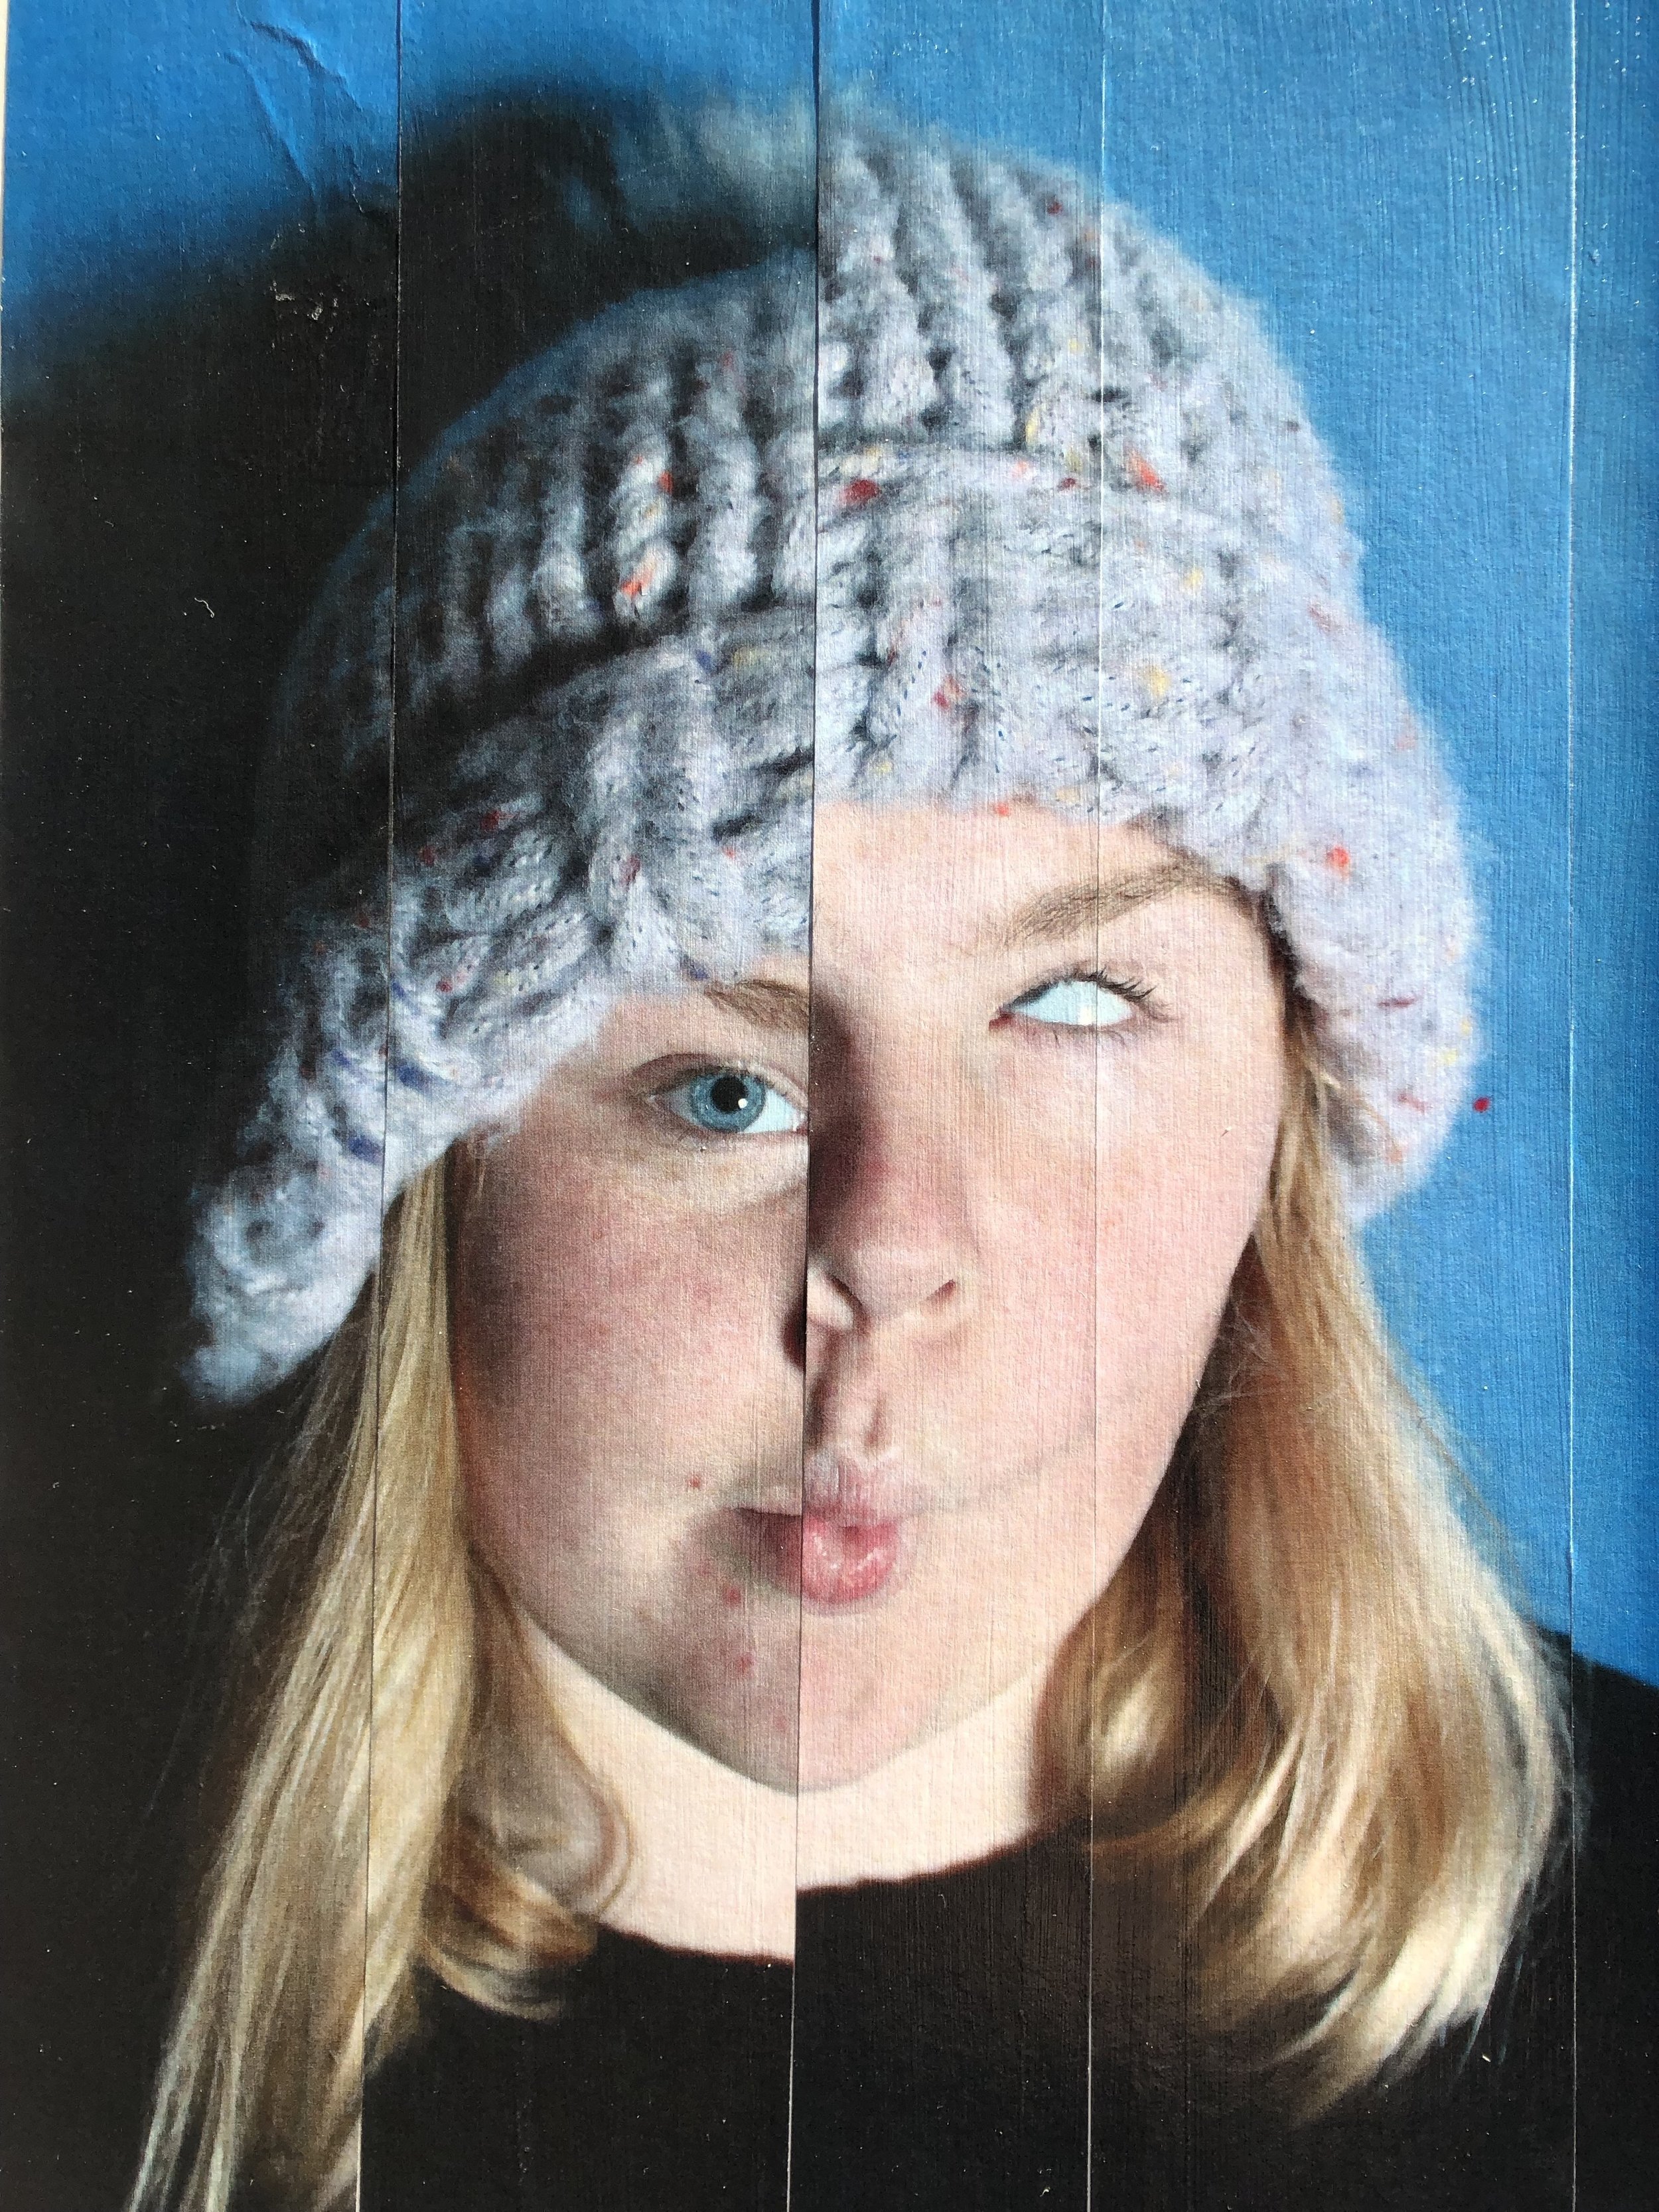
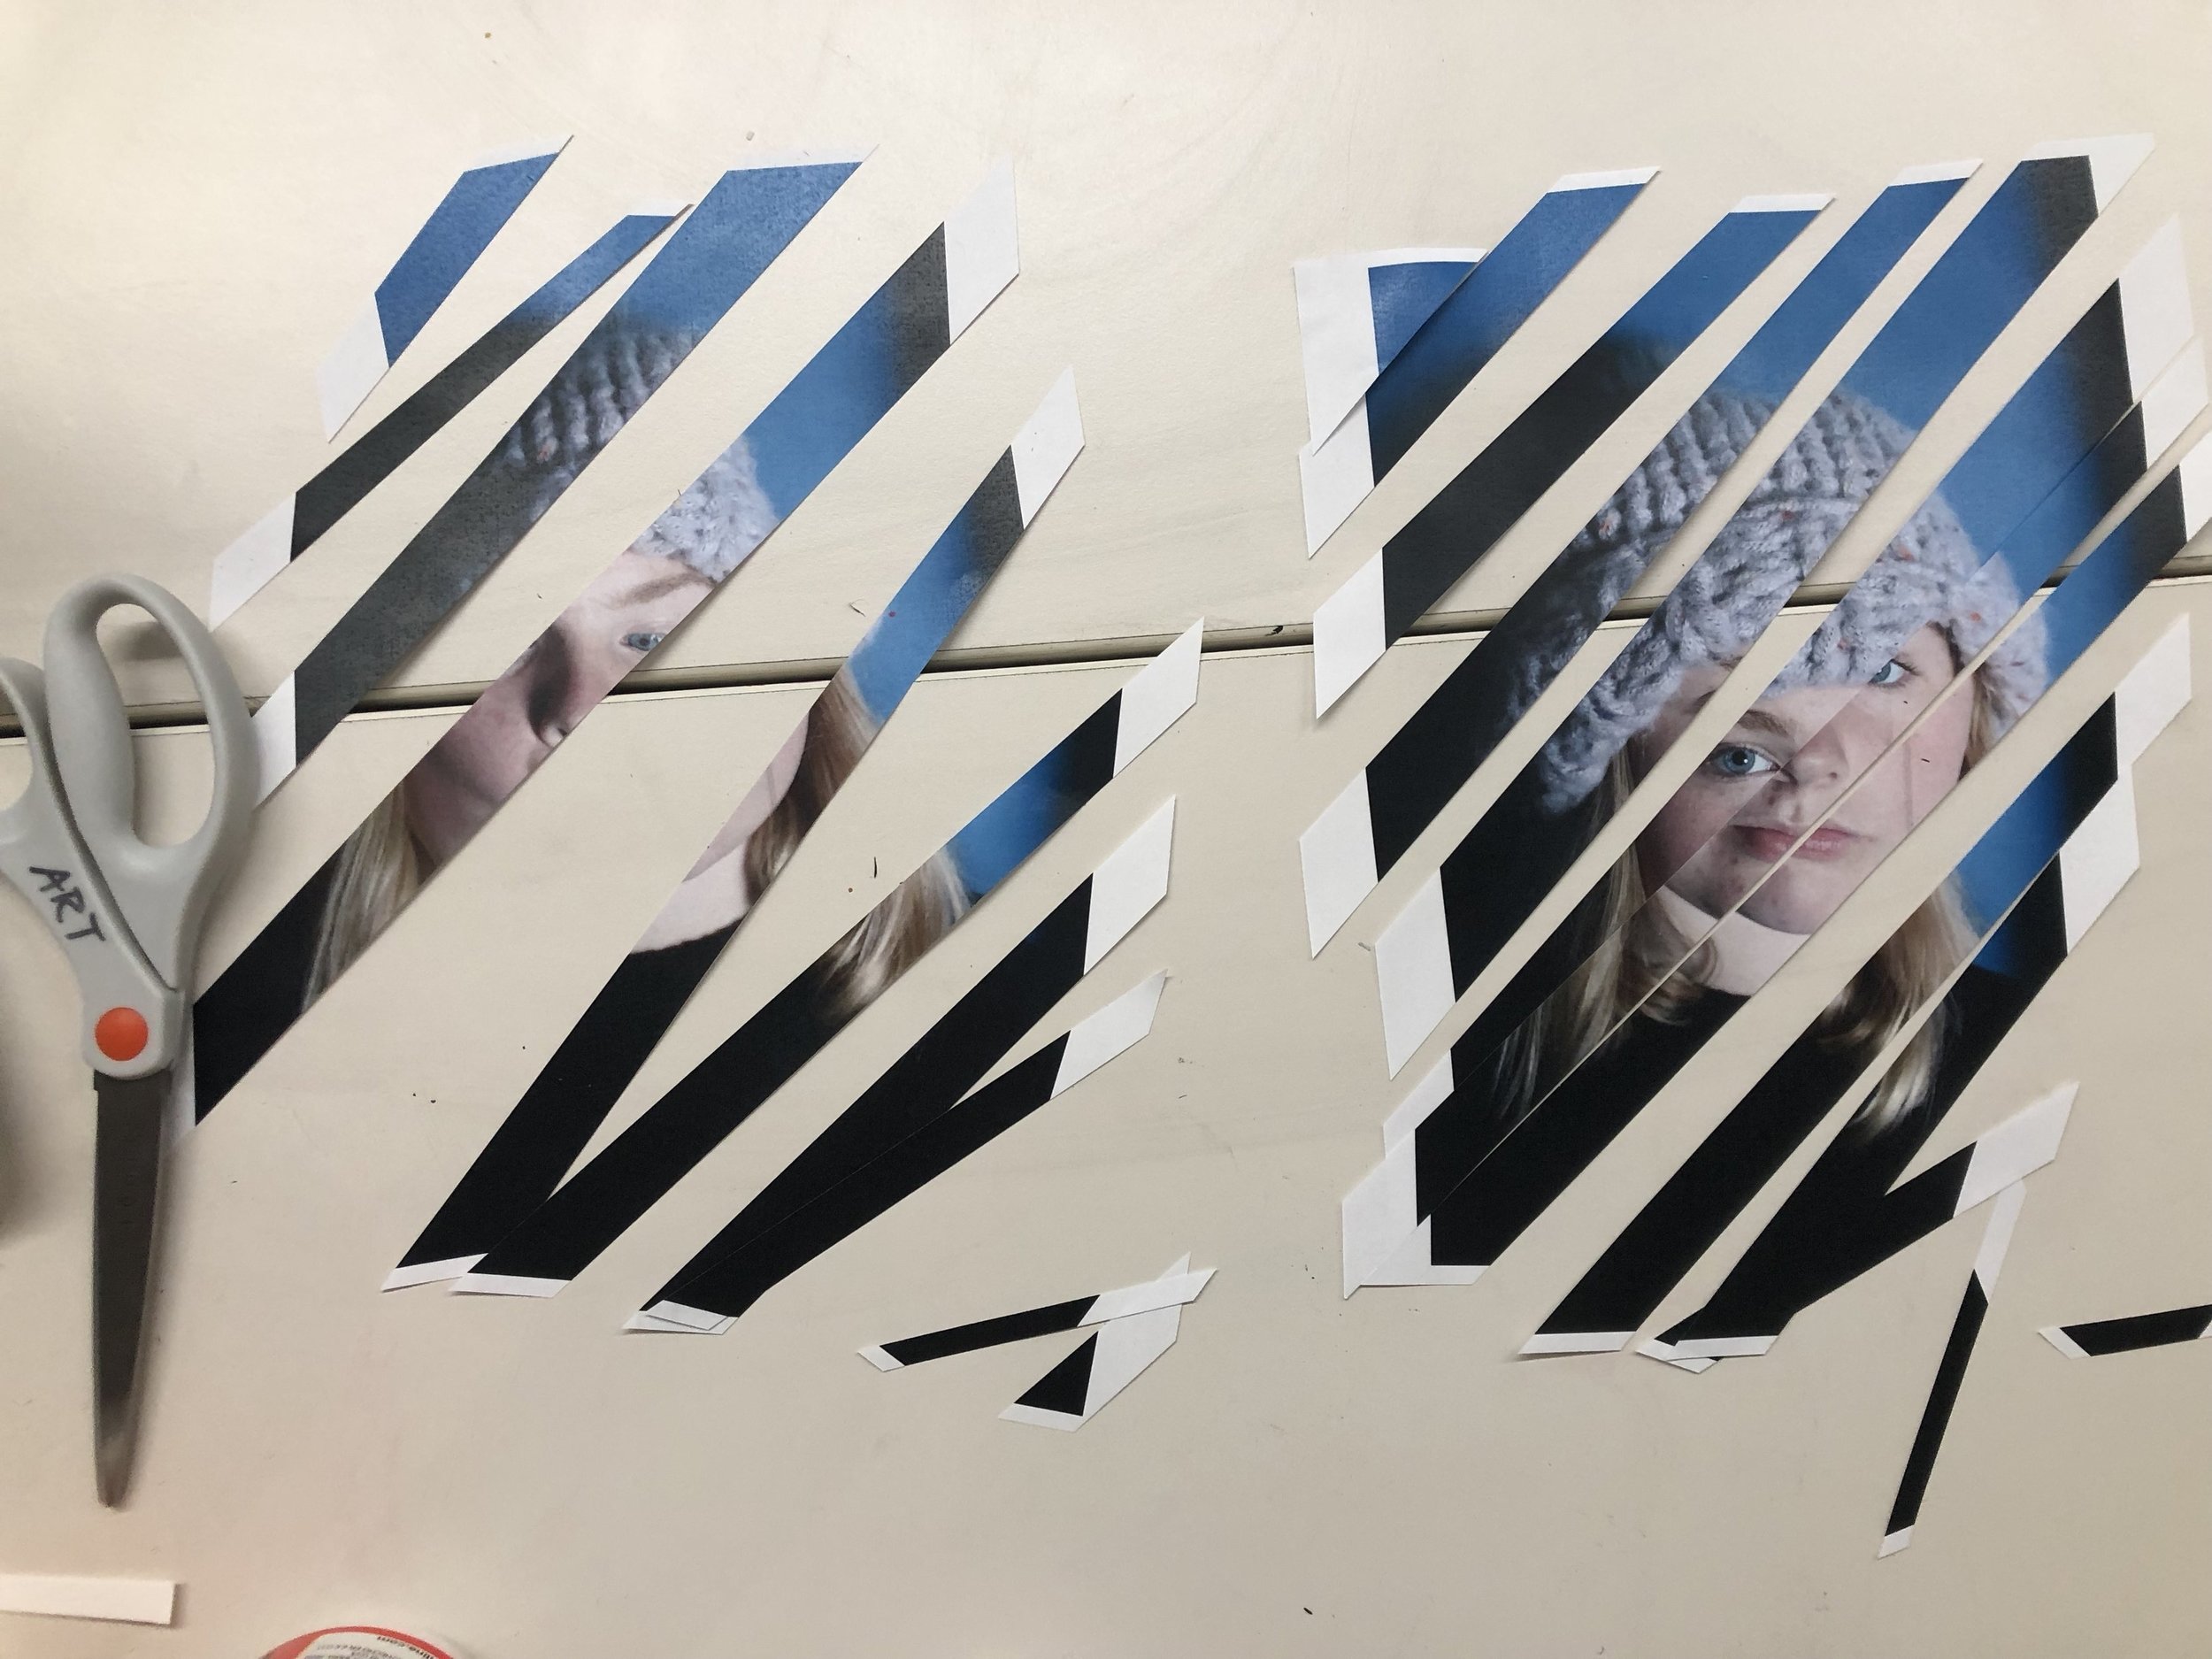
Take the two pictures and cut them diagonally in the same direction. You can also cut one picture horizontally and one vertically to challenge yourself and weave them together.

Step 3:
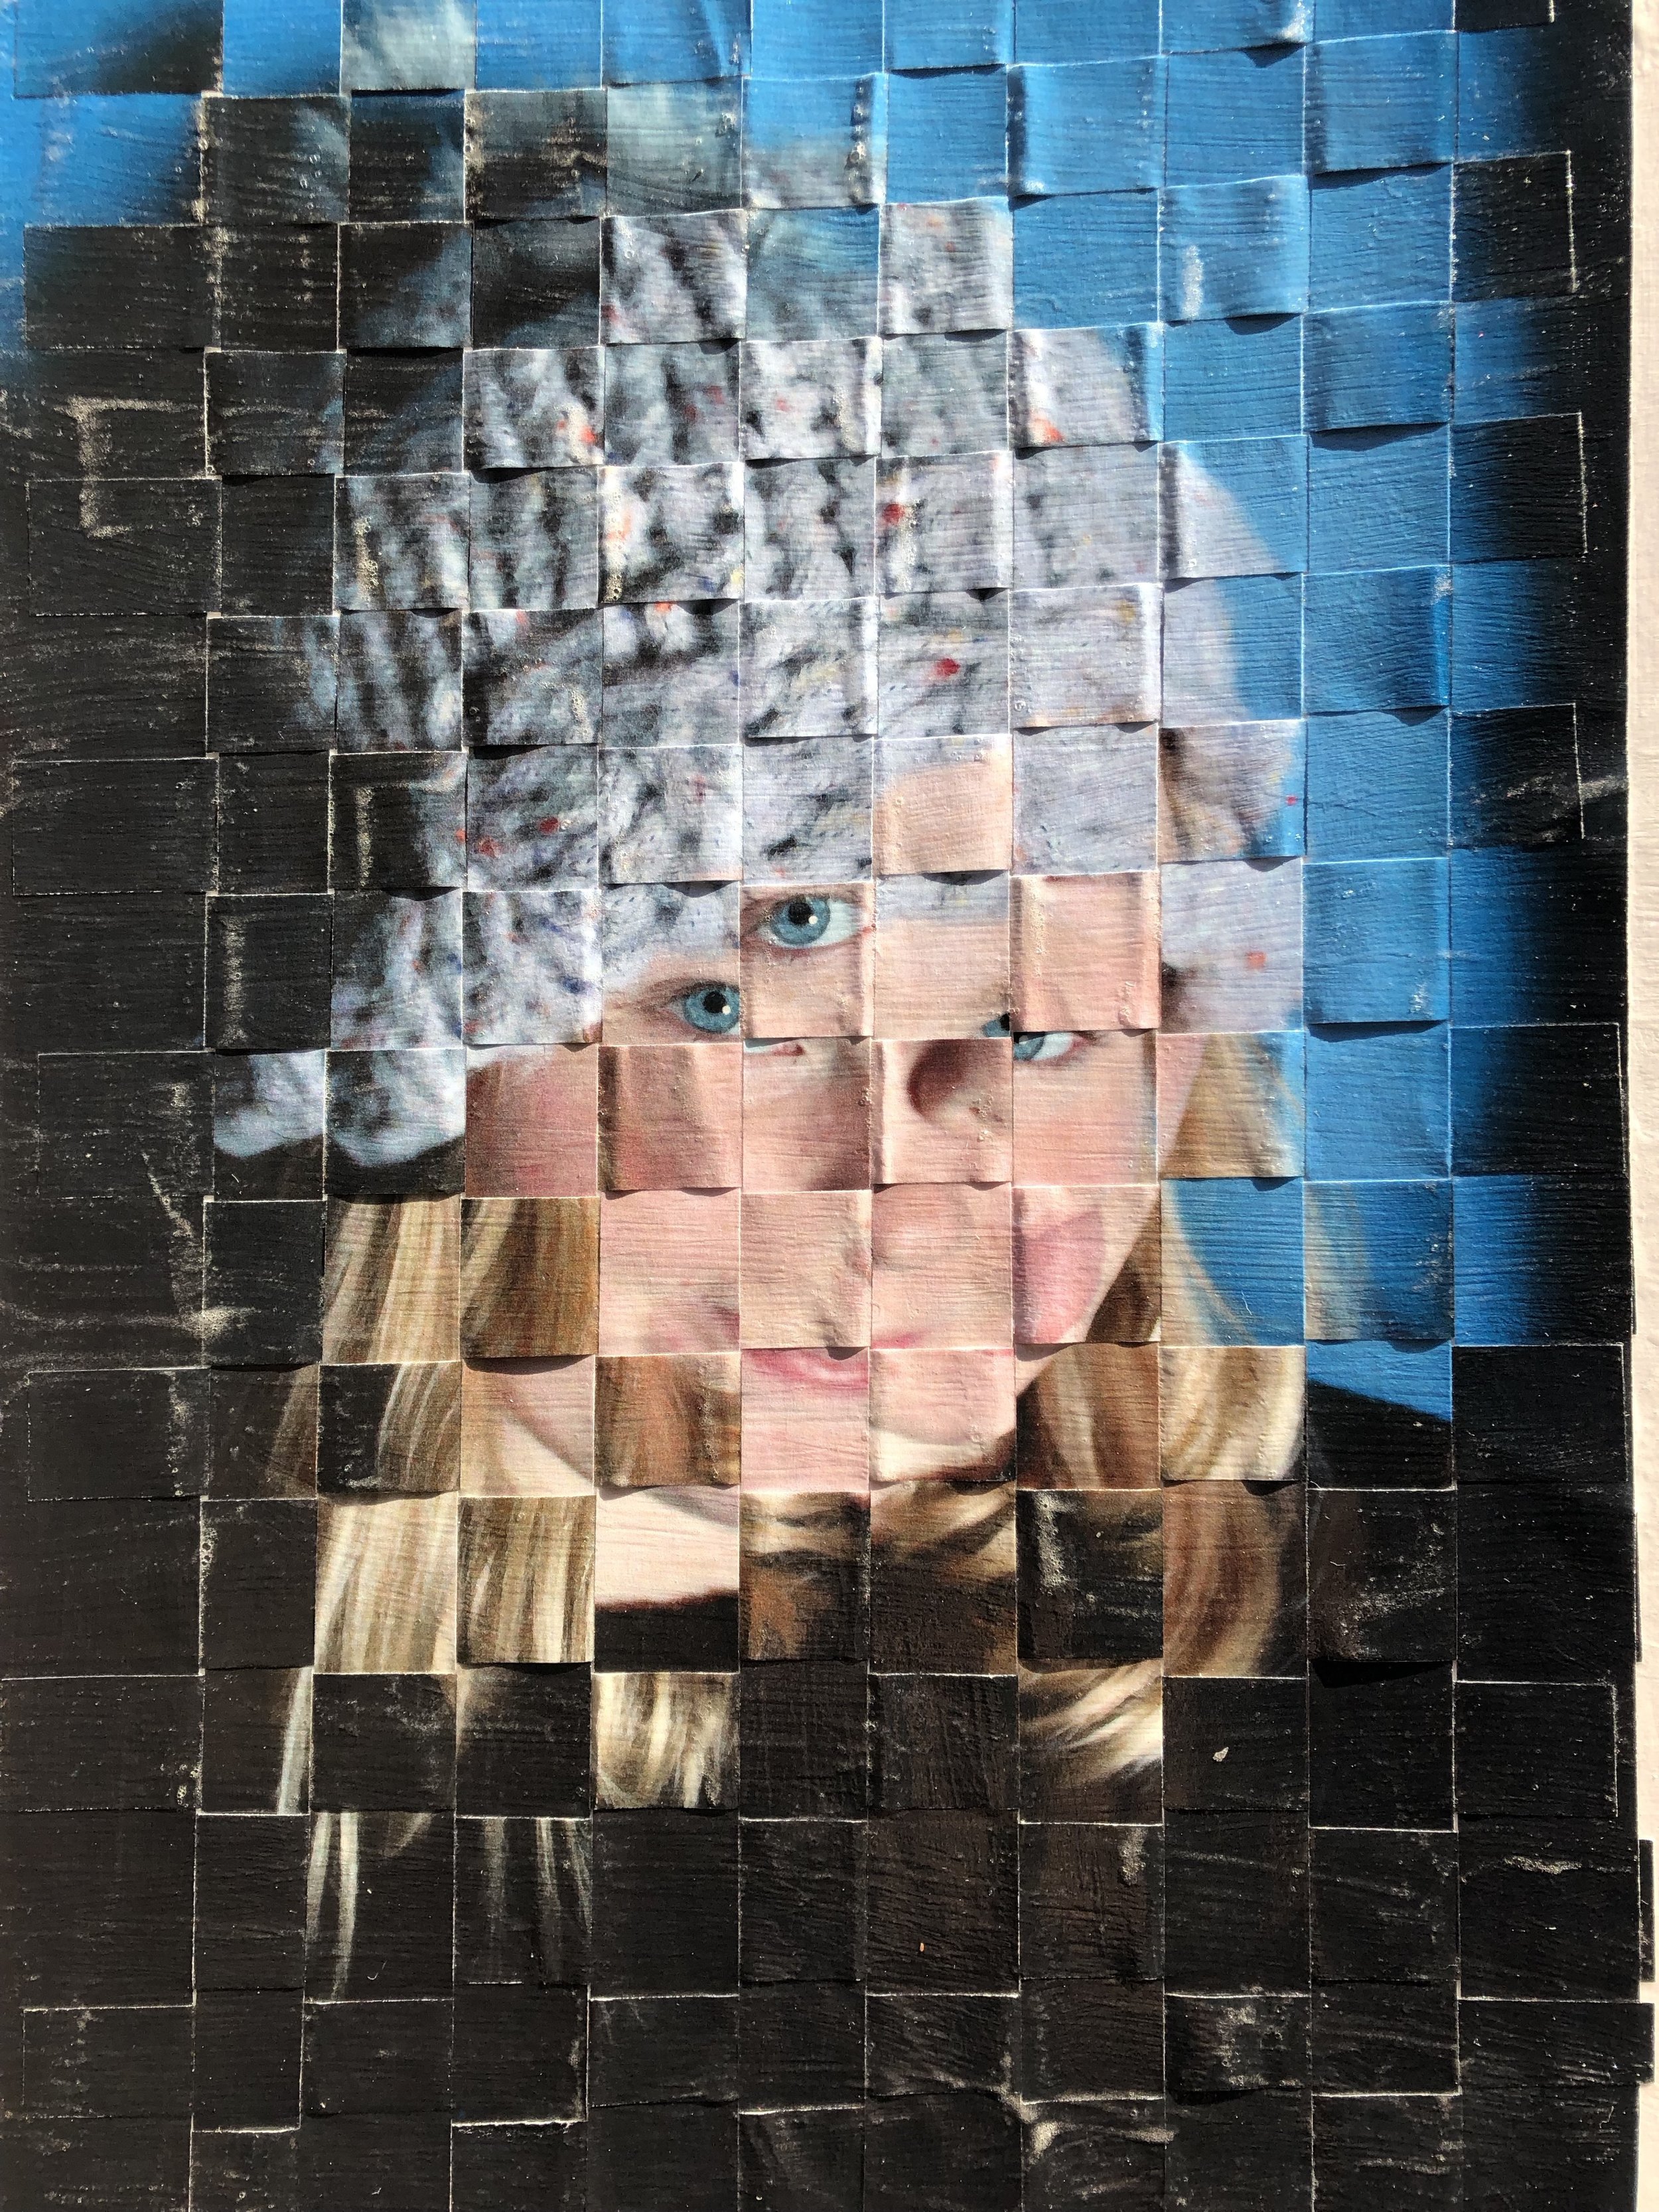
Now you want to combine the cut pieces of the picture. I recommend taking every other piece of the each picture and combining them. Honestly, you can do whatever you think looks good! Have fun with it!
Step 4:
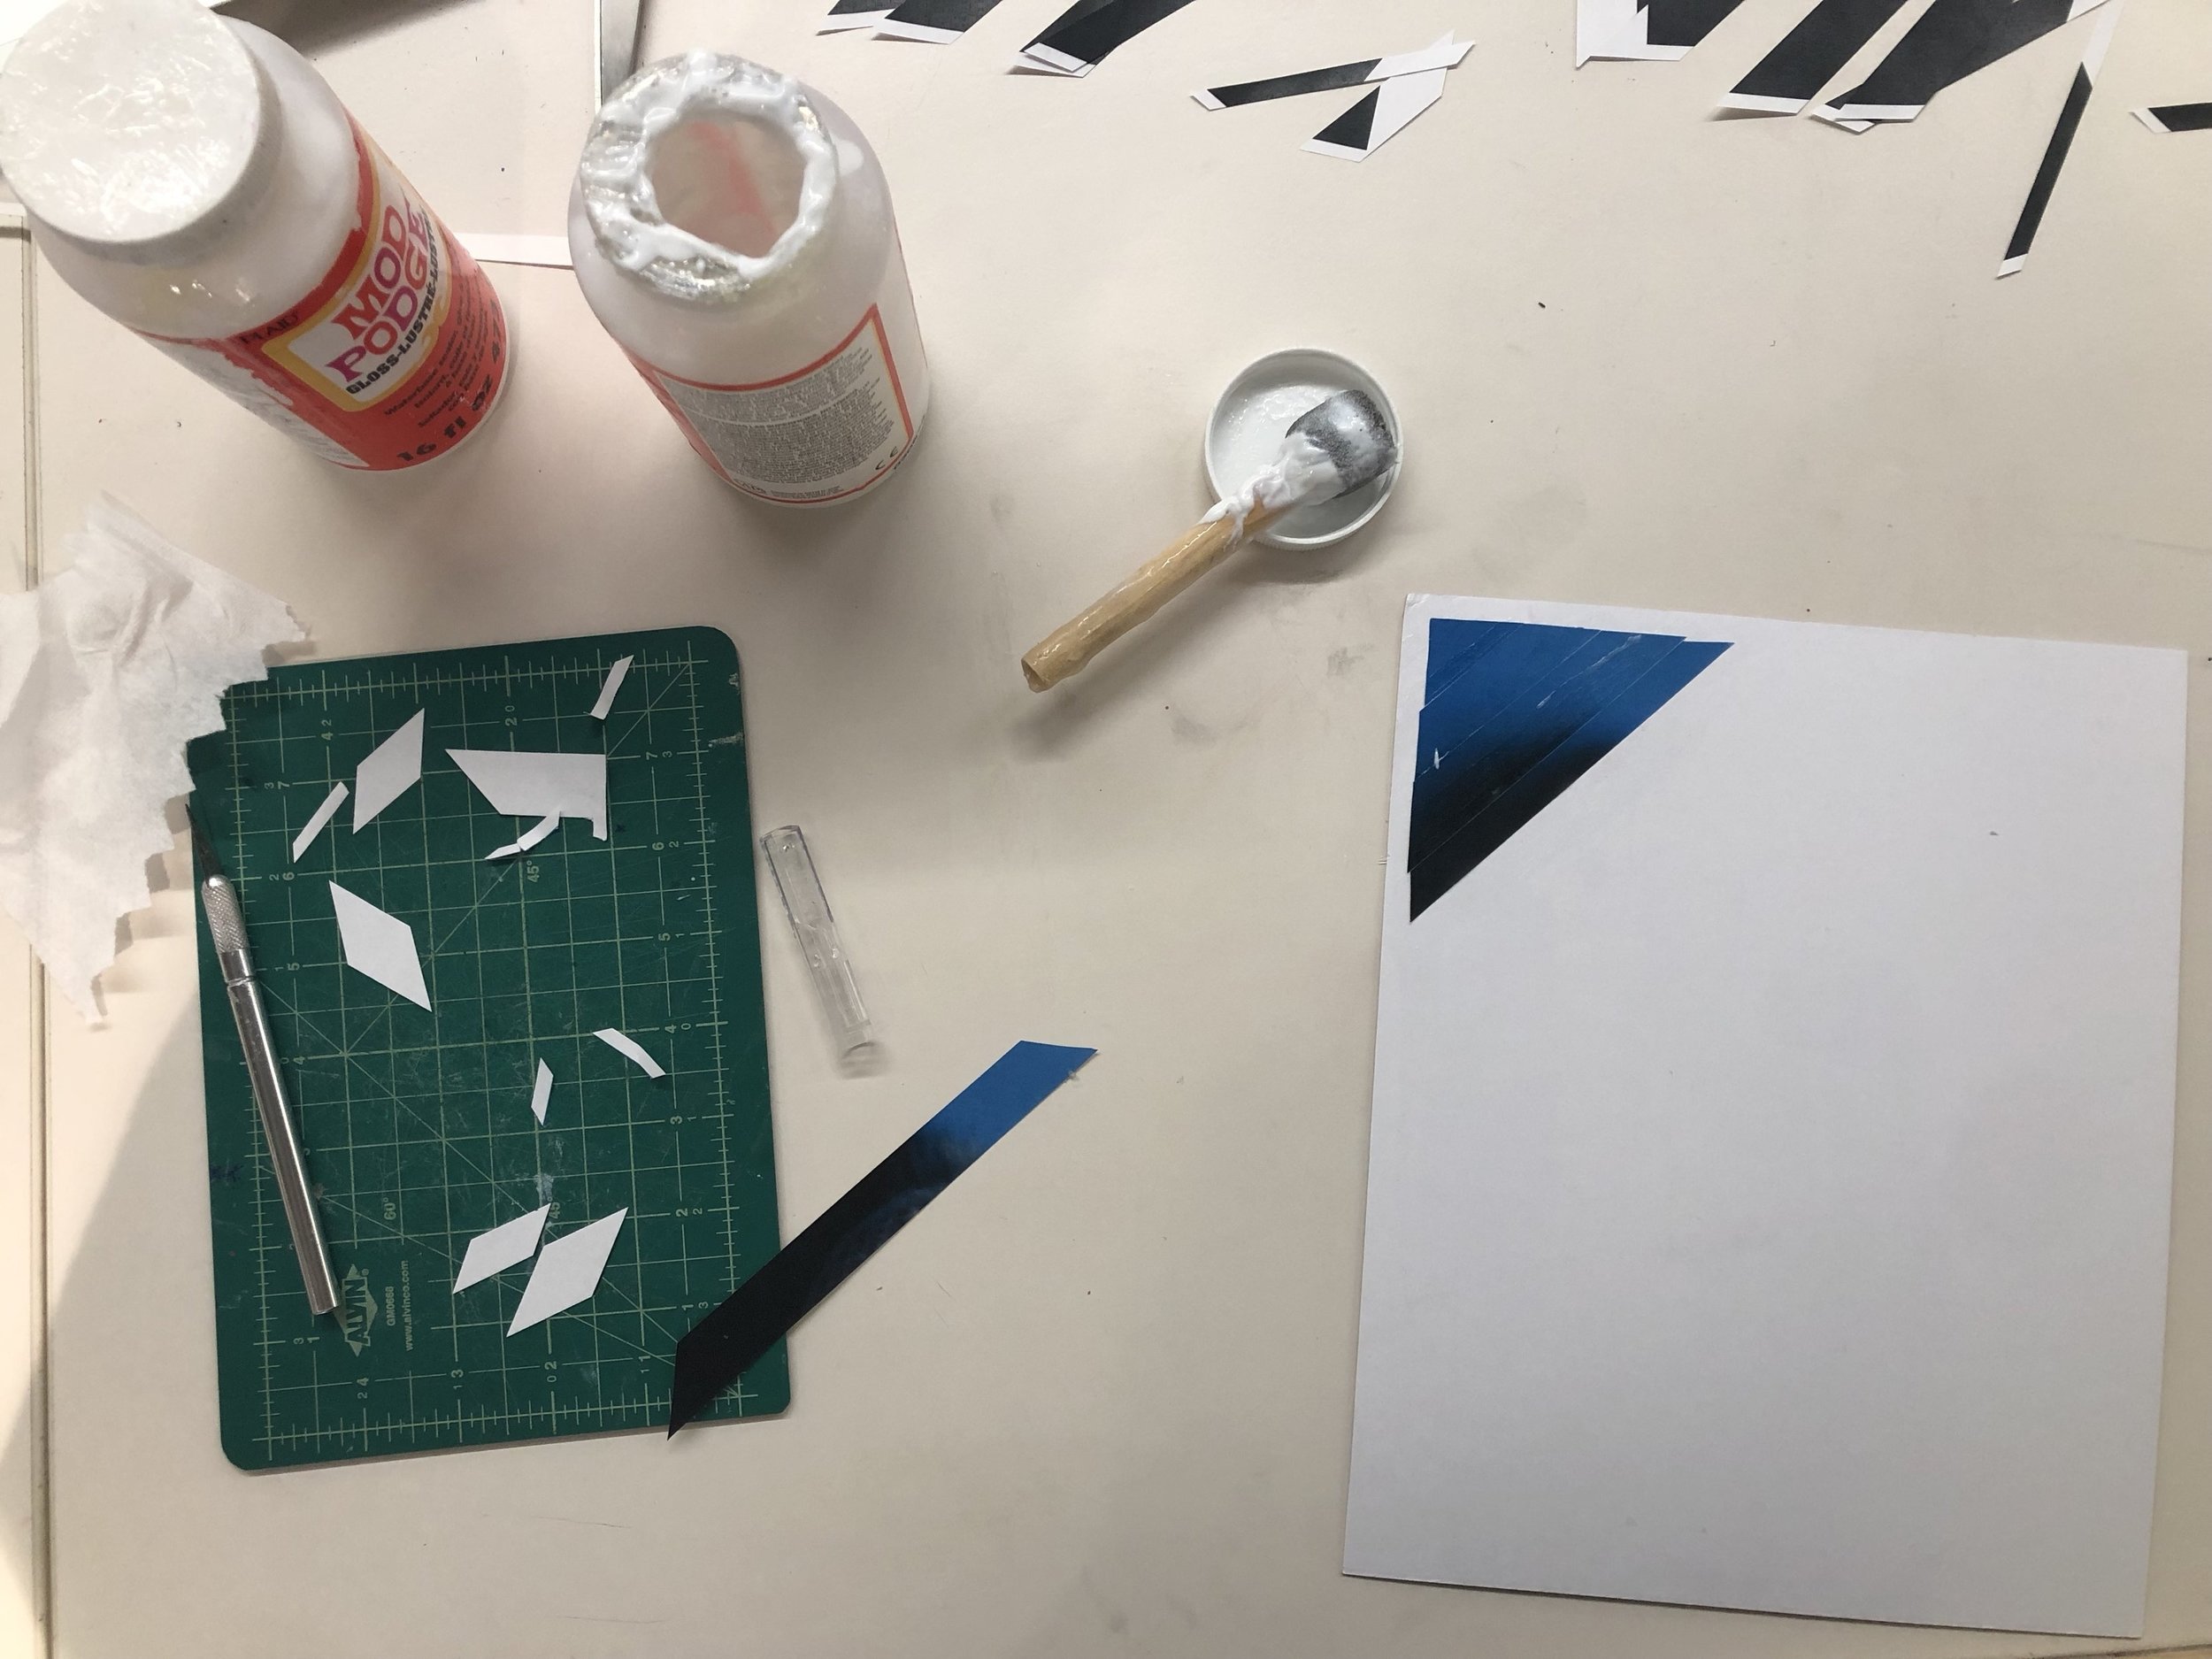
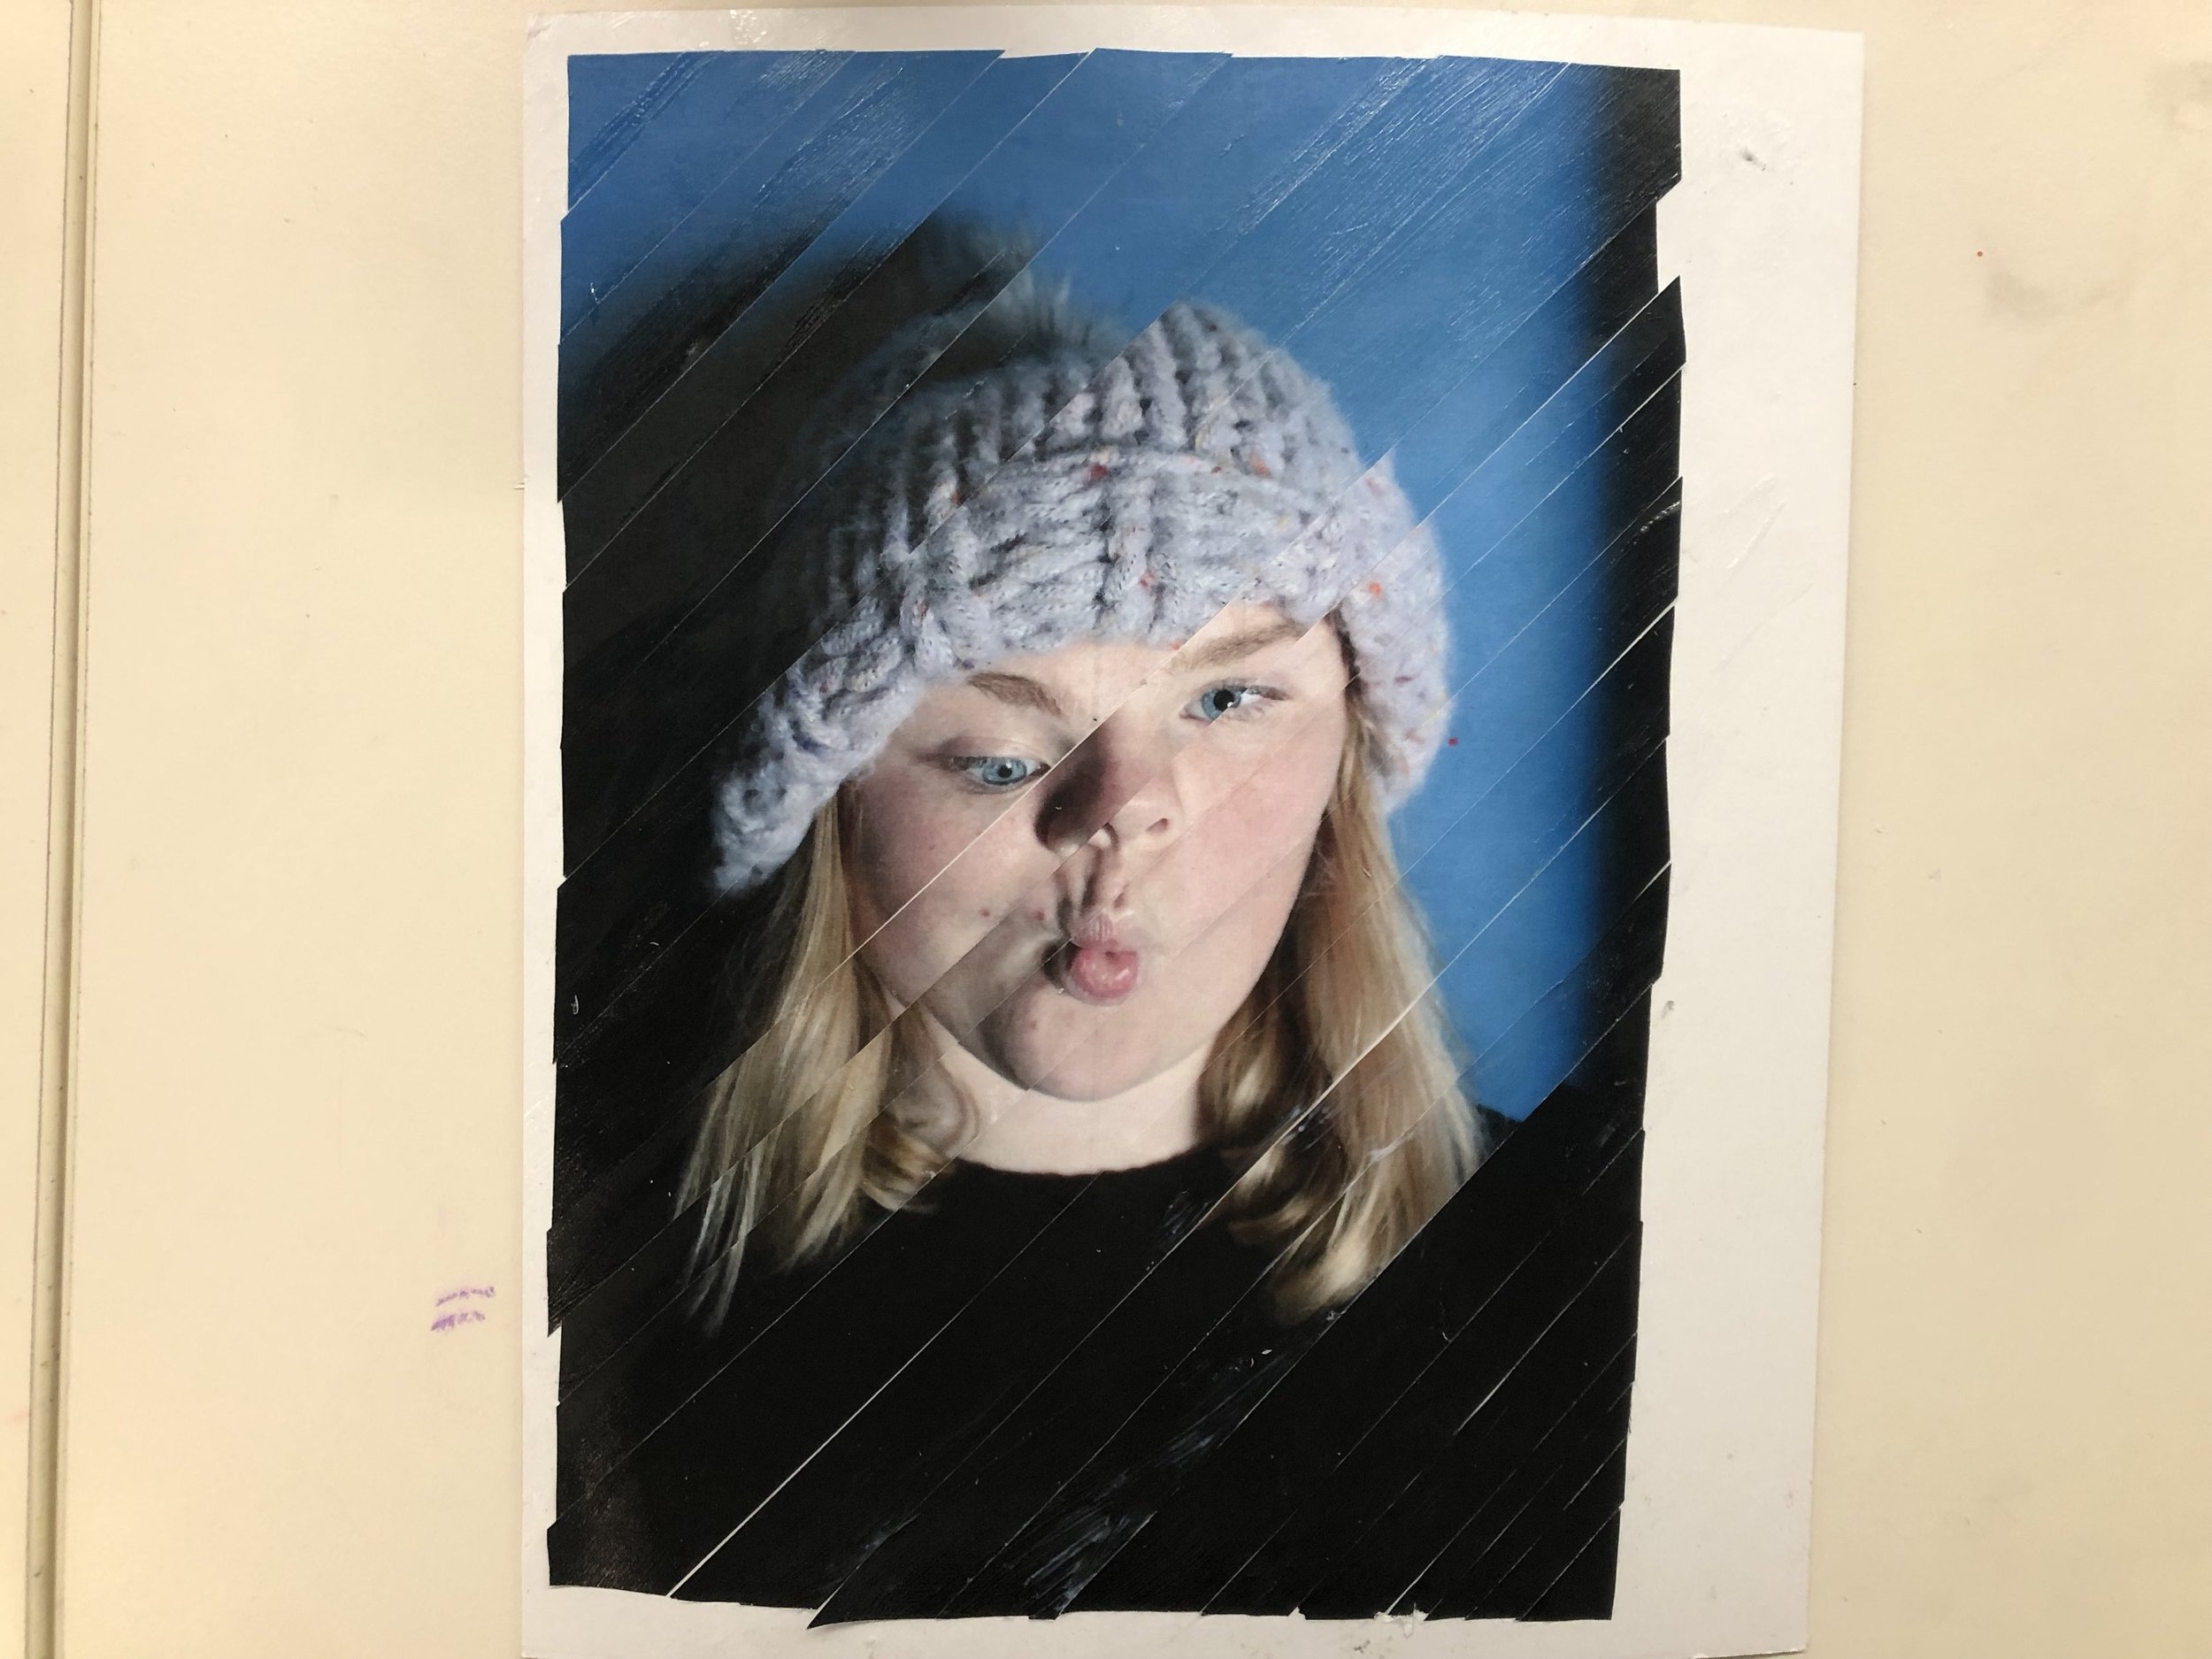
Take each piece of the newly created picture and use Modge Podge to glue it on to a matting board. Once you have them all glue down to the board, put a lot of Modge Podge over the top of the picture to seal it to the board.
Final Products