
Blair Academy Photography

A tutorial on double exposure while using multiple flashes
I want to create a multiple person effect with my camera like this inspiration photo:

How do I do this?

Starting Process
Materials
Gels or LED wand (I used an LED wand (changing colors manually))
Models
Backdrop
Black backdrop to emphasize the image
White backdrop to dilute it (make it seem more opaque)
Studio lights (with model lighting)
Camera
Tripod (suggestion)
Stools for the subjects to sit on
Remote attachment to the camera (to set off the flashes)
Setup

First, you want to set up the camera relatively close to the models. I had my lighting on the left side of my models at the beginning of the shoot. Later I added the LED wand on the right side of the subjects. Your lighting can be on both sides, it is up to the photographer to decide ( just not center because that would create a shadow of yourself on the individuals in the photo).
Using a tripod, with the lights in the studio turned on, you will want to manually focus your camera on the subject before you begin. This is important because, in the dark, it will be difficult to adjust the focus to your preference.
It is important to do your entire photoshoot, with double exposure and multiple flashes, in total darkness, because the lighting will enter into the camera (by the flash) for however long your exposure is set for, thus if there is multiple light sources more light will enter your camera and make the image appear completely white.
Camera settings

ISO: 200
Shutter speed: 1sec - .5 sec (I found that the longer my camera’s shutter was open for the easier it was to produce multiple flashes)
Aperture: should be around F8.0 (Canon)
Photoshoot Advice!!
Add gels or a LED wand later - it is more important to establish a strong focus on the individual than focusing on the color

2. Having the models move back and forth simultaneously promotes a better “two self” depiction

(shows movement)
3. During the second flash the model wants to move towards the camera to create a more prominent second image of the model. Also, to create the second flash, you will want to click the “flash test” button after the first flash has gone off and while the exposure is still open.
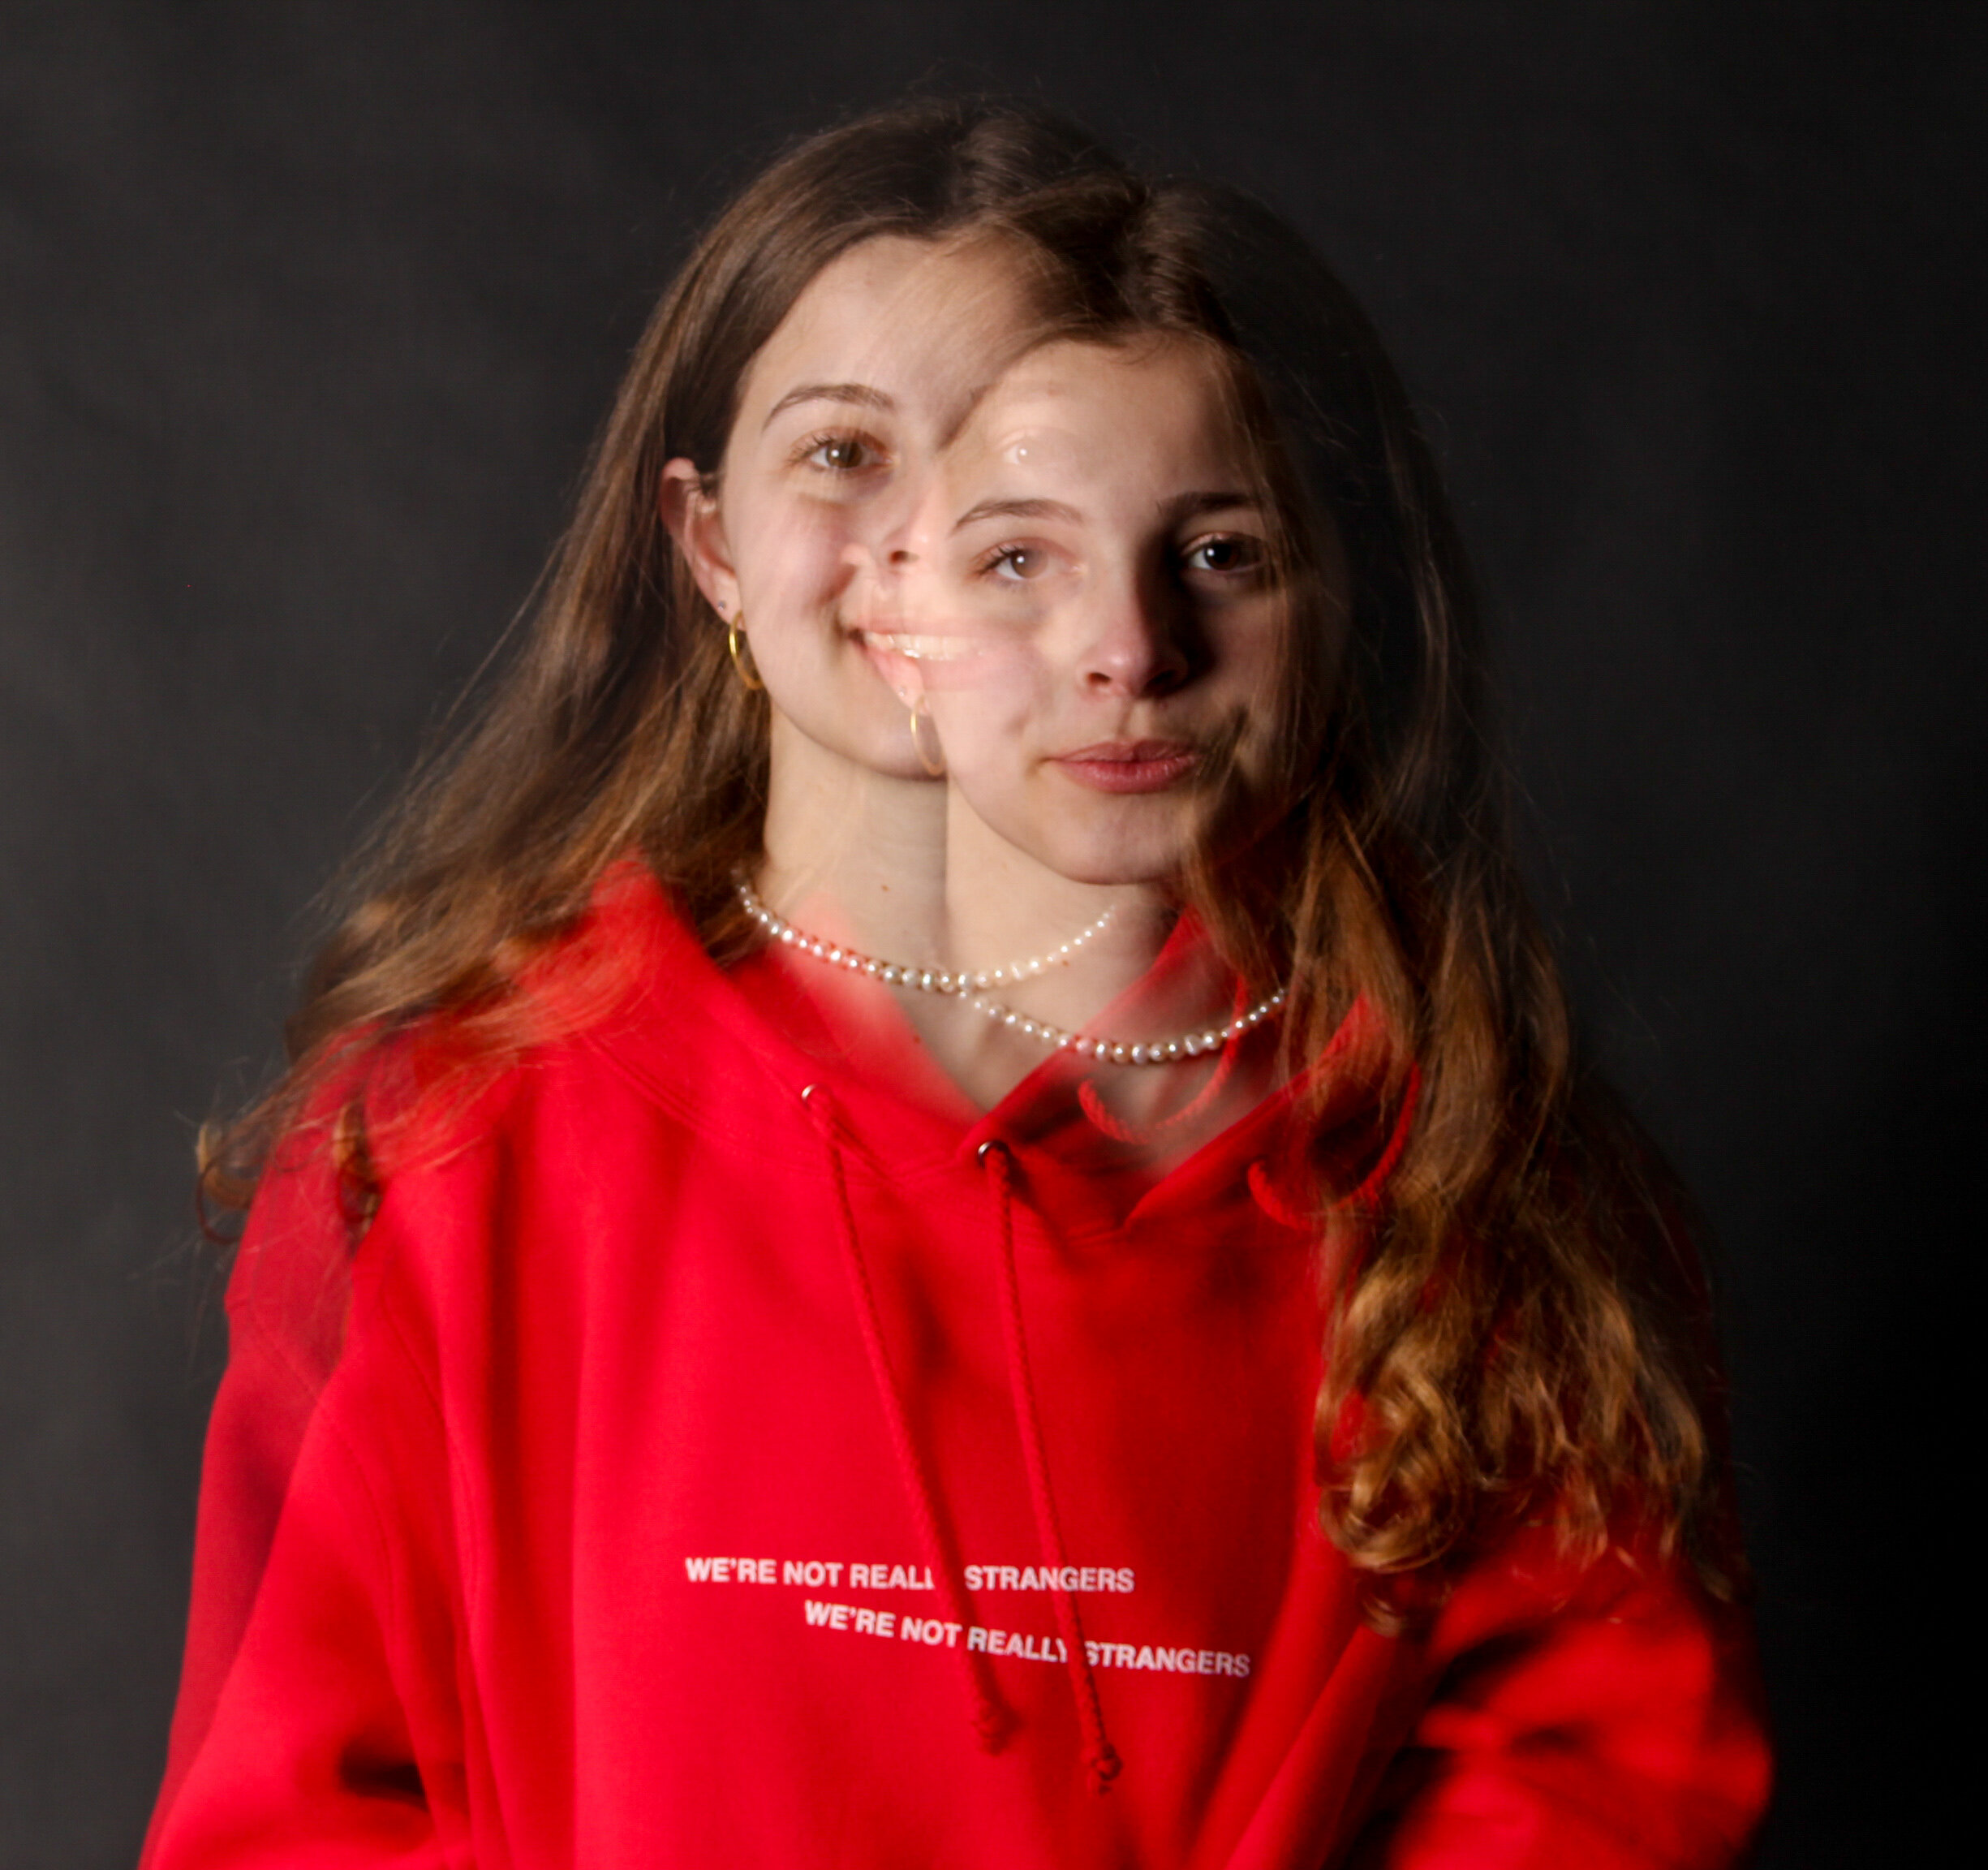
(second photo the viewer can see more clearly because the model moved closer to the camera)
4.When using the LED light to promote a switch in color, you want to change the color of the LED when the flash changes

https://tyson-trish-44ap.squarespace.com/config/pages/5fcd82a724c49707d336d173